
- Create a feed, then add an X / Twitter source.
- Point it at your profile or a public hashtag. A hashtag needs no account connection.
- Approve the posts you want on the Collect page.
- Pick a layout in the Design Studio and hit Get Code.
- Set "Where are you installing your widget?" to Wix, and copy the snippet.
- In the Wix Editor: + Add → Elements → Embed → Embed code, paste, publish.
<script> tag into Wix, it is describing a different platform.Where the Wix-specific step sits
The animation ticks off the six stages every feed goes through, from deciding what the feed is for to testing it on a phone. Wix changes only the last one: before you embed, the snippet you copy is chosen by the host you name in the Get Code dialog, so naming Wix there is what produces an iframe snippet instead of a script tag, and skipping that choice is the single most common reason an X feed never appears on a published Wix site.
Part 1: Build the X Feed (Steps 1 to 6)
This half happens before you open the Wix Editor. Getting the feed finished first means it is already presentable the moment it appears on your Wix page, instead of being published live and moderated afterwards in front of visitors.
Step 1: Create your account
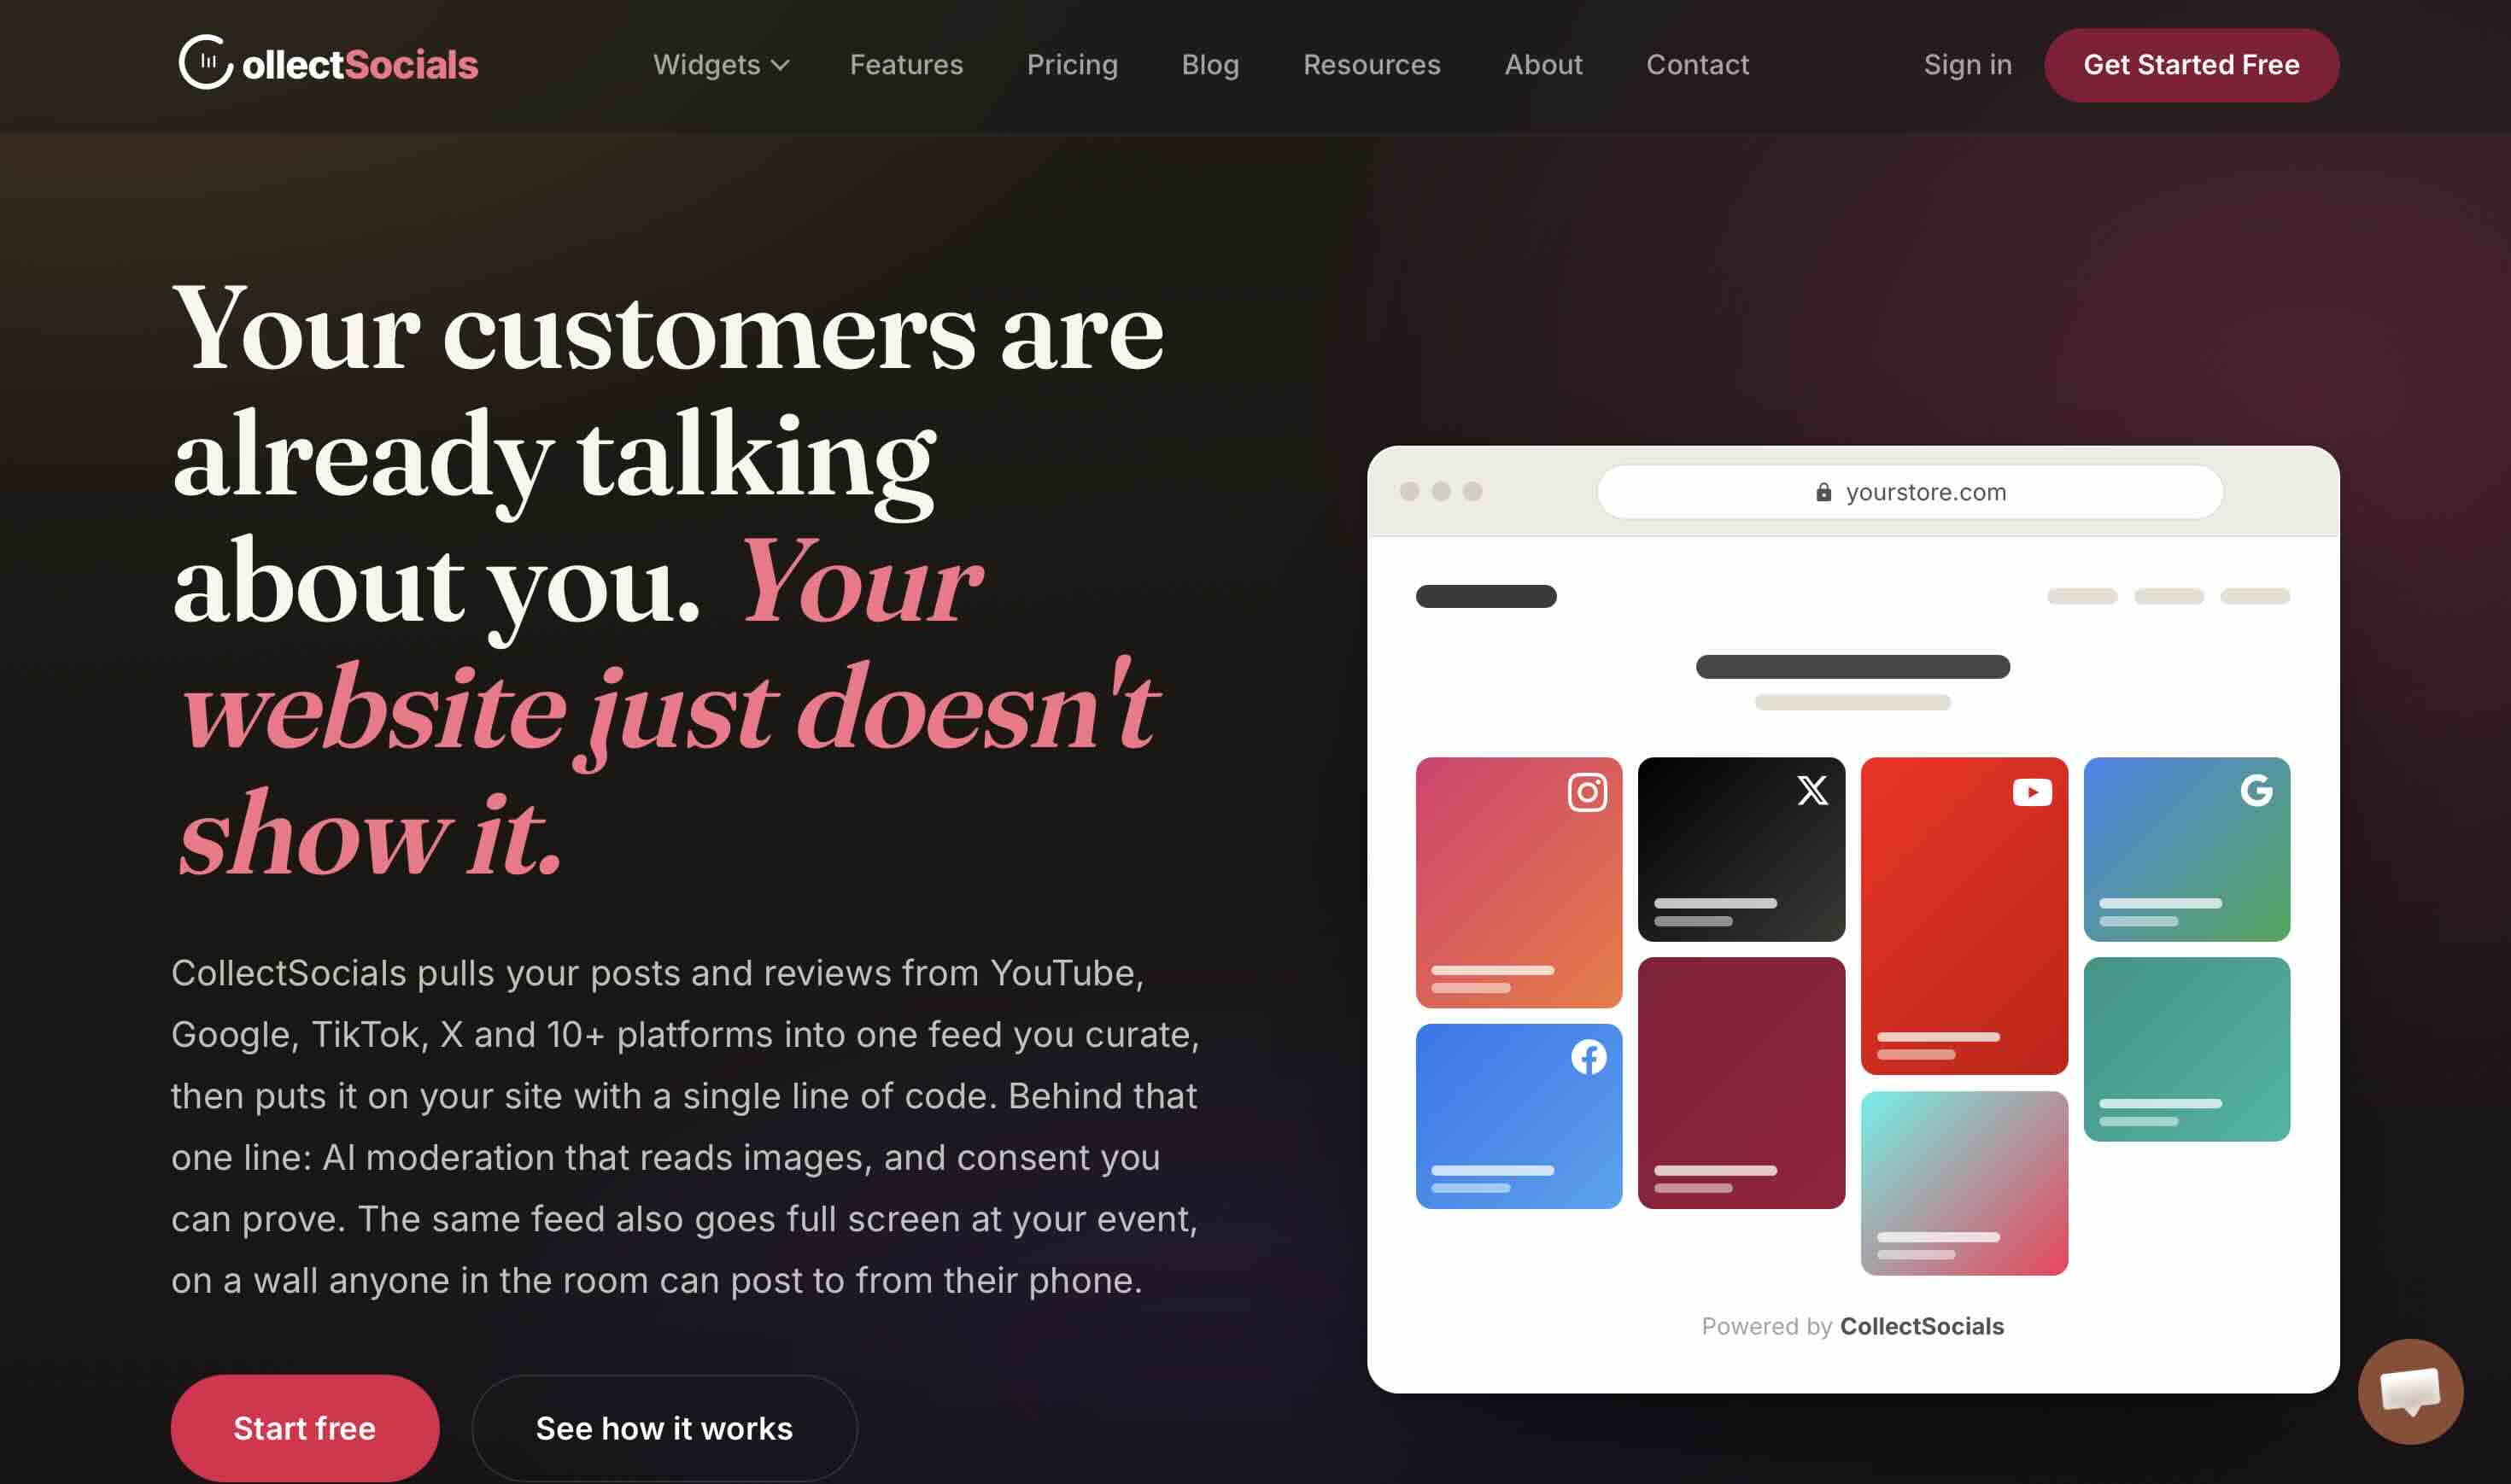
Start at the CollectSocials home page and click Get Started Free in the top right.
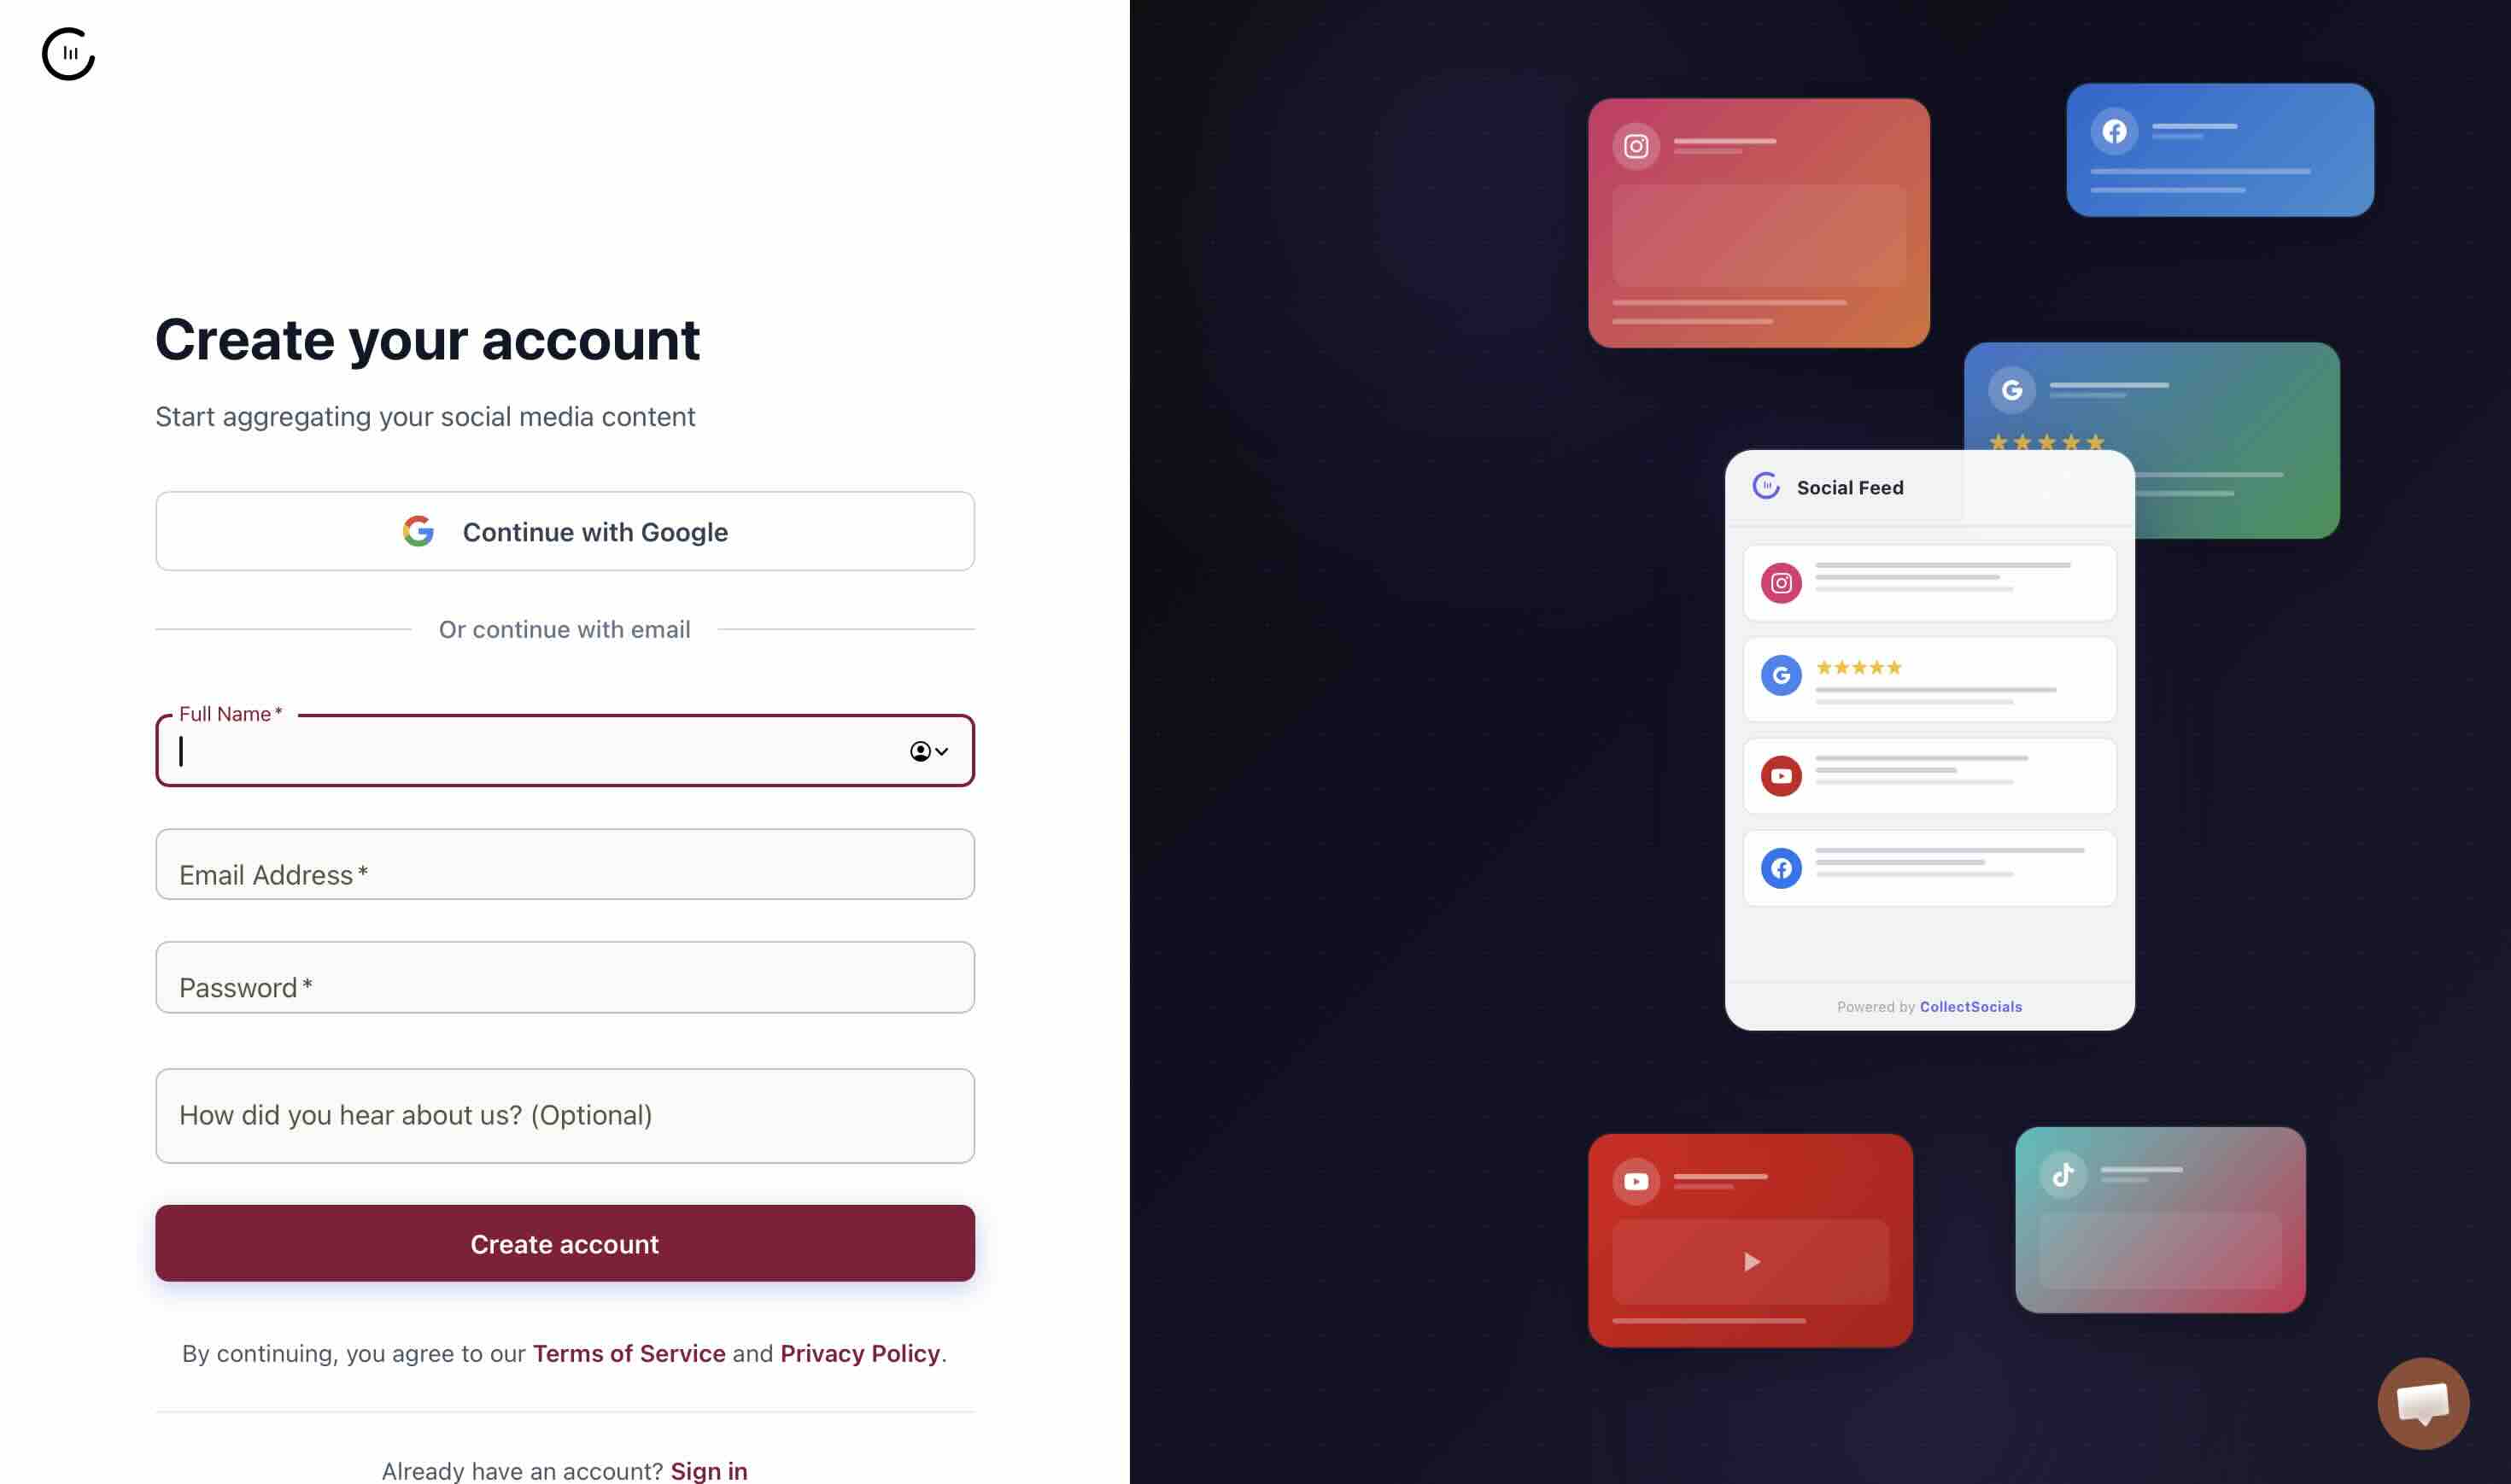
The signup screen takes a full name, an email and a password, or you can use Continue with Google and skip the form. No card is asked for at any point in this walkthrough.
Step 2: Create a feed and choose its default post status
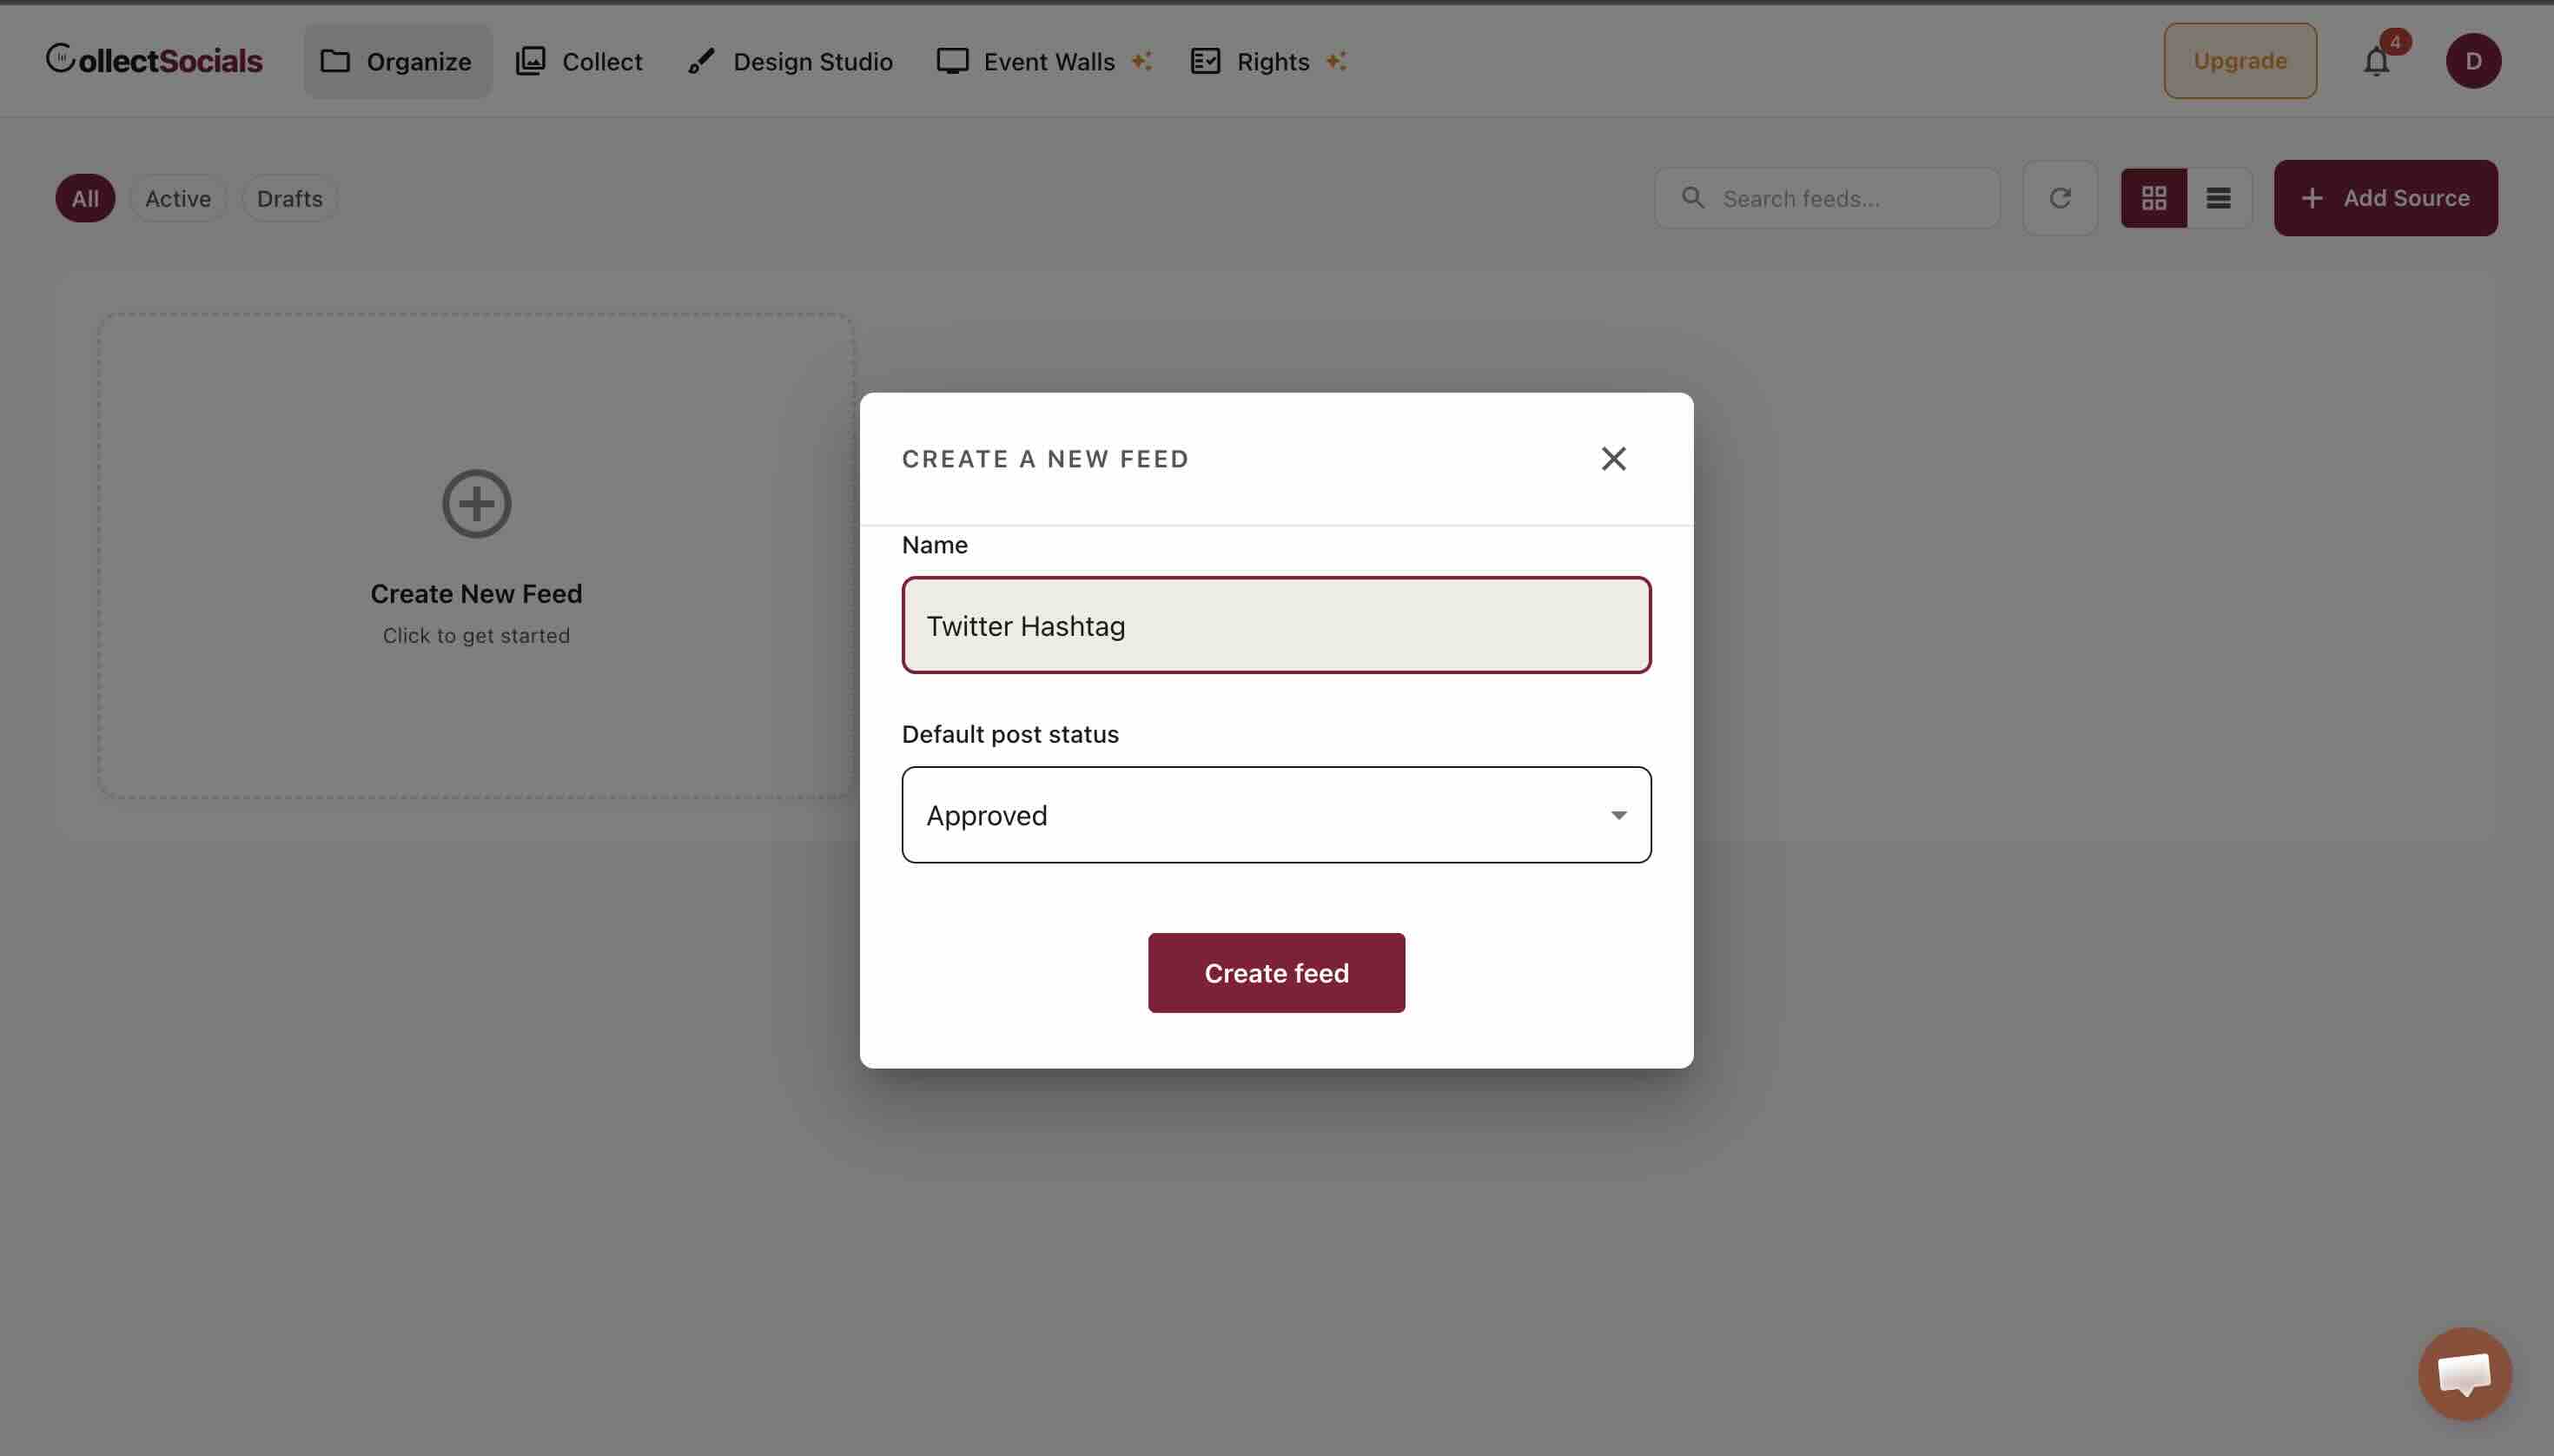
A feed is the container your sources pour into and the thing you eventually embed. On the Organize tab, click Create New Feed, give it a name you will recognise later, and set a Default post status.
That dropdown offers Approved, Pending and Draft, and it is worth being precise about what it is: a label on the feed card in your dashboard, so you can tell a feed you are still building from one you consider finished. Leave it on Approved unless you have a reason not to.
Step 3: Add X / Twitter as the source
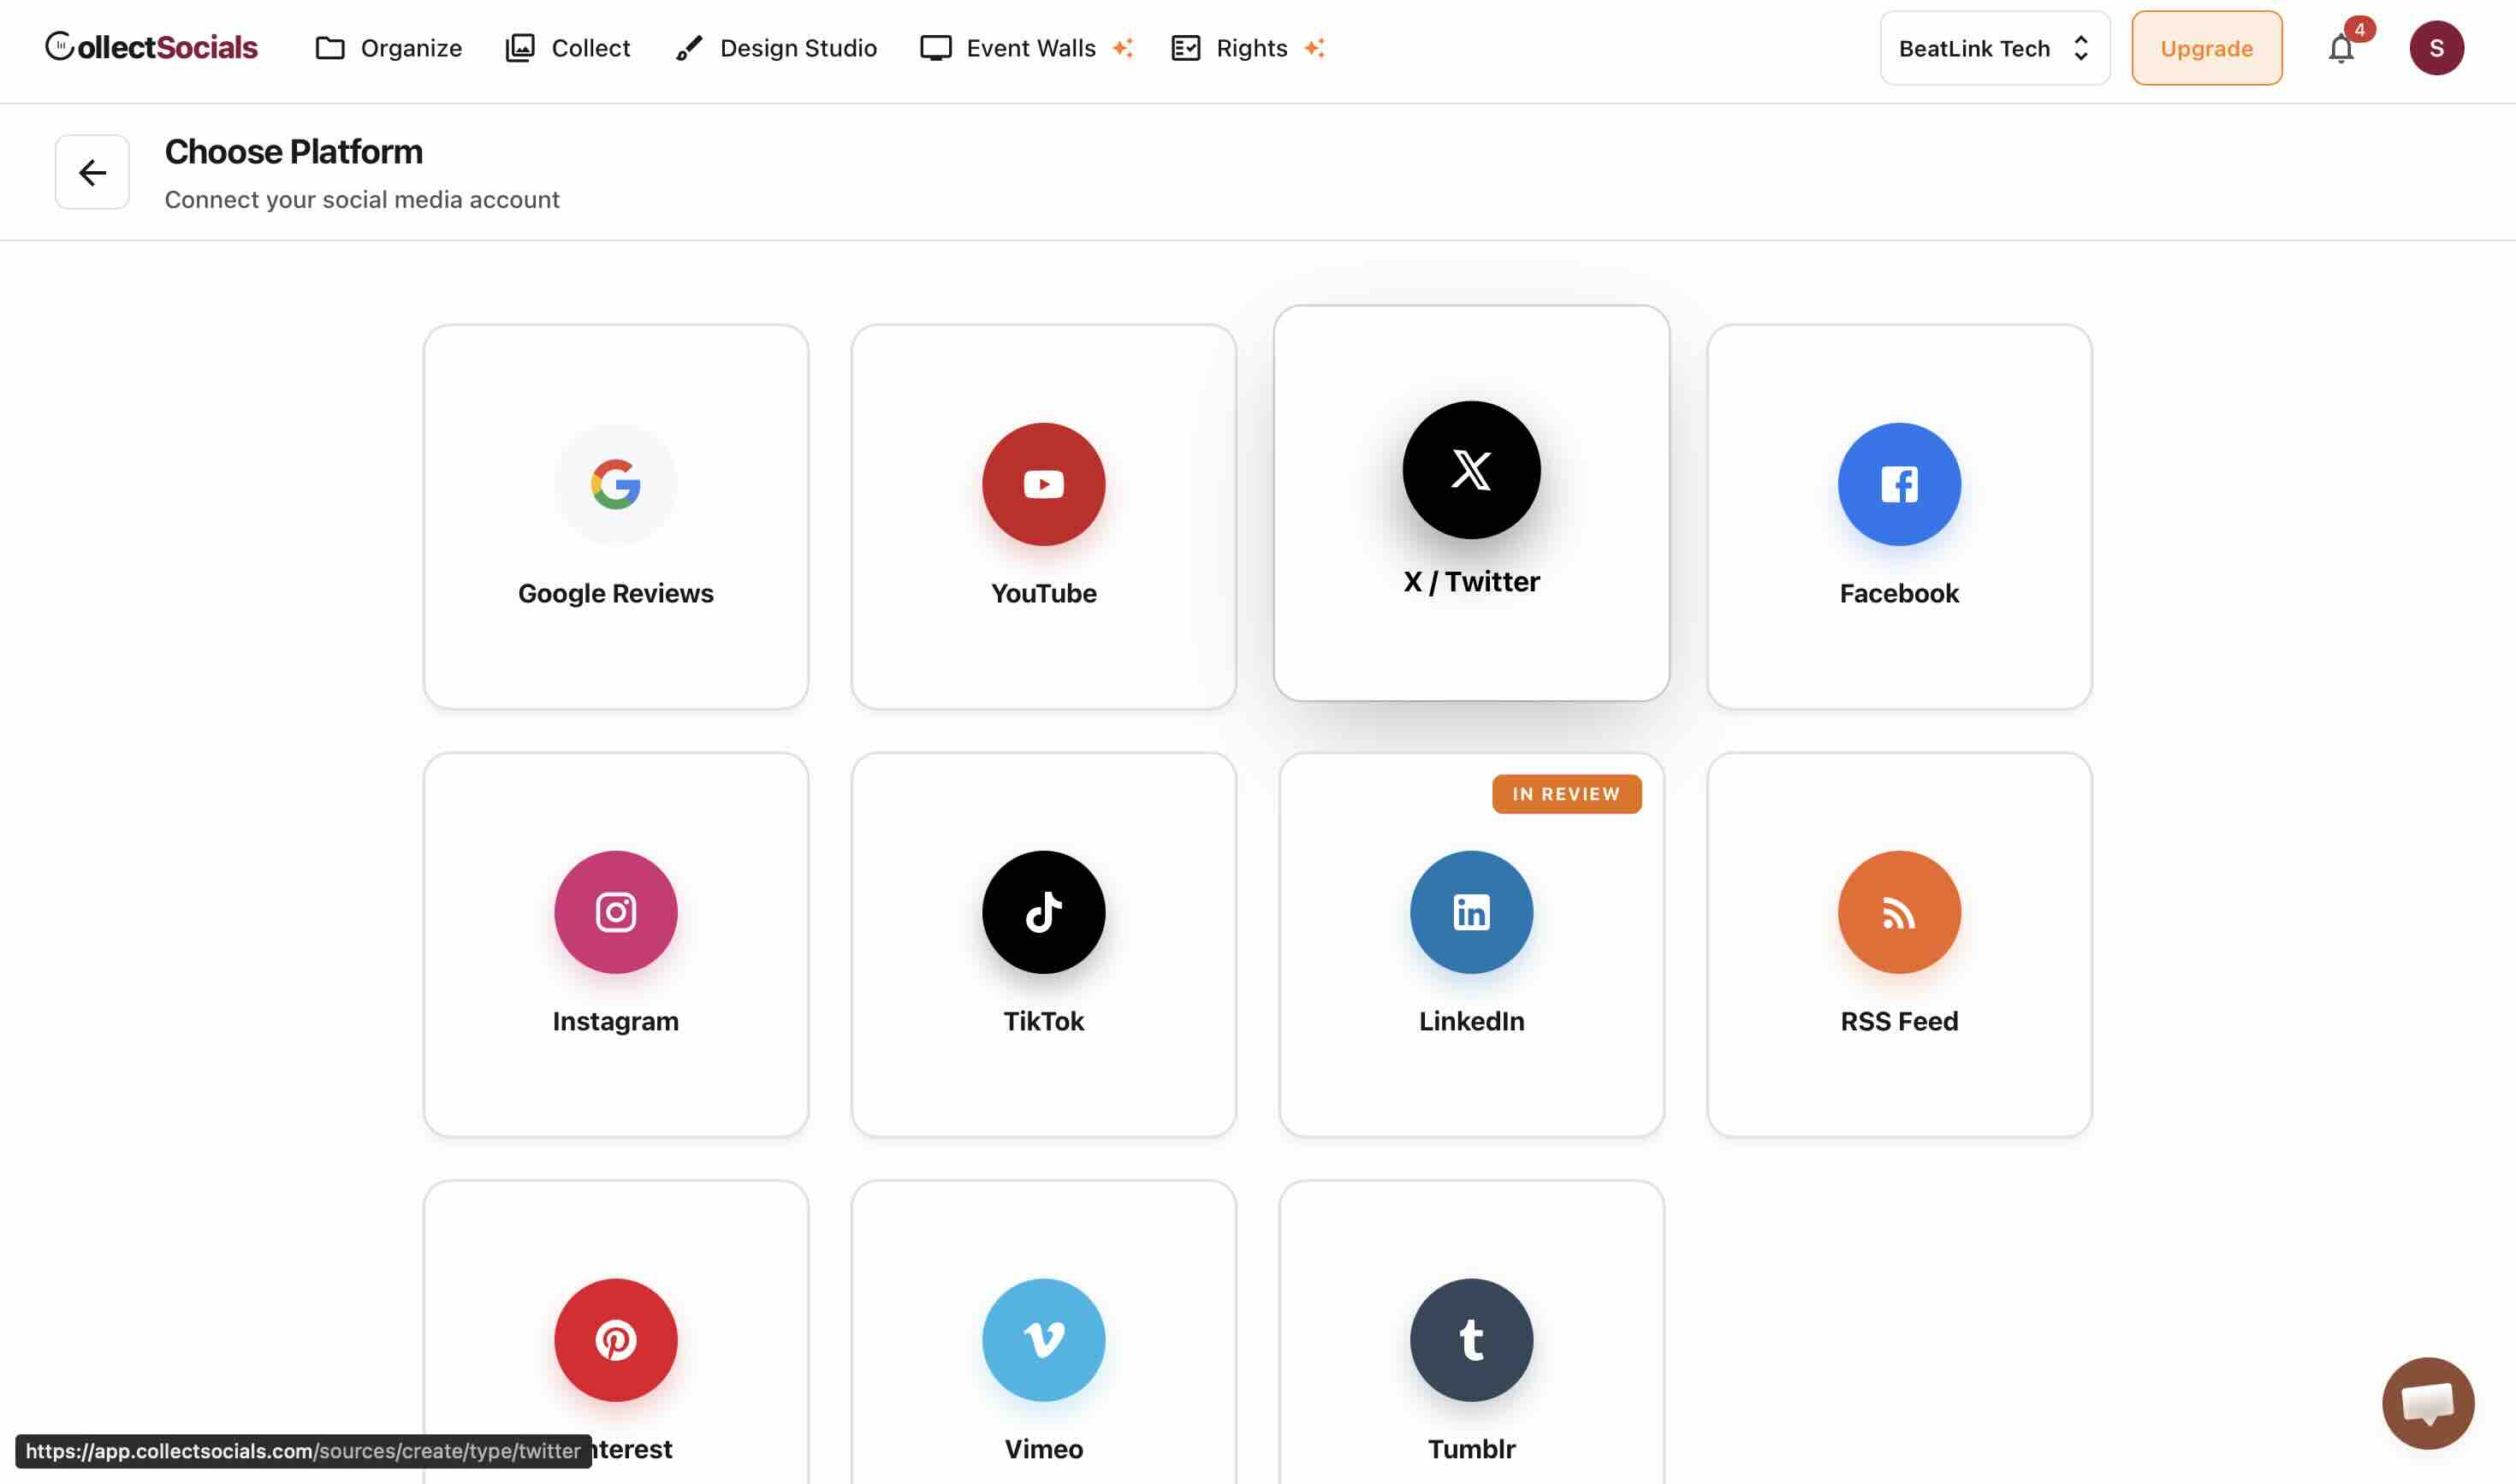
Click Add Source and the Choose Platform grid opens. Pick X / Twitter.
One feed can hold several sources from different platforms, so this same screen is where you would later add Instagram or Google Reviews posts into the same wall. For now it is just X.
Step 4: Point it at a hashtag, or at your own profile
The Add X / Twitter Posts screen asks what to import, and the two options behave differently enough to be worth a moment:
- My Tweets imports posts from your own X account, and you approve read access on X's own sign-in screen.
- Hashtag collects posts from any public hashtag and needs no account connection at all, because it reads X's public recent-search endpoint using our application credentials rather than yours.
Either way, you never need your own X developer account or API key. I used a hashtag here, typed without the # symbol, which the field adds for you.
One limit on that screen applies to everybody and is worth reading rather than clicking past: hashtag search returns posts from the last 7 days only. That is an X API boundary, not a plan limit, and no tool can reach further back.
How many posts you get on that first pull depends on which side of the trial you are on, and the screen changes shape accordingly:
- On the 7-day trial, the budget is fixed rather than chosen. The first pull brings back 40 posts, another 10 unlock each day, up to 100 across the trial, shared across up to three X sources. There is no slider.
- On a paid plan, you get the Initial pull slider in the screenshot below, which sets how far into the account's back catalogue the first fetch reaches. The pull happens once, when the source is created; after that the source refreshes on its own every 12 hours.
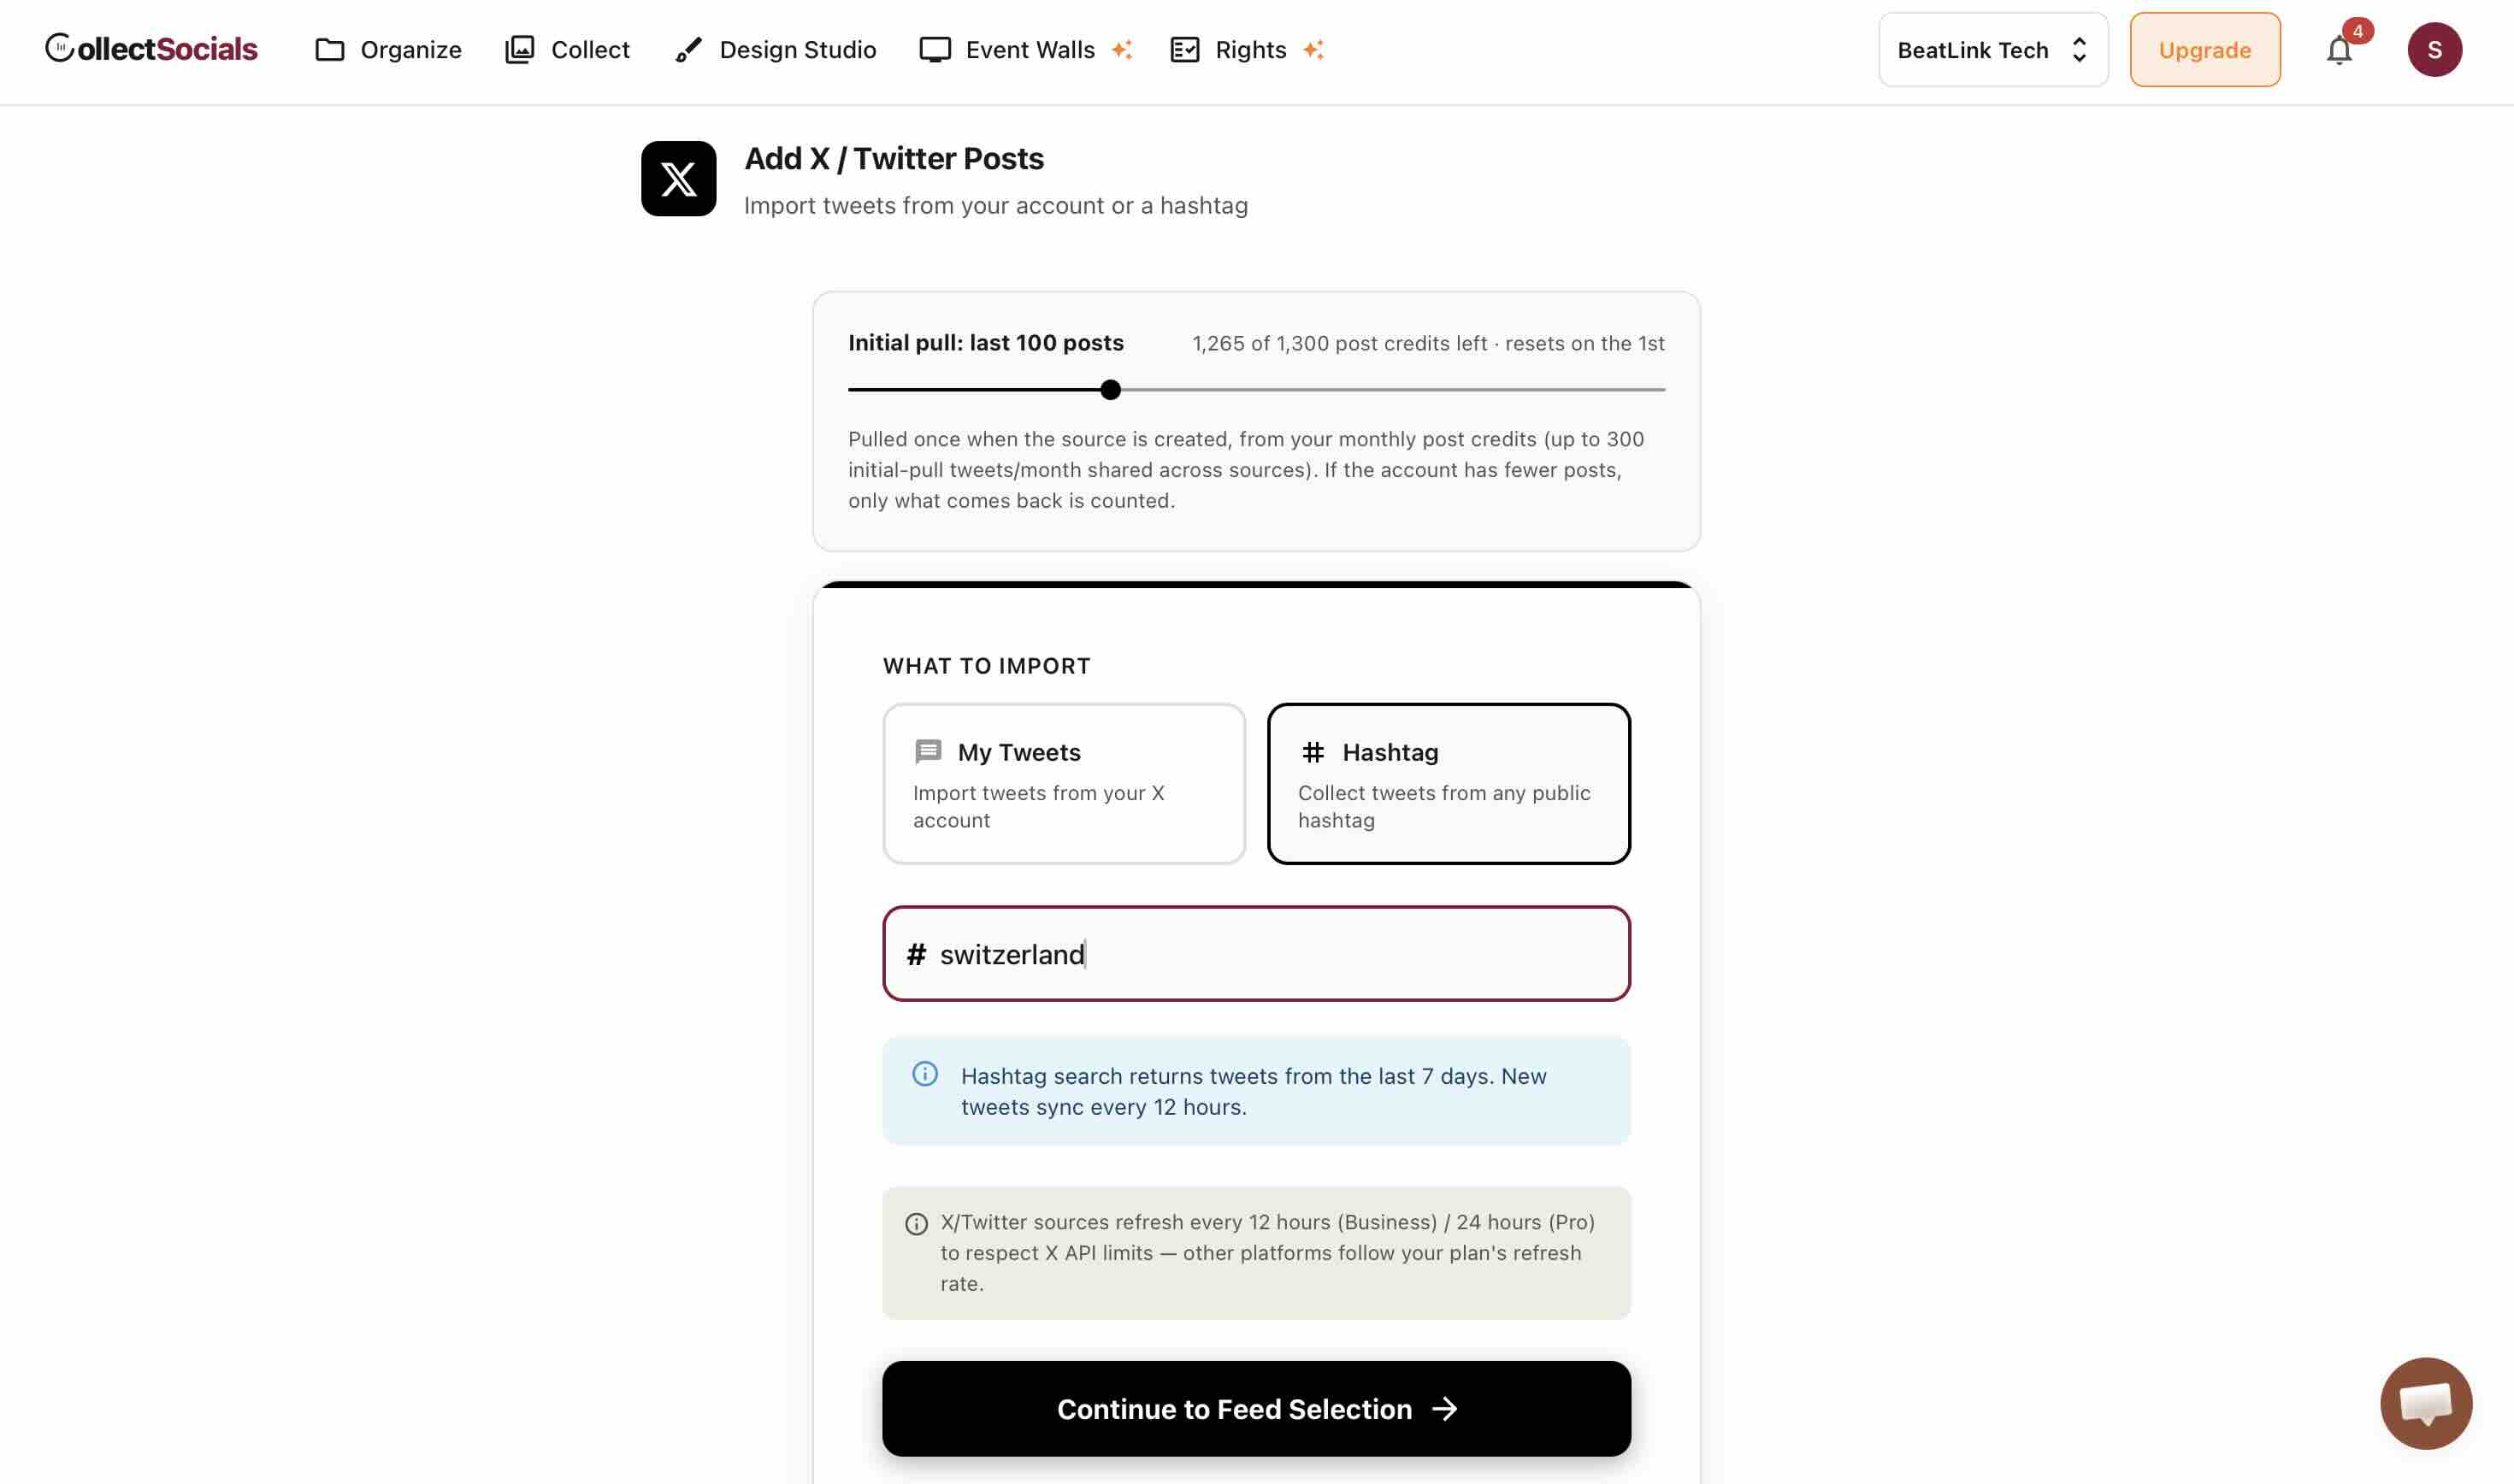
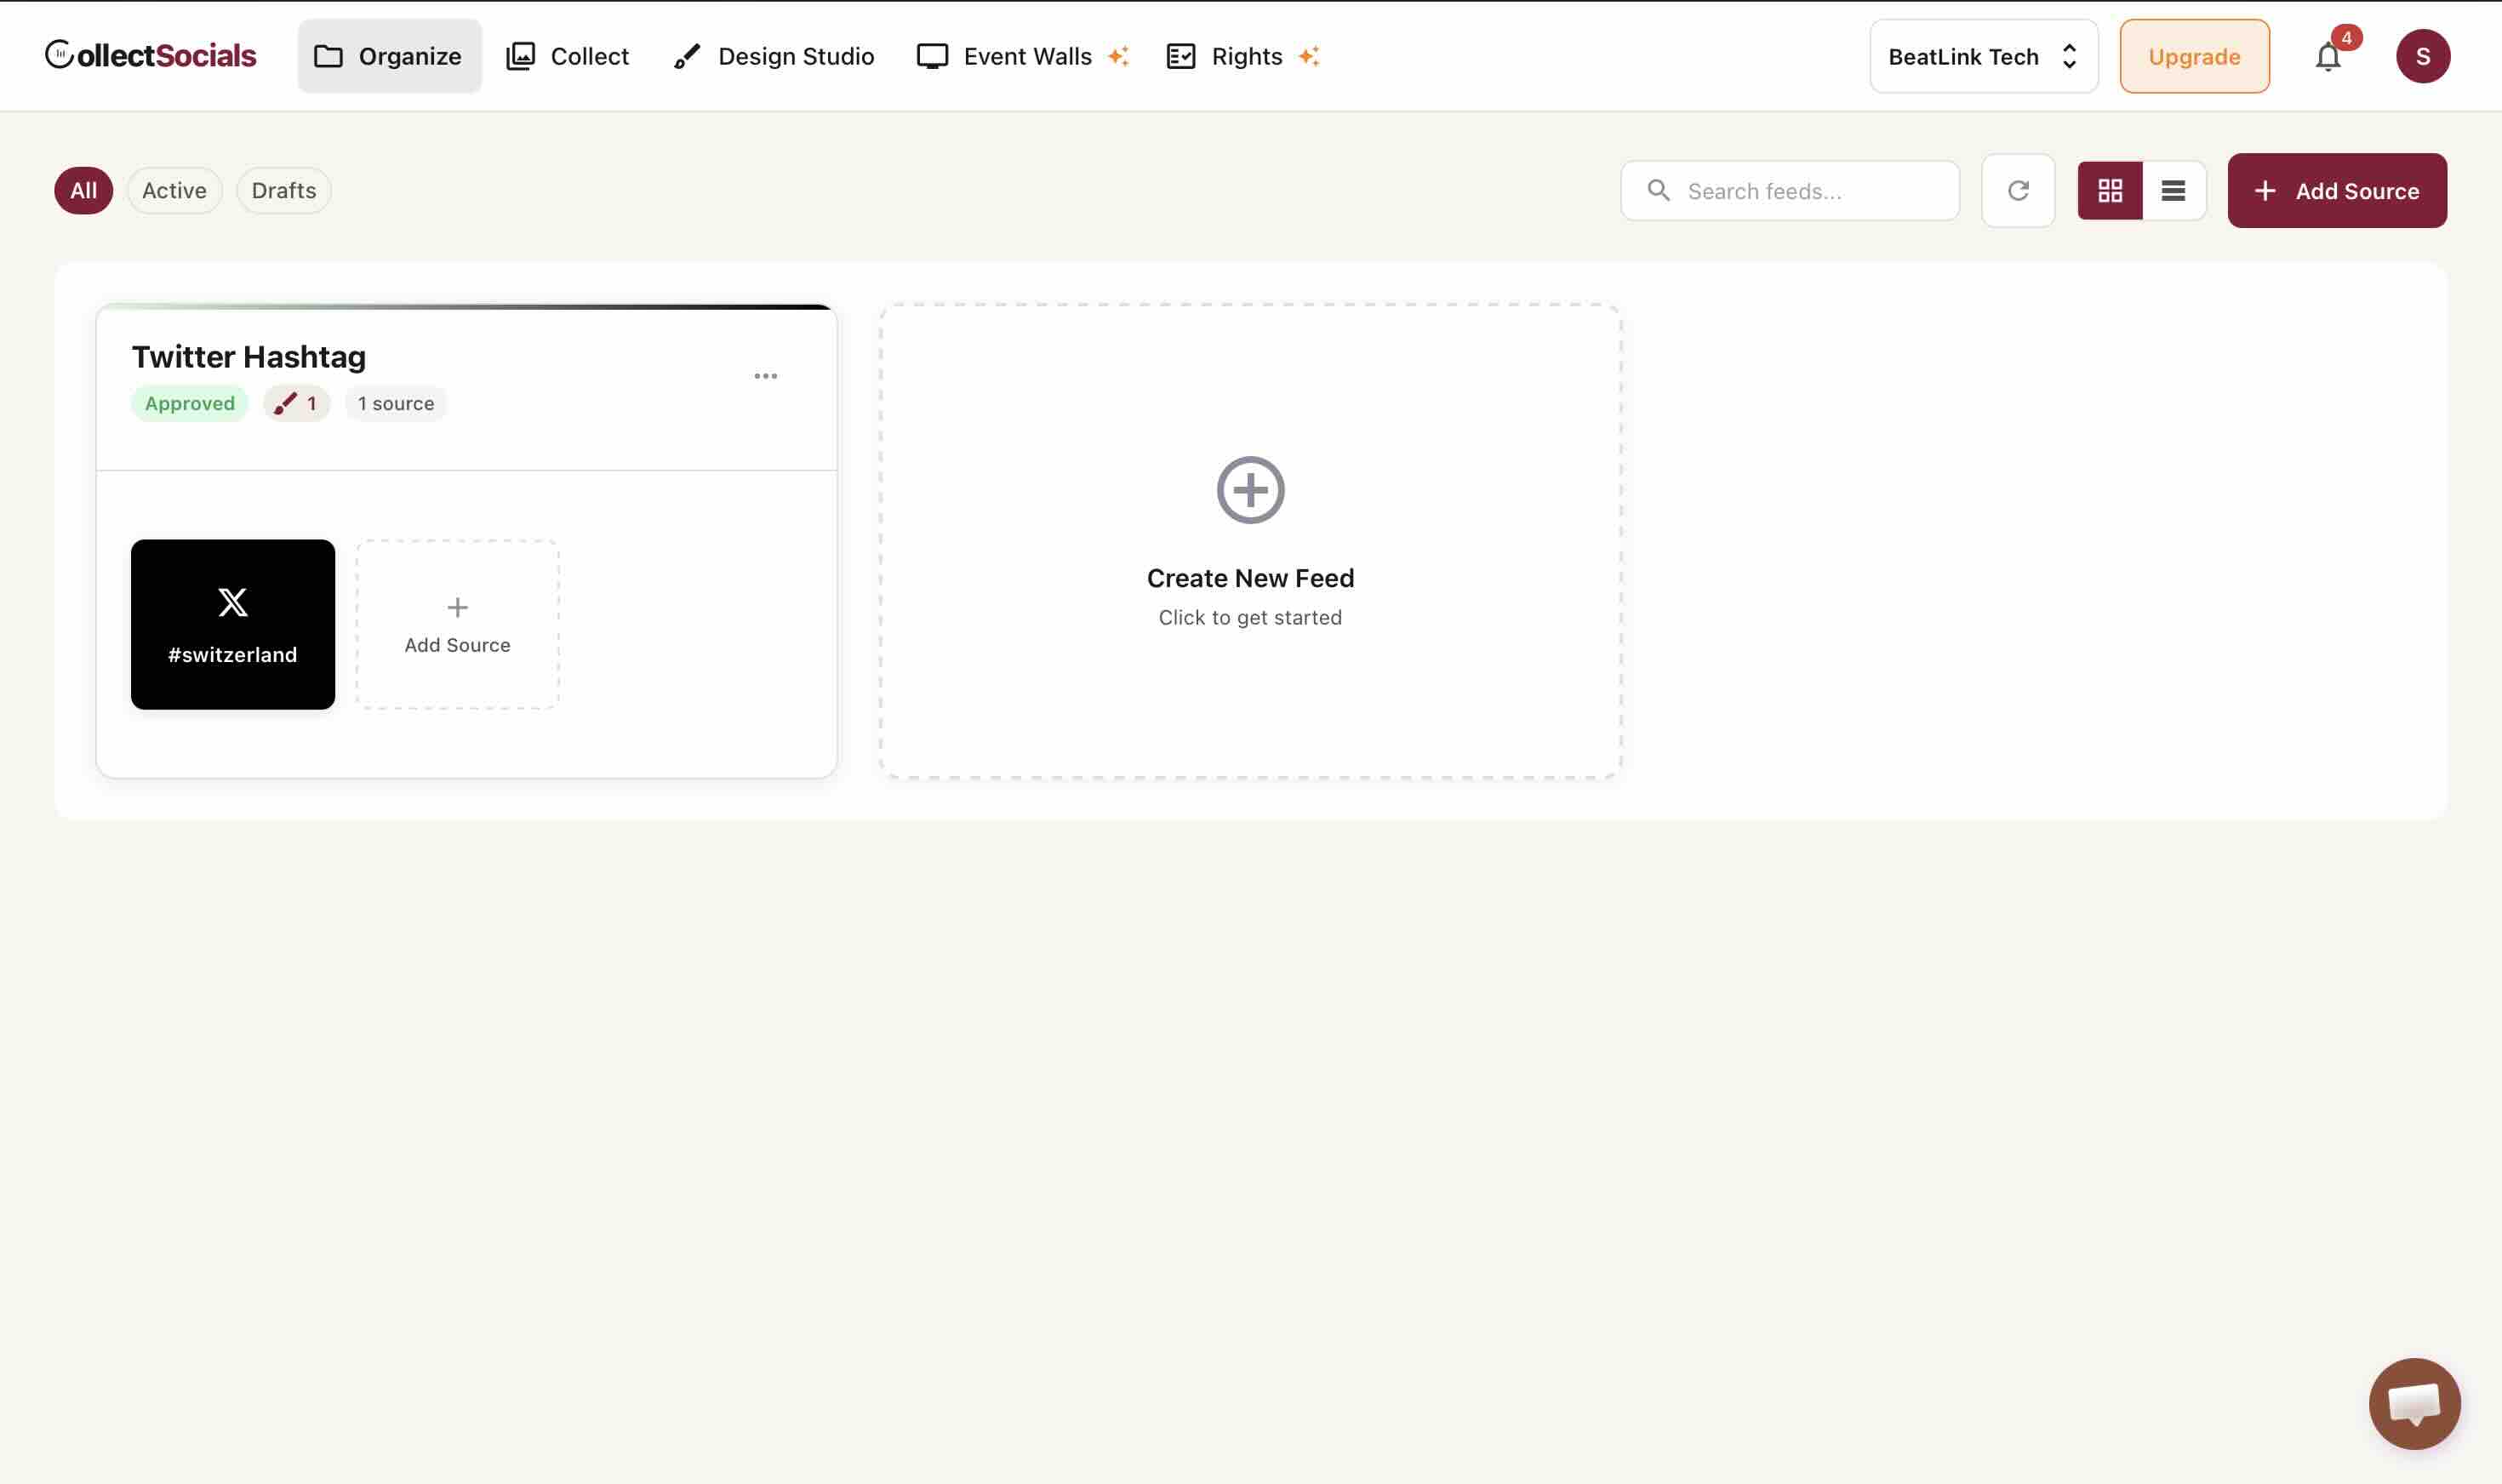
Click Continue and the source attaches to the feed you made in step 2. Back on Organize, the feed card now shows its status badge and the source under it, which is the quickest confirmation that the pull actually ran.
Step 5: Moderate what actually came back
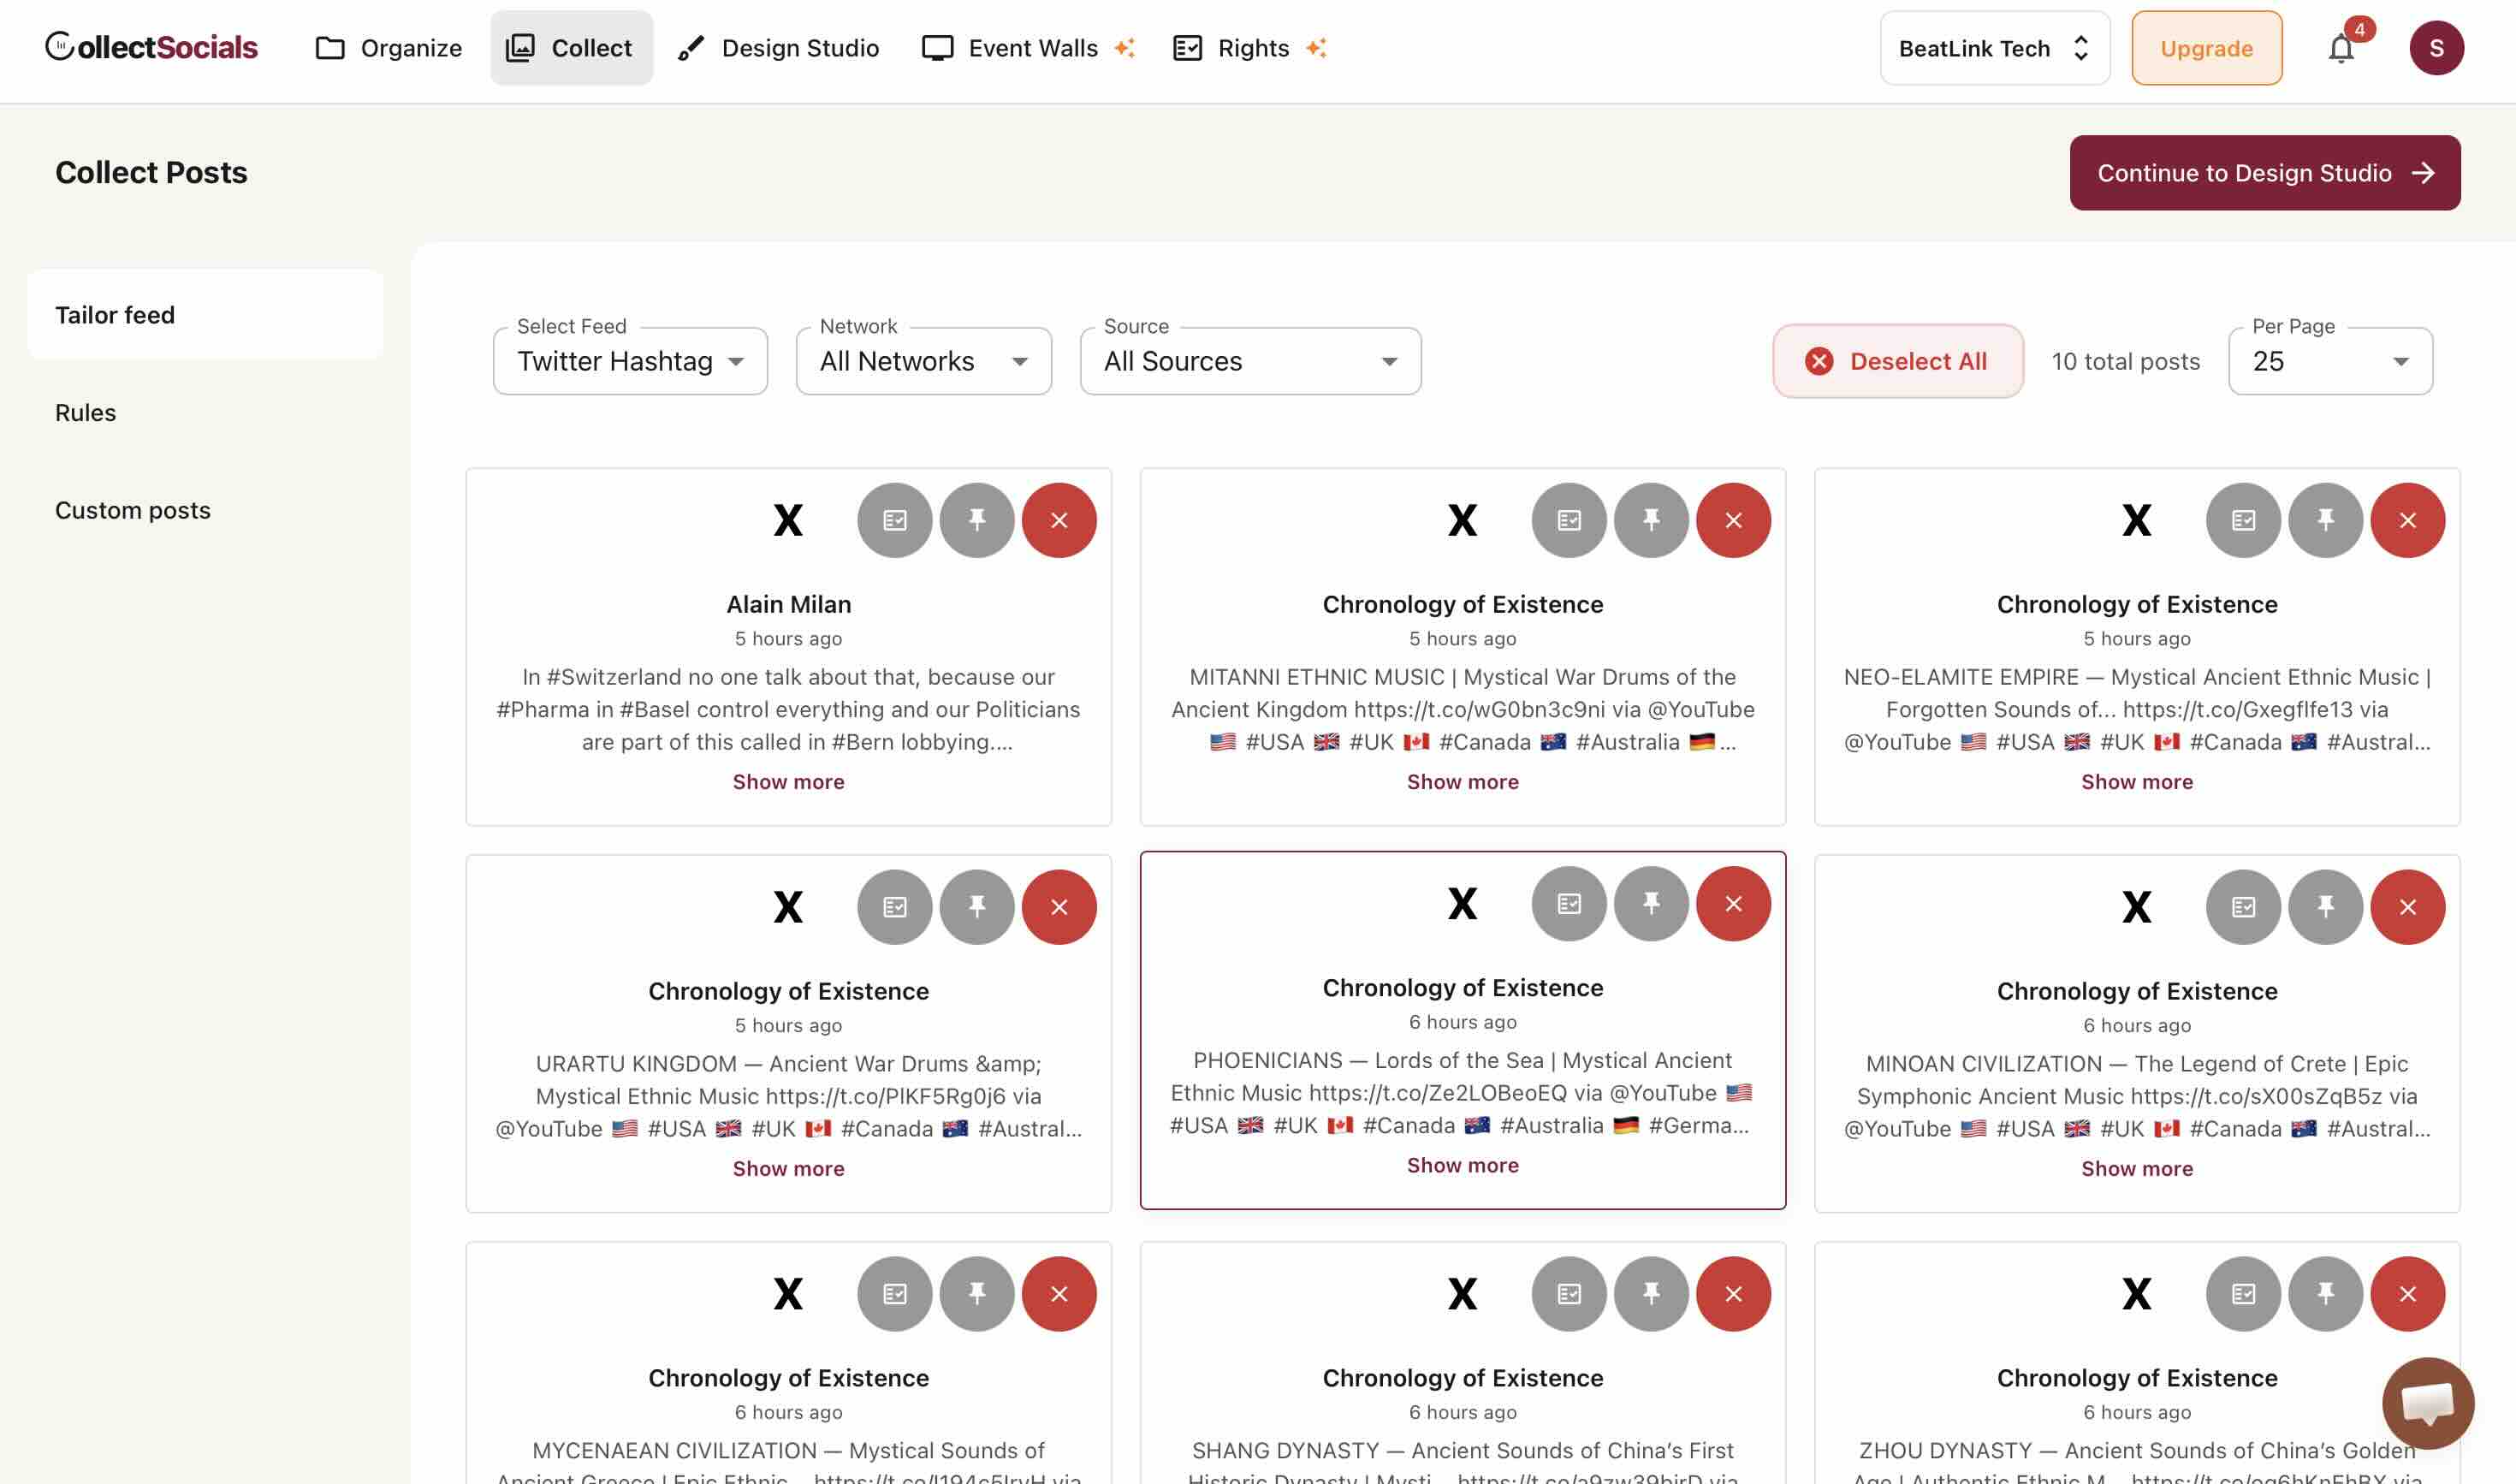
Open the Collect tab. Every post that arrived is here with three controls on it: usage rights (ask the author for permission to reuse the post), pin (hold it at the top), and approve or reject. Pick your feed in the Select Feed dropdown if you have more than one.
This step is where a hashtag feed earns its keep, and my test run is a good advertisement for not skipping it. The hashtag I chose returned ten posts, and most of them were the same account auto-posting YouTube links with a dozen country hashtags stapled to the end. One post was a genuine local opinion. That ratio is normal for a broad hashtag and it is exactly what you do not want appearing unattended on a business site.
Two things help. The Rules tab in the left sidebar takes keyword rules, and it is worth knowing exactly what they do: a blocked post still appears in this queue, flagged, but it is hidden from the published widget. That is deliberate, so you can see the rule working and override it on a post the rule caught wrongly. It means the queue keeps growing, but your Wix page stays clean without you watching it. And a narrower hashtag beats a popular one: a branded or event-specific tag returns less volume and far more of it is usable.
Step 6: Design the feed, then Get Code with Wix selected
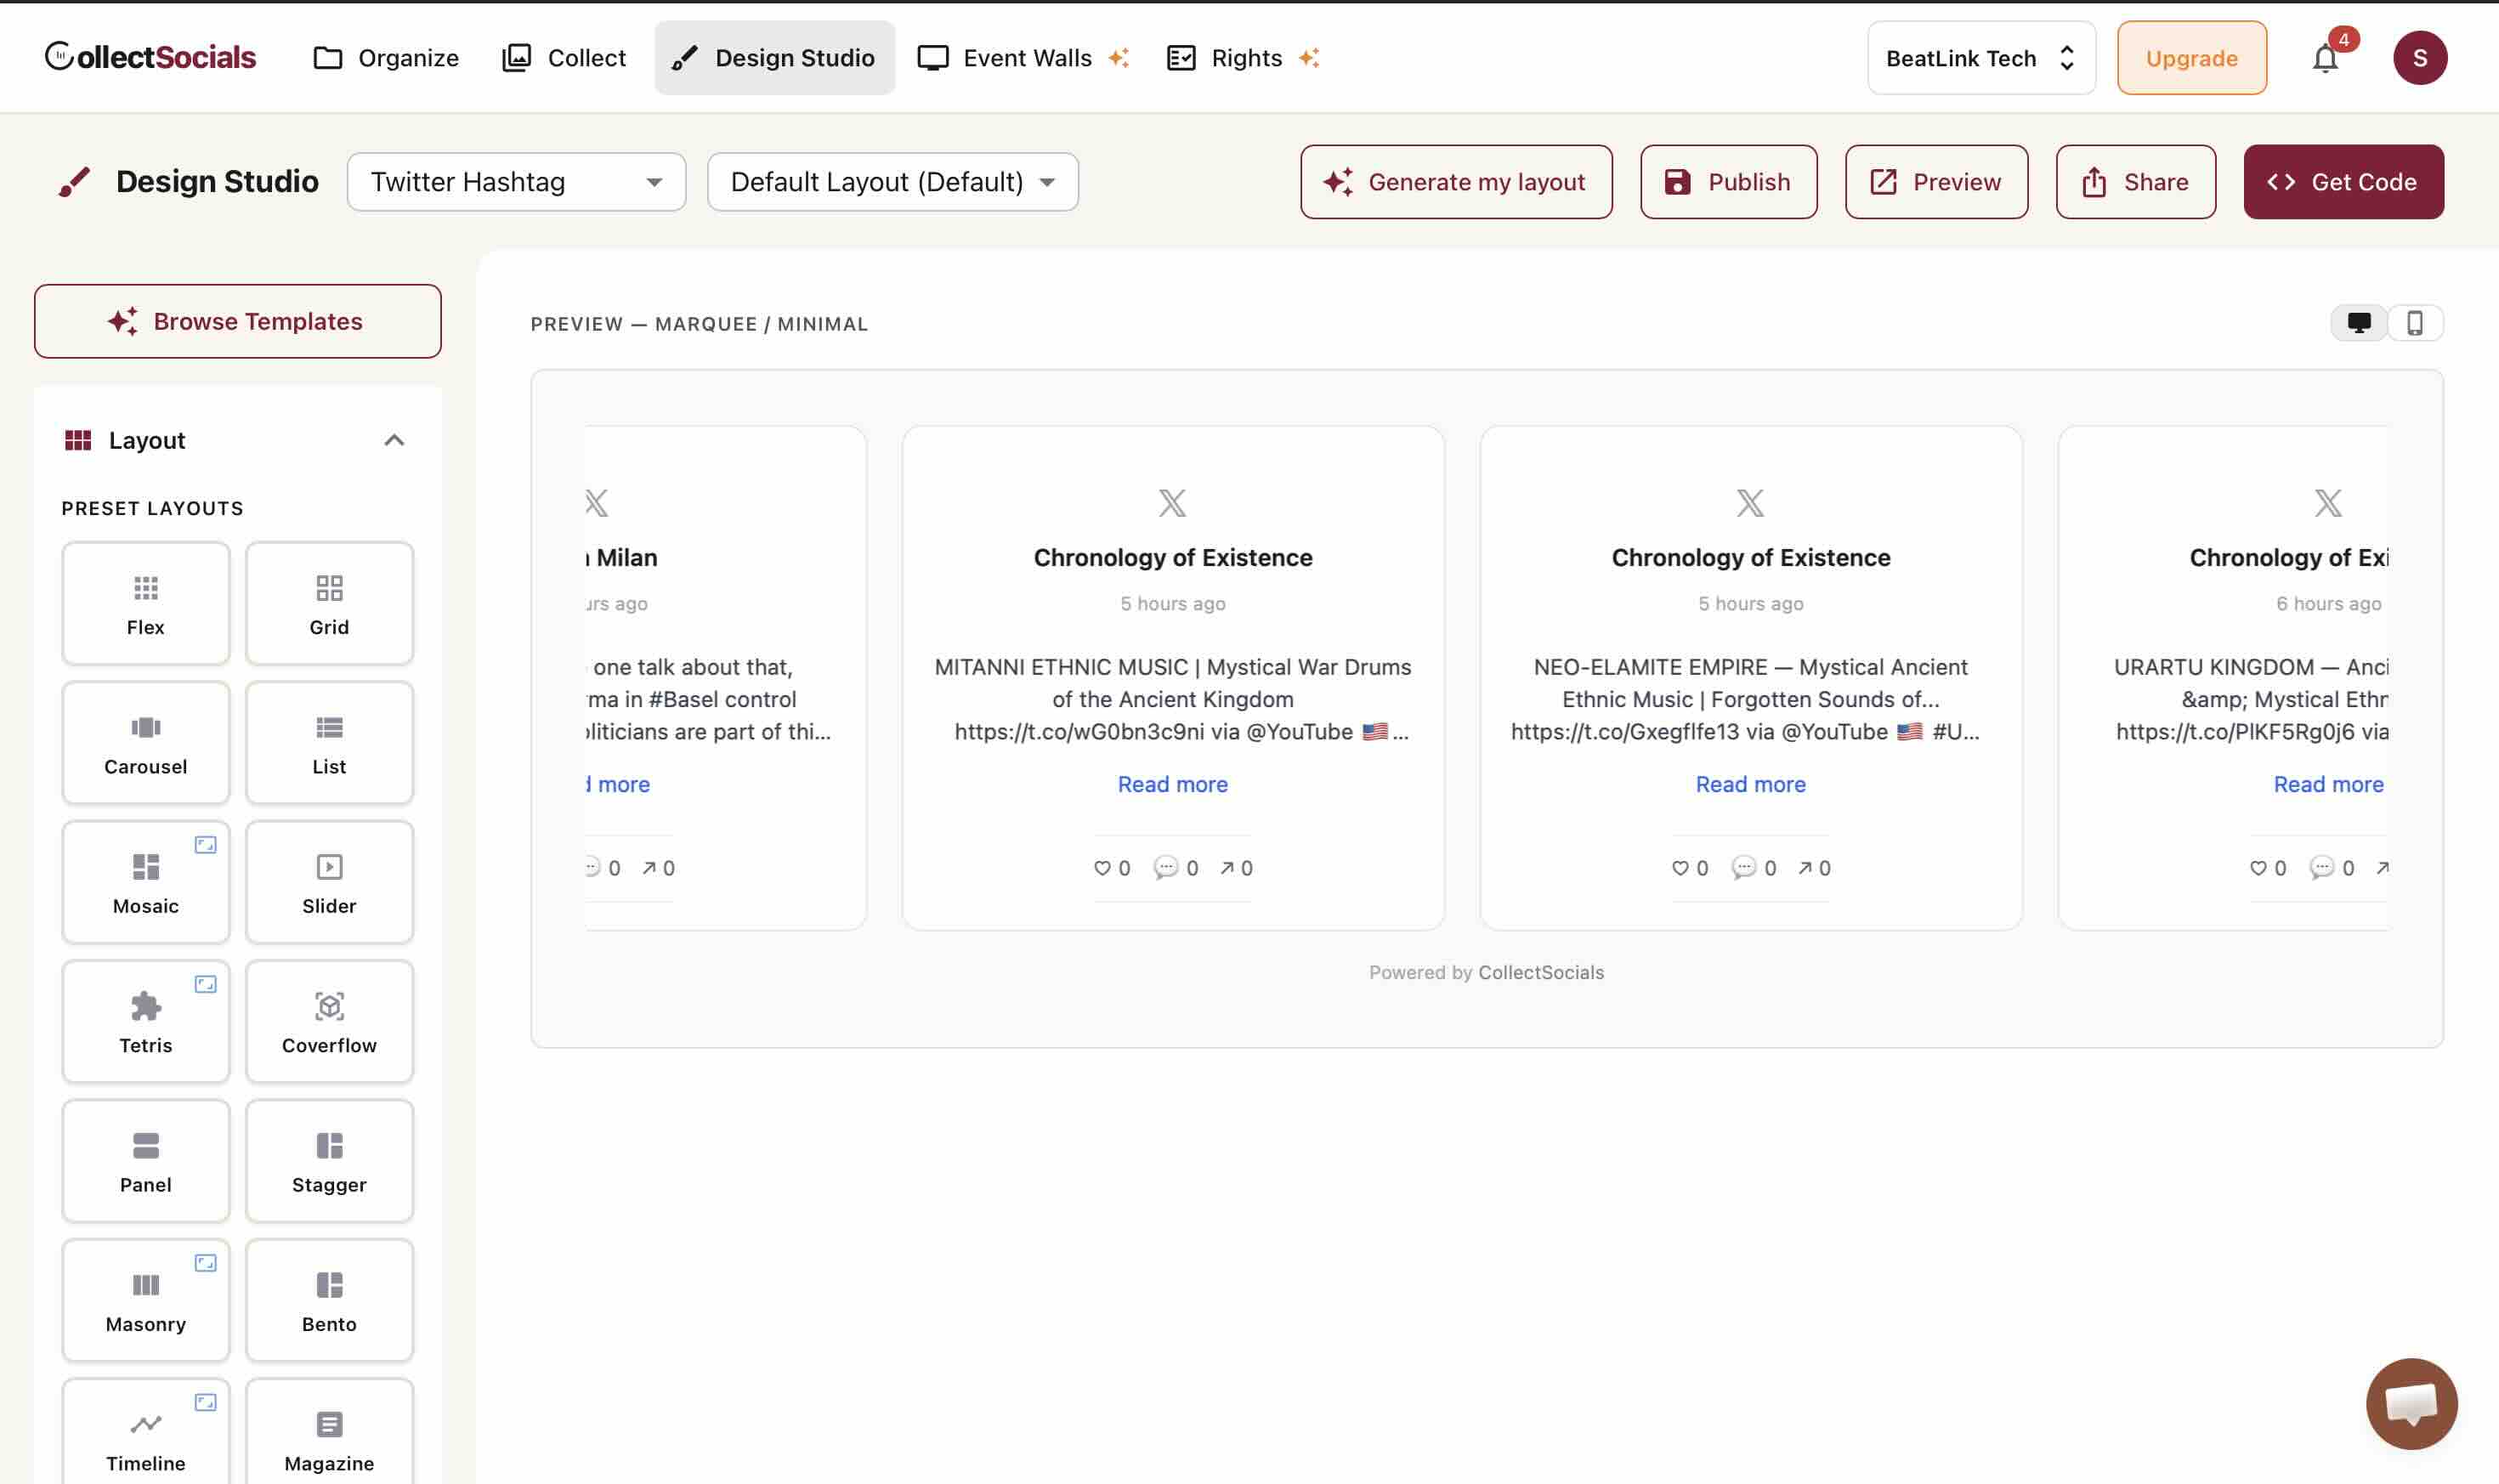
Continue to Design Studio opens the layout picker. Choose a preset from the left rail, or press Generate my layout and adjust what comes back. The preview in the middle is the real widget rendering your real posts, not a mockup, so what you see here is what Wix visitors will see.
Then the step that decides whether any of this works on Wix. Click Get Code, and in the dialog set "Where are you installing your widget?" to Wix. That dropdown is not cosmetic. Naming Wix is what hands you an <iframe> snippet instead of the plain script tag other hosts get. Copy what the dialog gives you without editing it. If the feed is not live yet, the same screen offers Put it on my site, which is what actually publishes it; once it is live that button becomes Get the embed code.
Part 2: Install It on Your Wix Site (Steps 7 to 12)
Step 7: Open + Add, then Elements
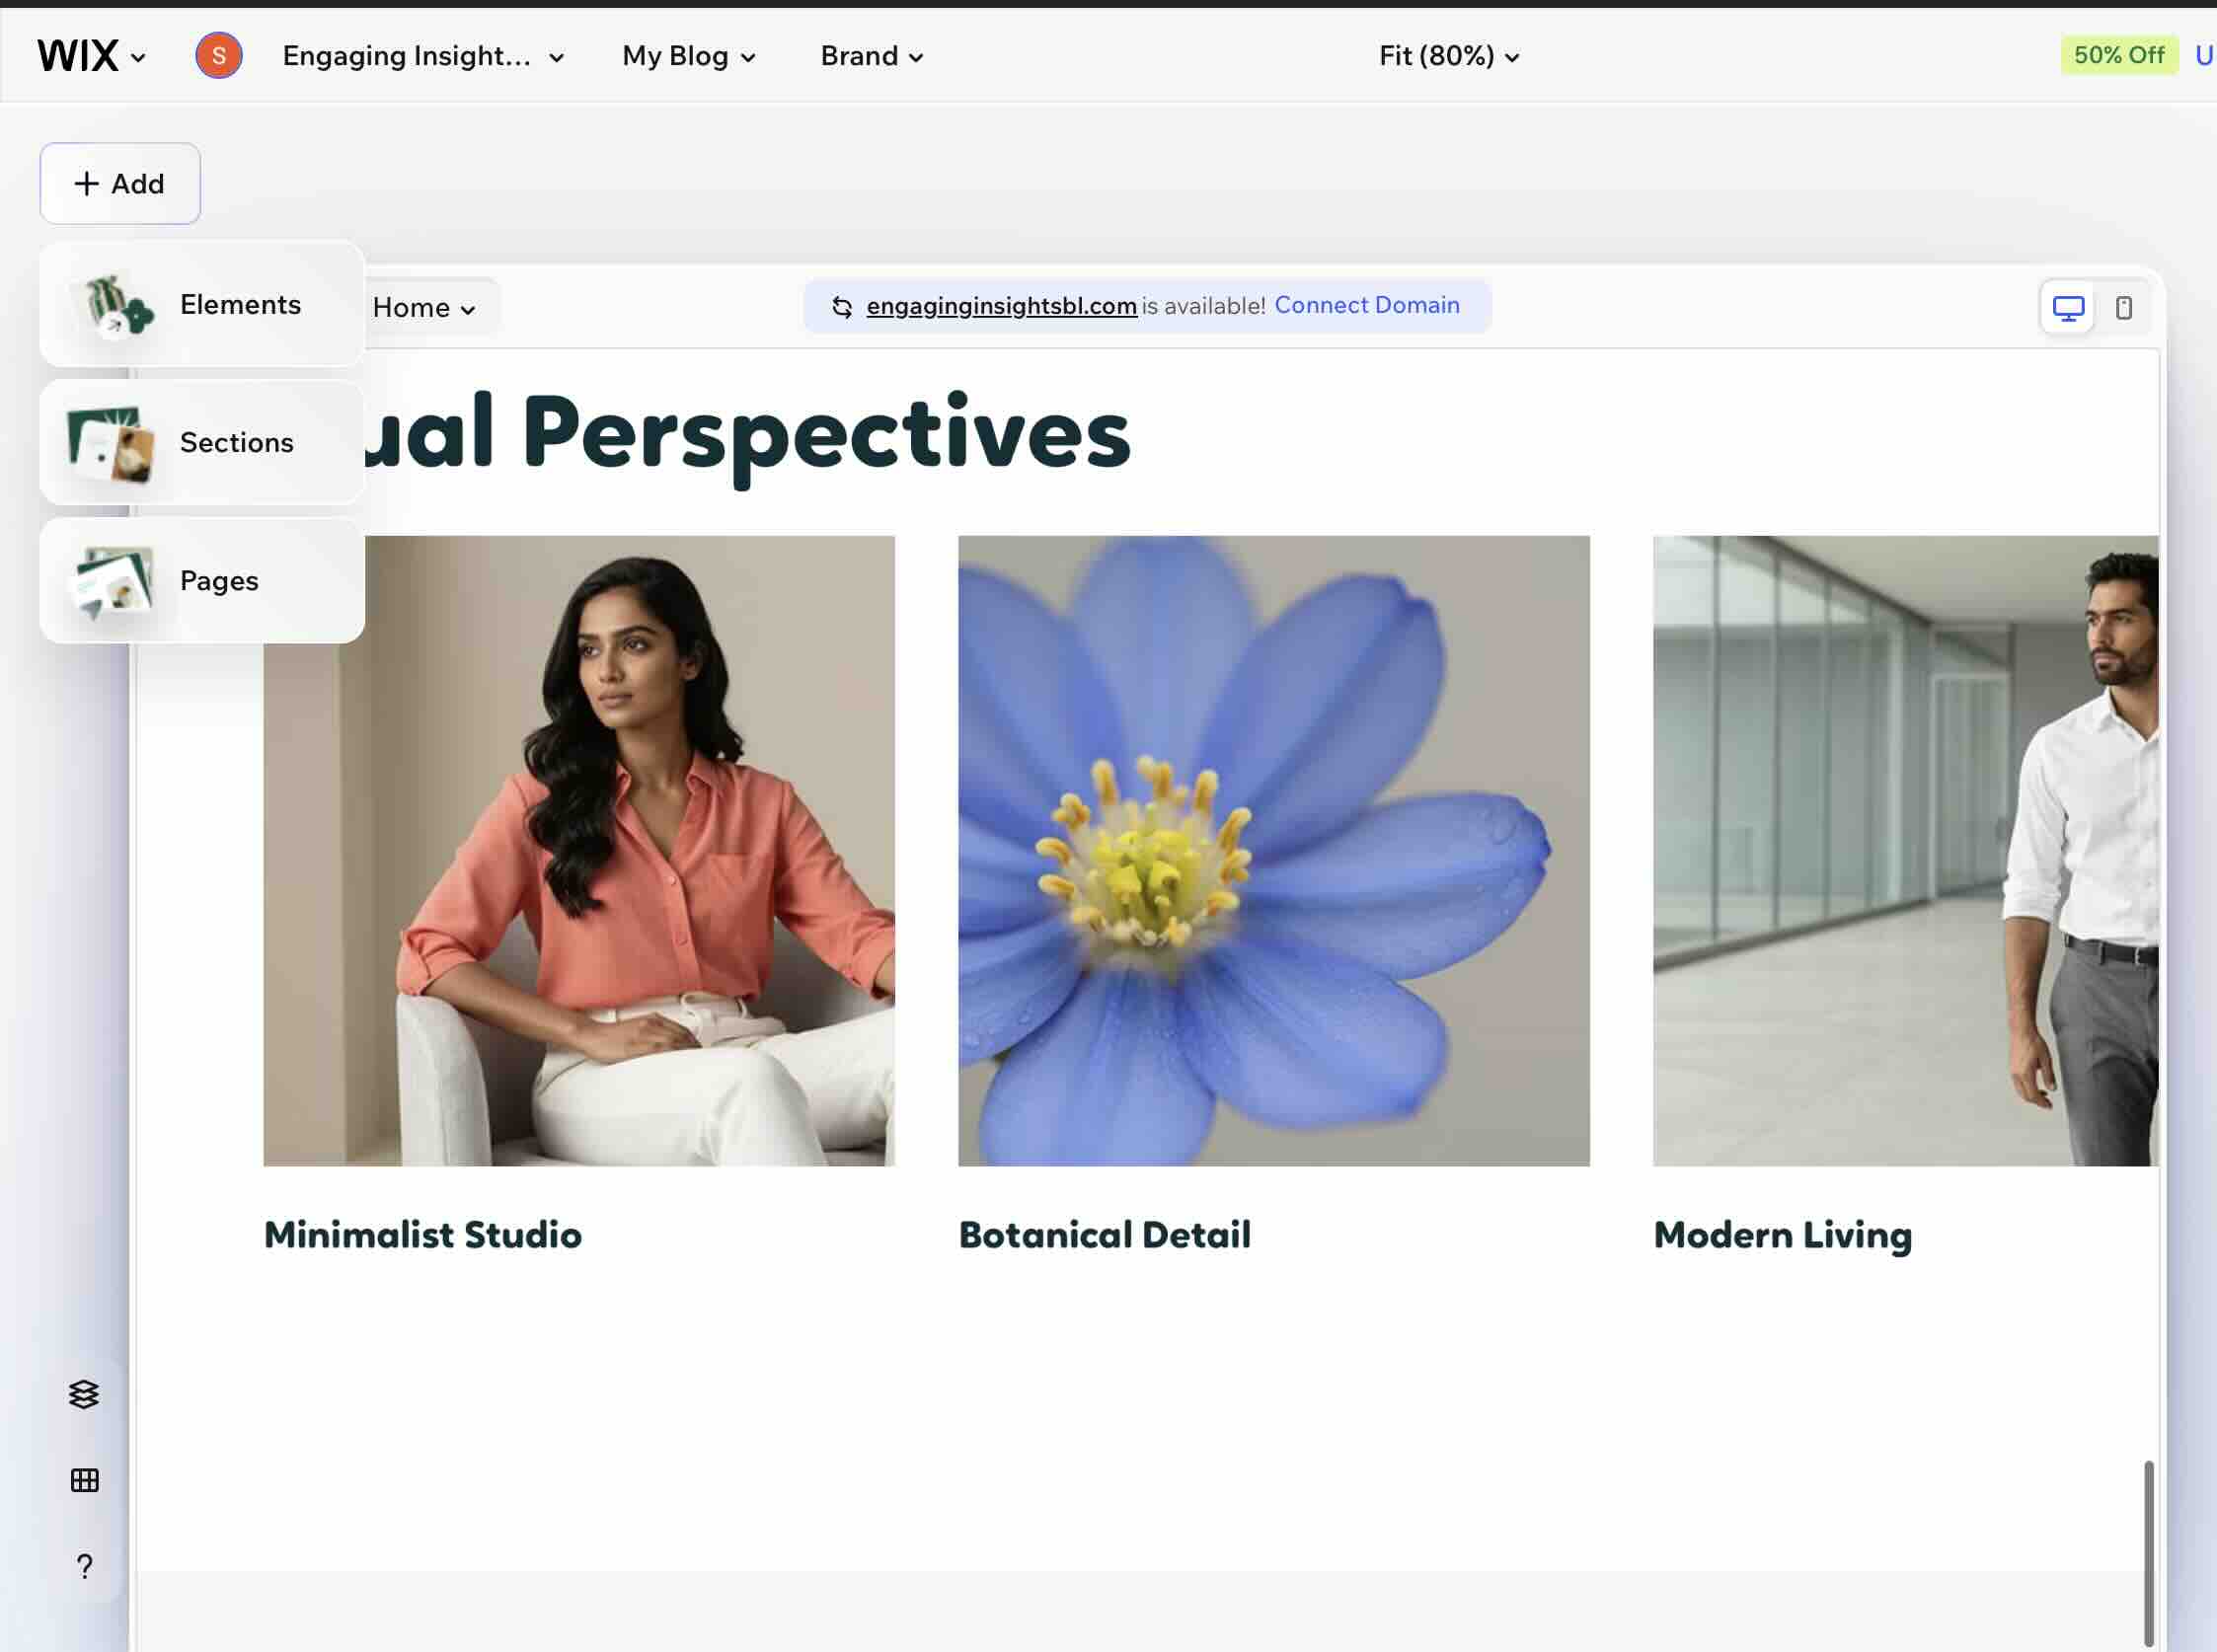
Open the Wix Editor on the page where the feed belongs and click + Add in the top left. Three options appear: Elements, Sections and Pages. You want Elements.
Step 8: Pick Embed from the elements list
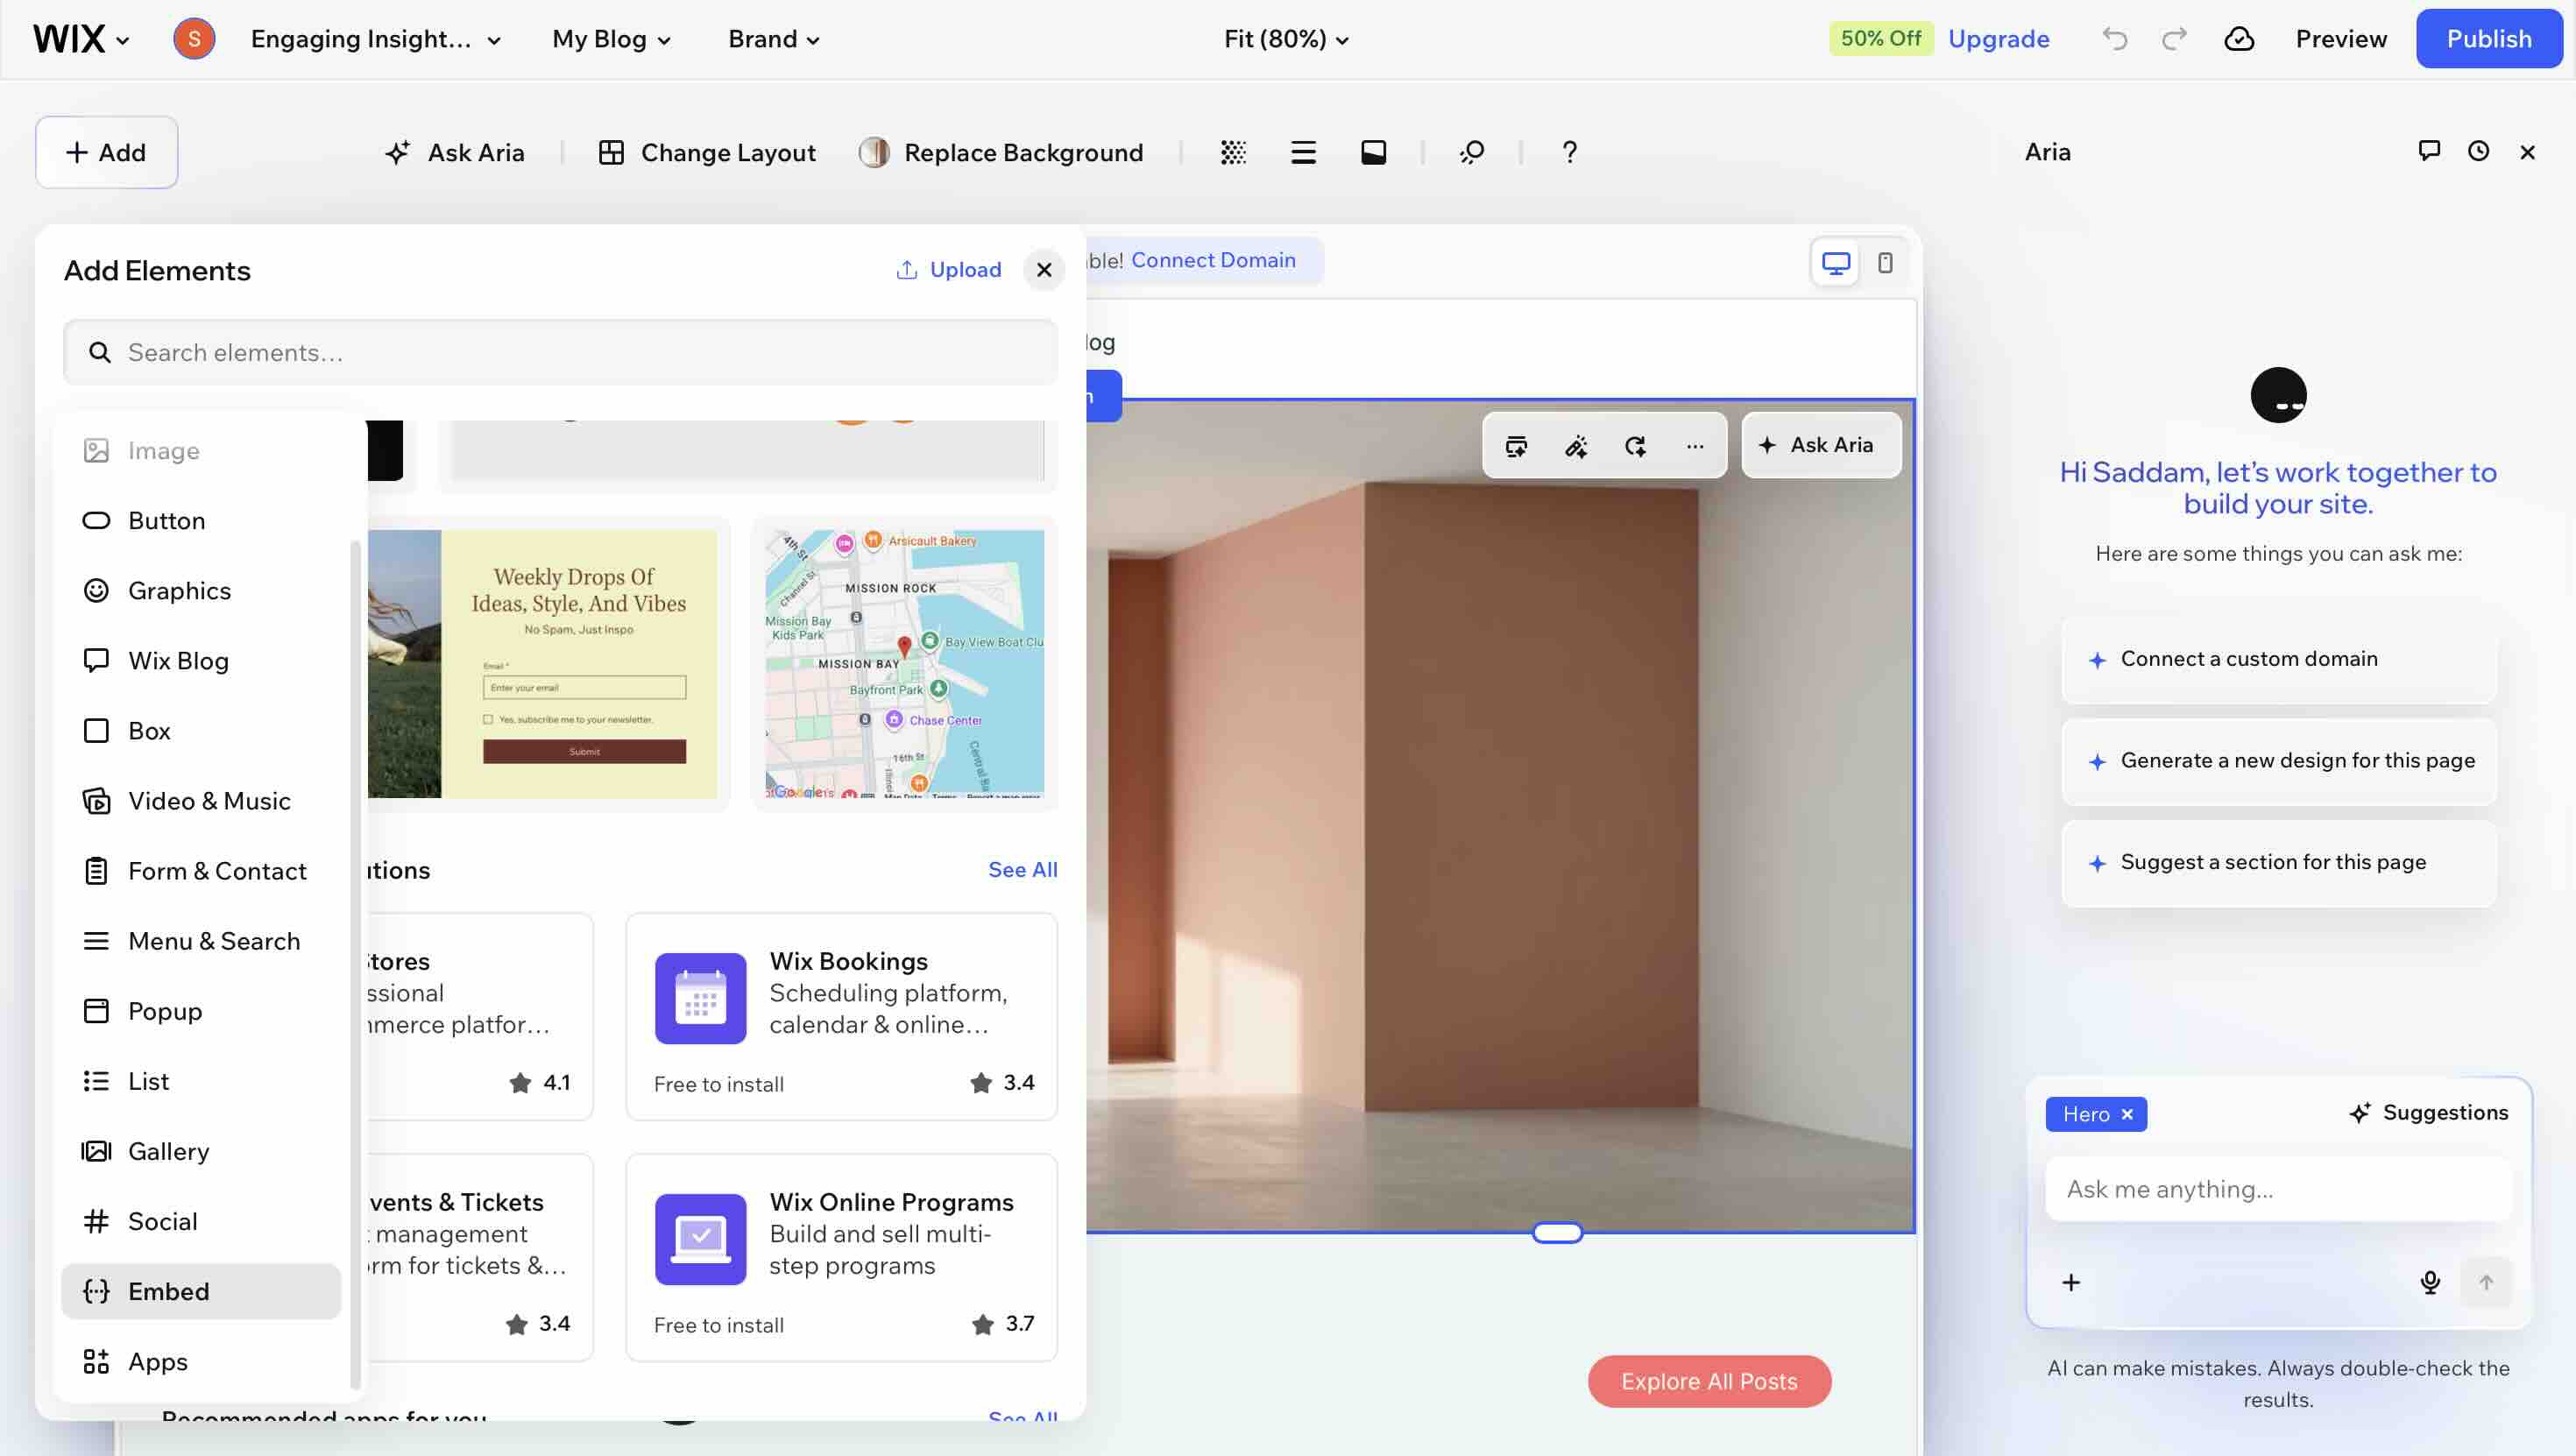
The Add Elements panel opens with a category list down the left: Image, Button, Graphics, Wix Blog, Box, Video & Music, Form & Contact, Menu & Search, Popup, List, Gallery, Social, Embed, Apps. Choose Embed.
Worth noting because it costs people time: Social sits just above Embed in the same list and is not what you want. That category holds Wix's own social elements, and none of them will render your feed.
Step 9: Choose Embed code, not Embed a site
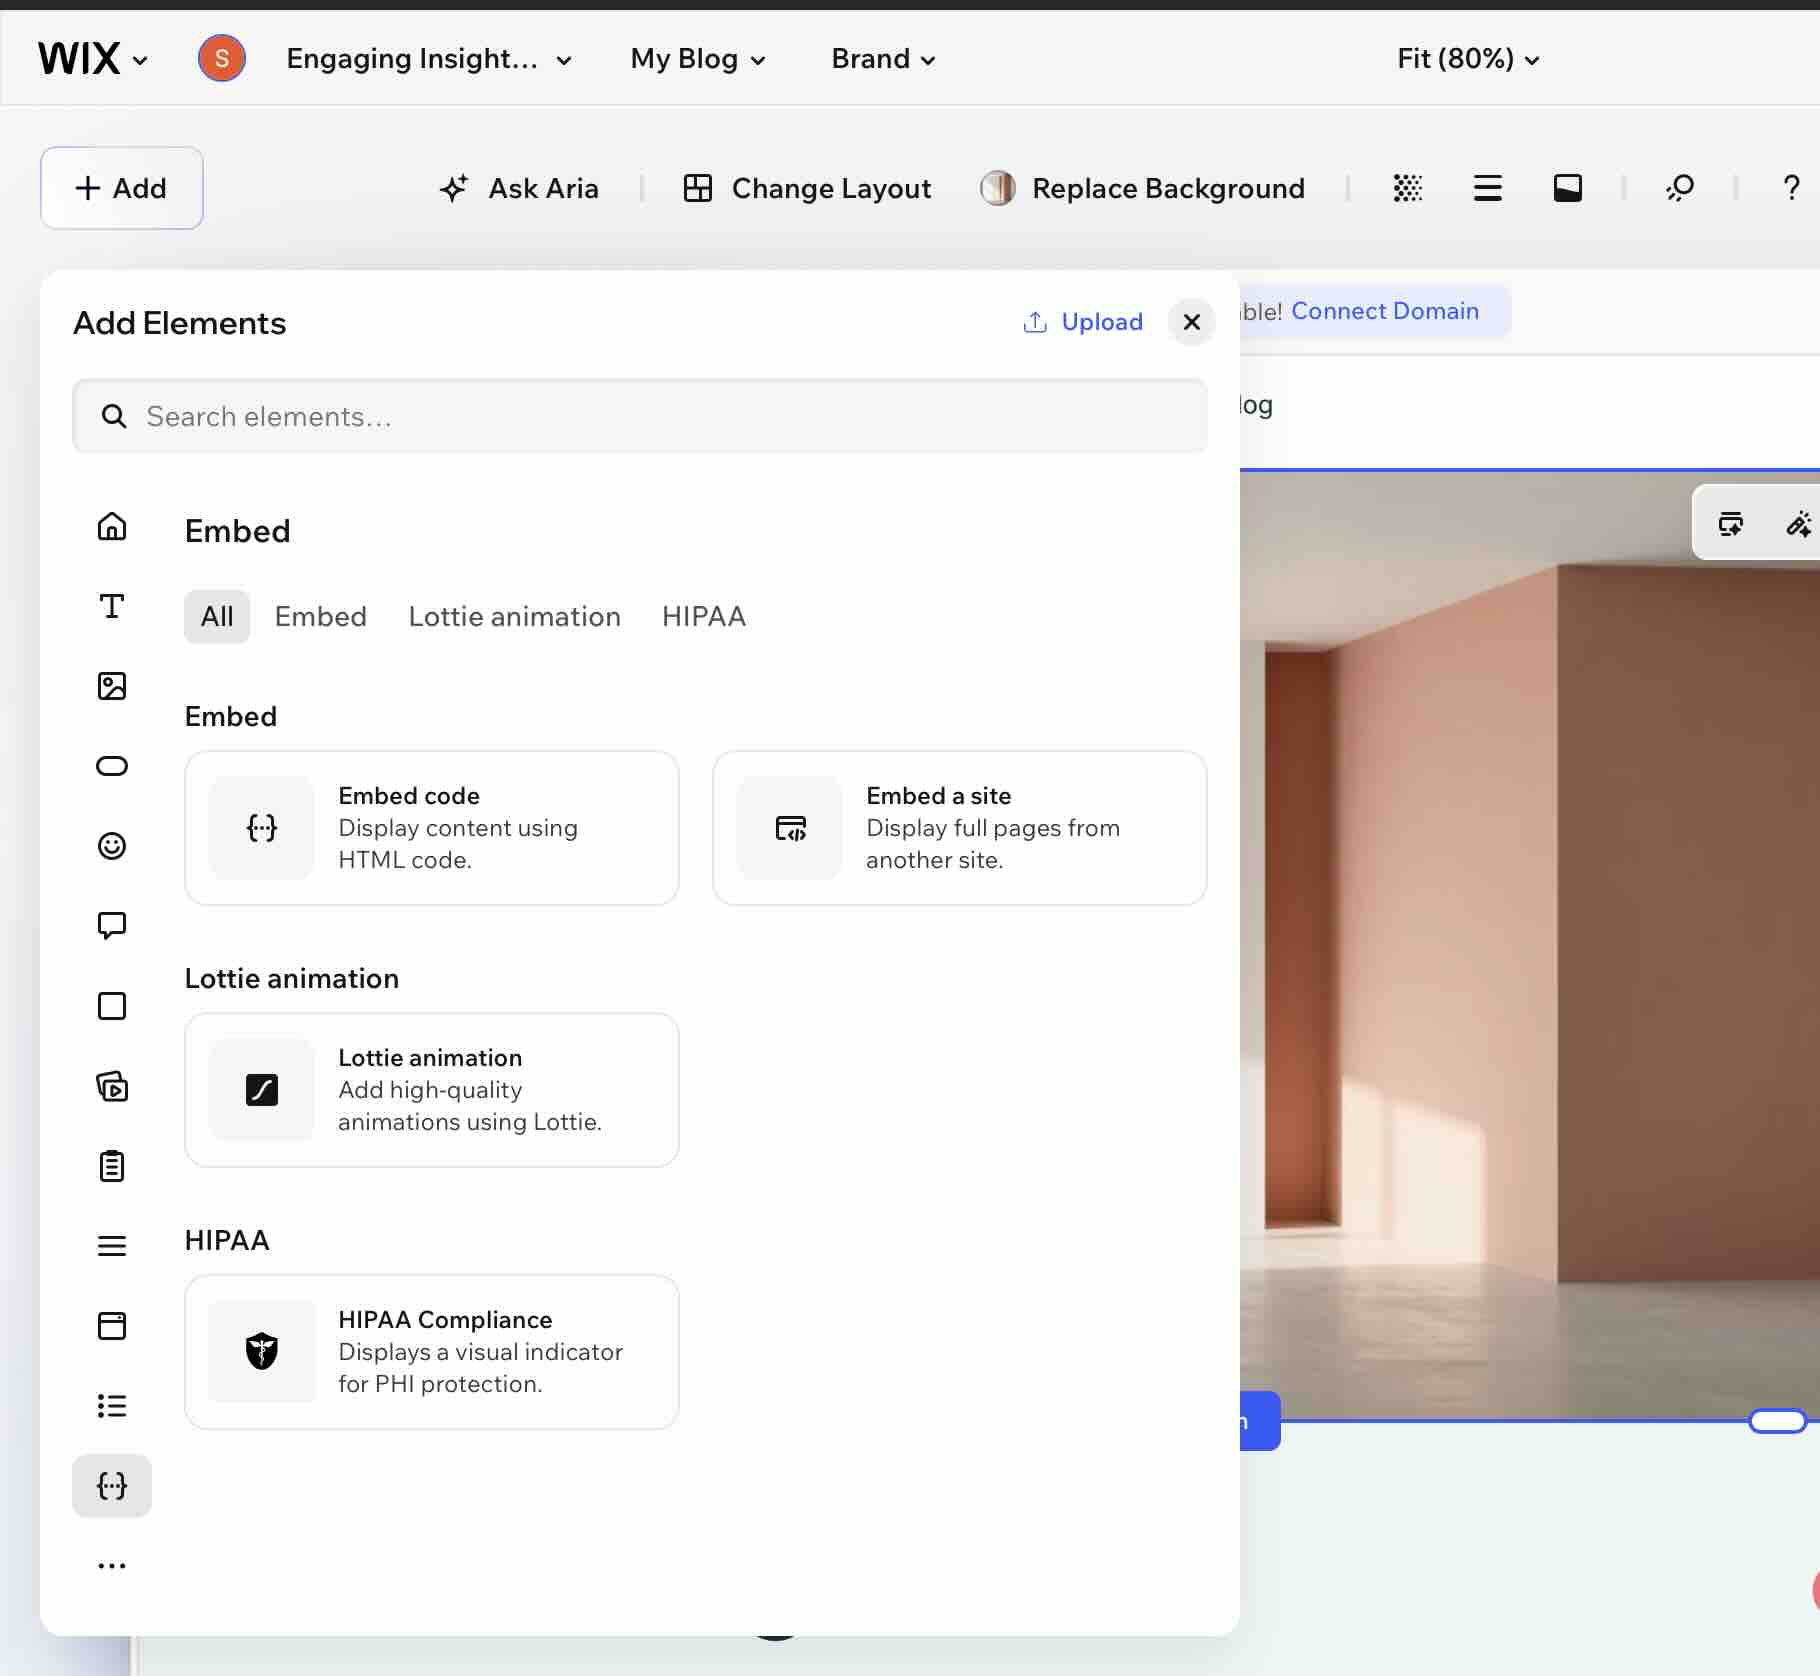
The Embed category offers two things that sound interchangeable and are not. Embed code displays content using HTML code, which is what you want. Embed a site displays full pages from another site, which would put your whole feed page inside a frame rather than the widget.
Step 10: Size the element before you paste anything
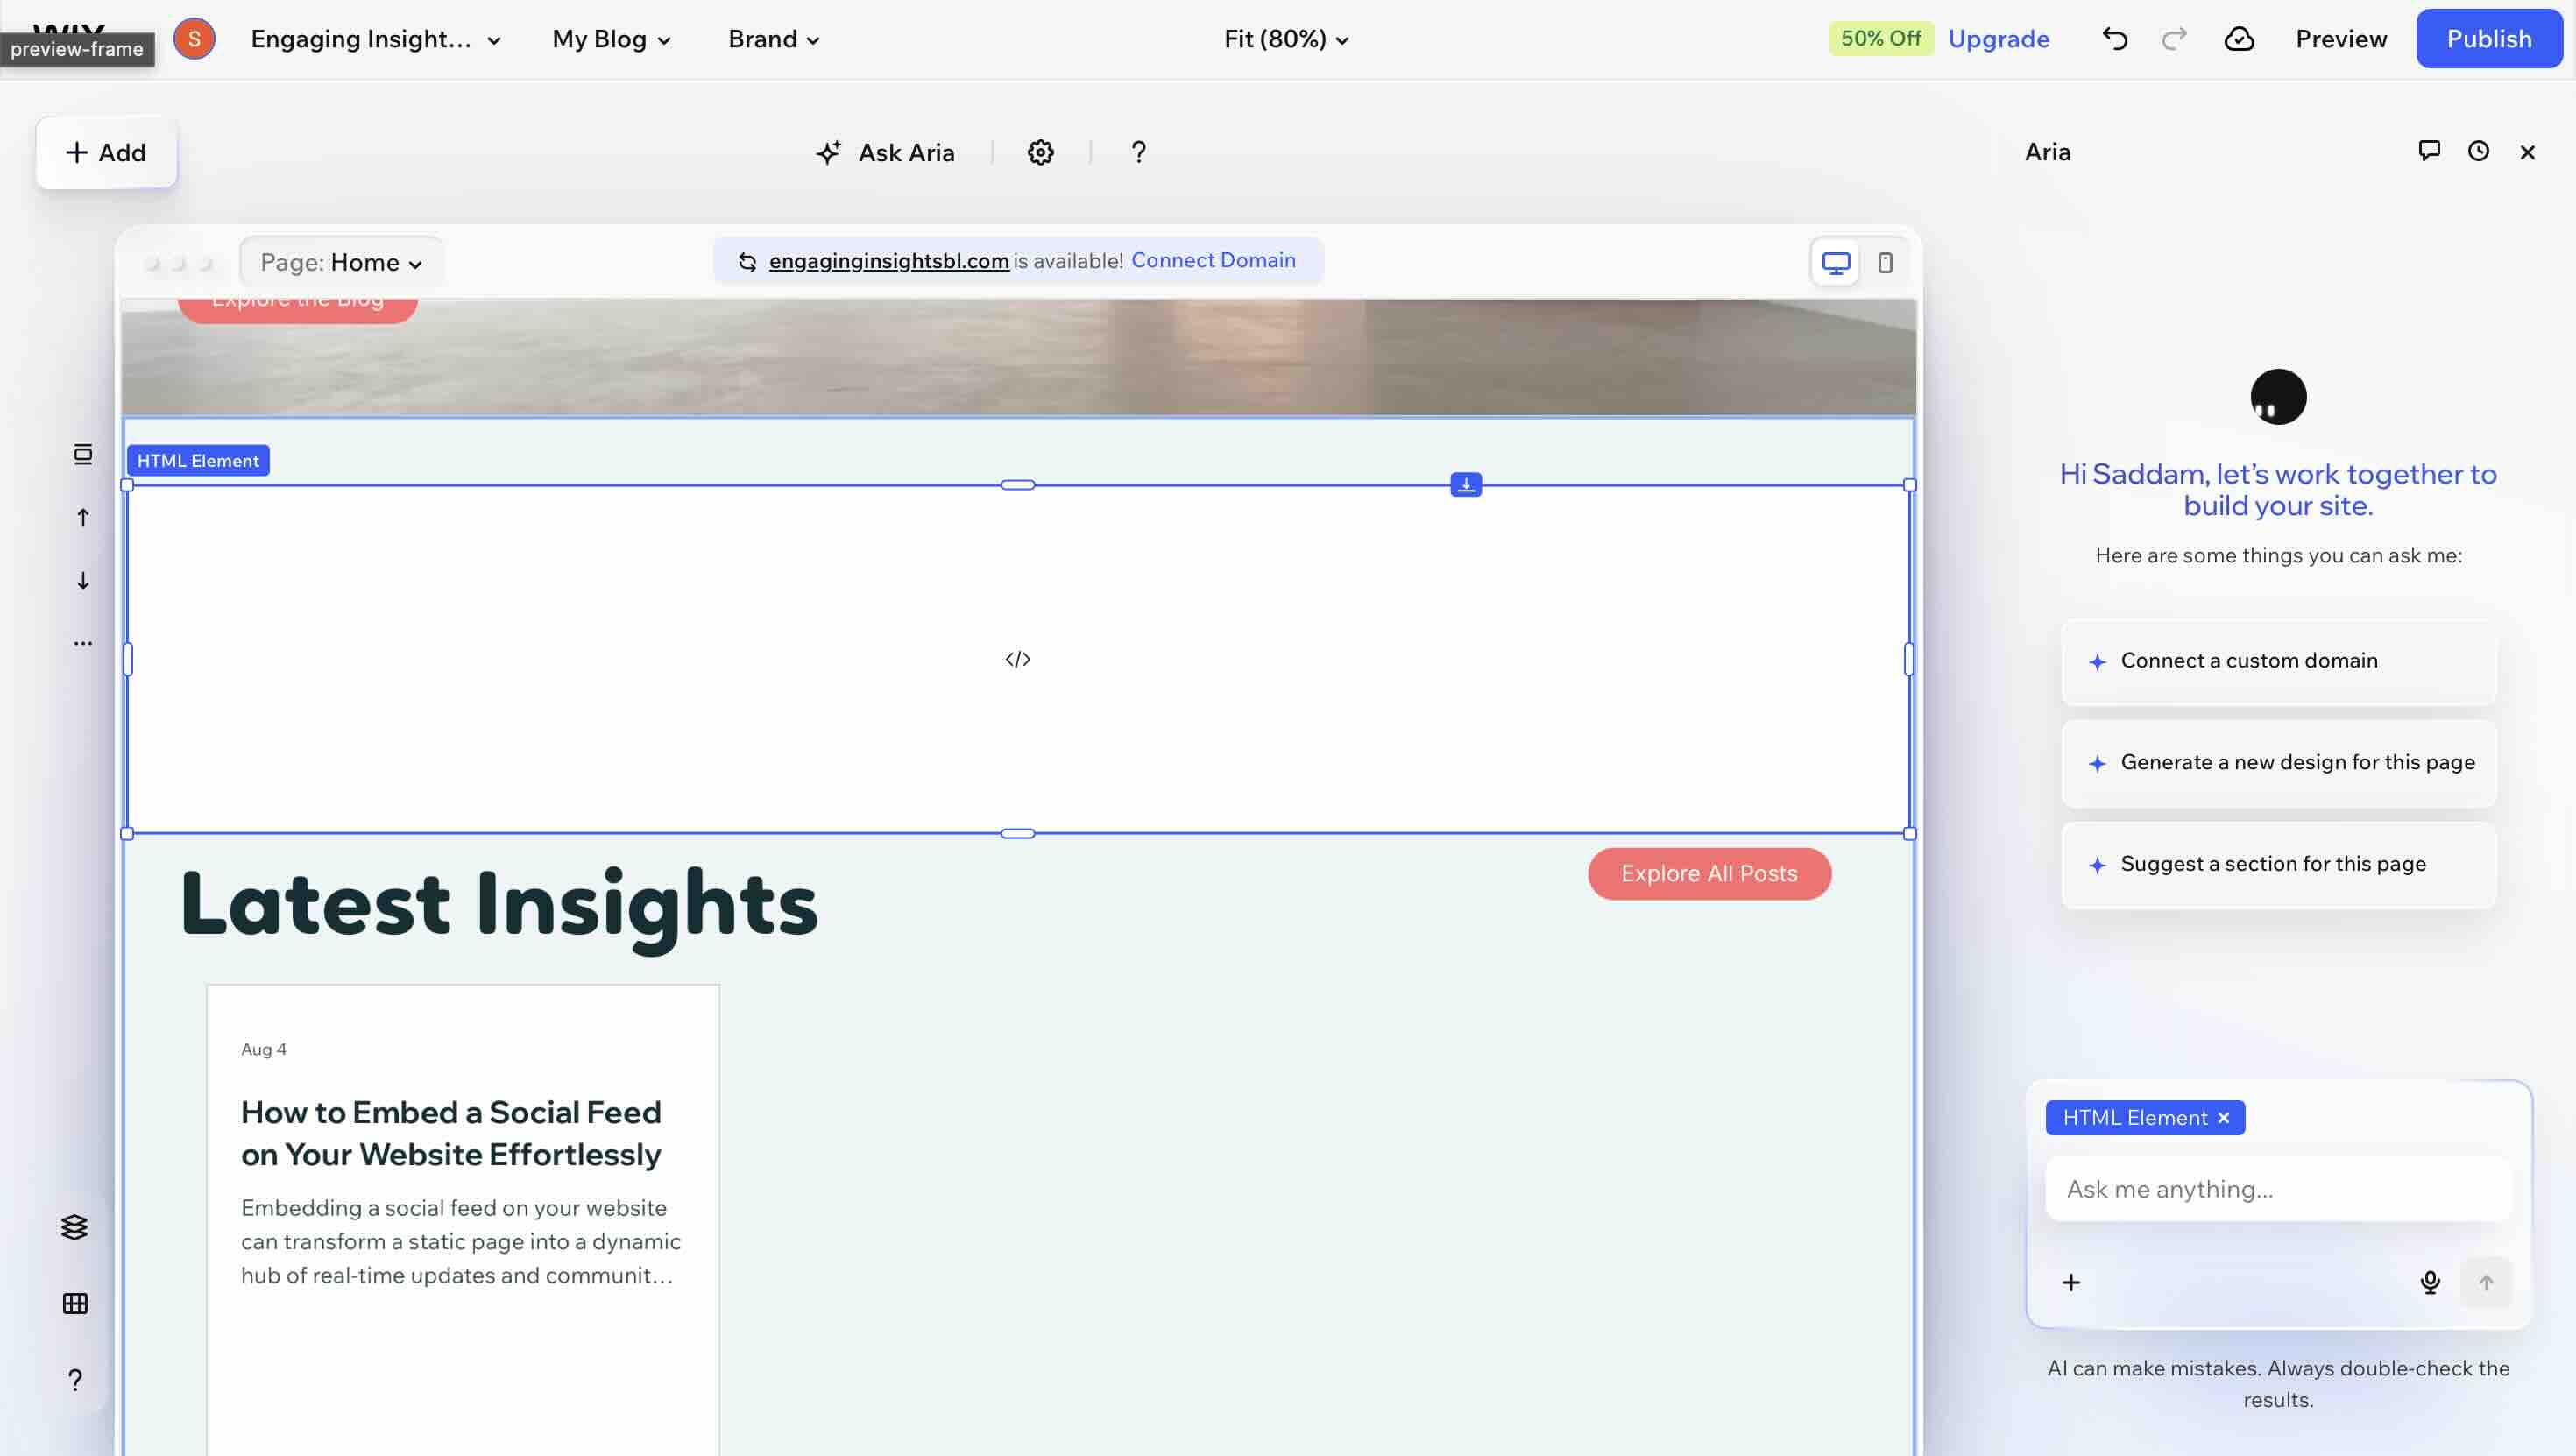
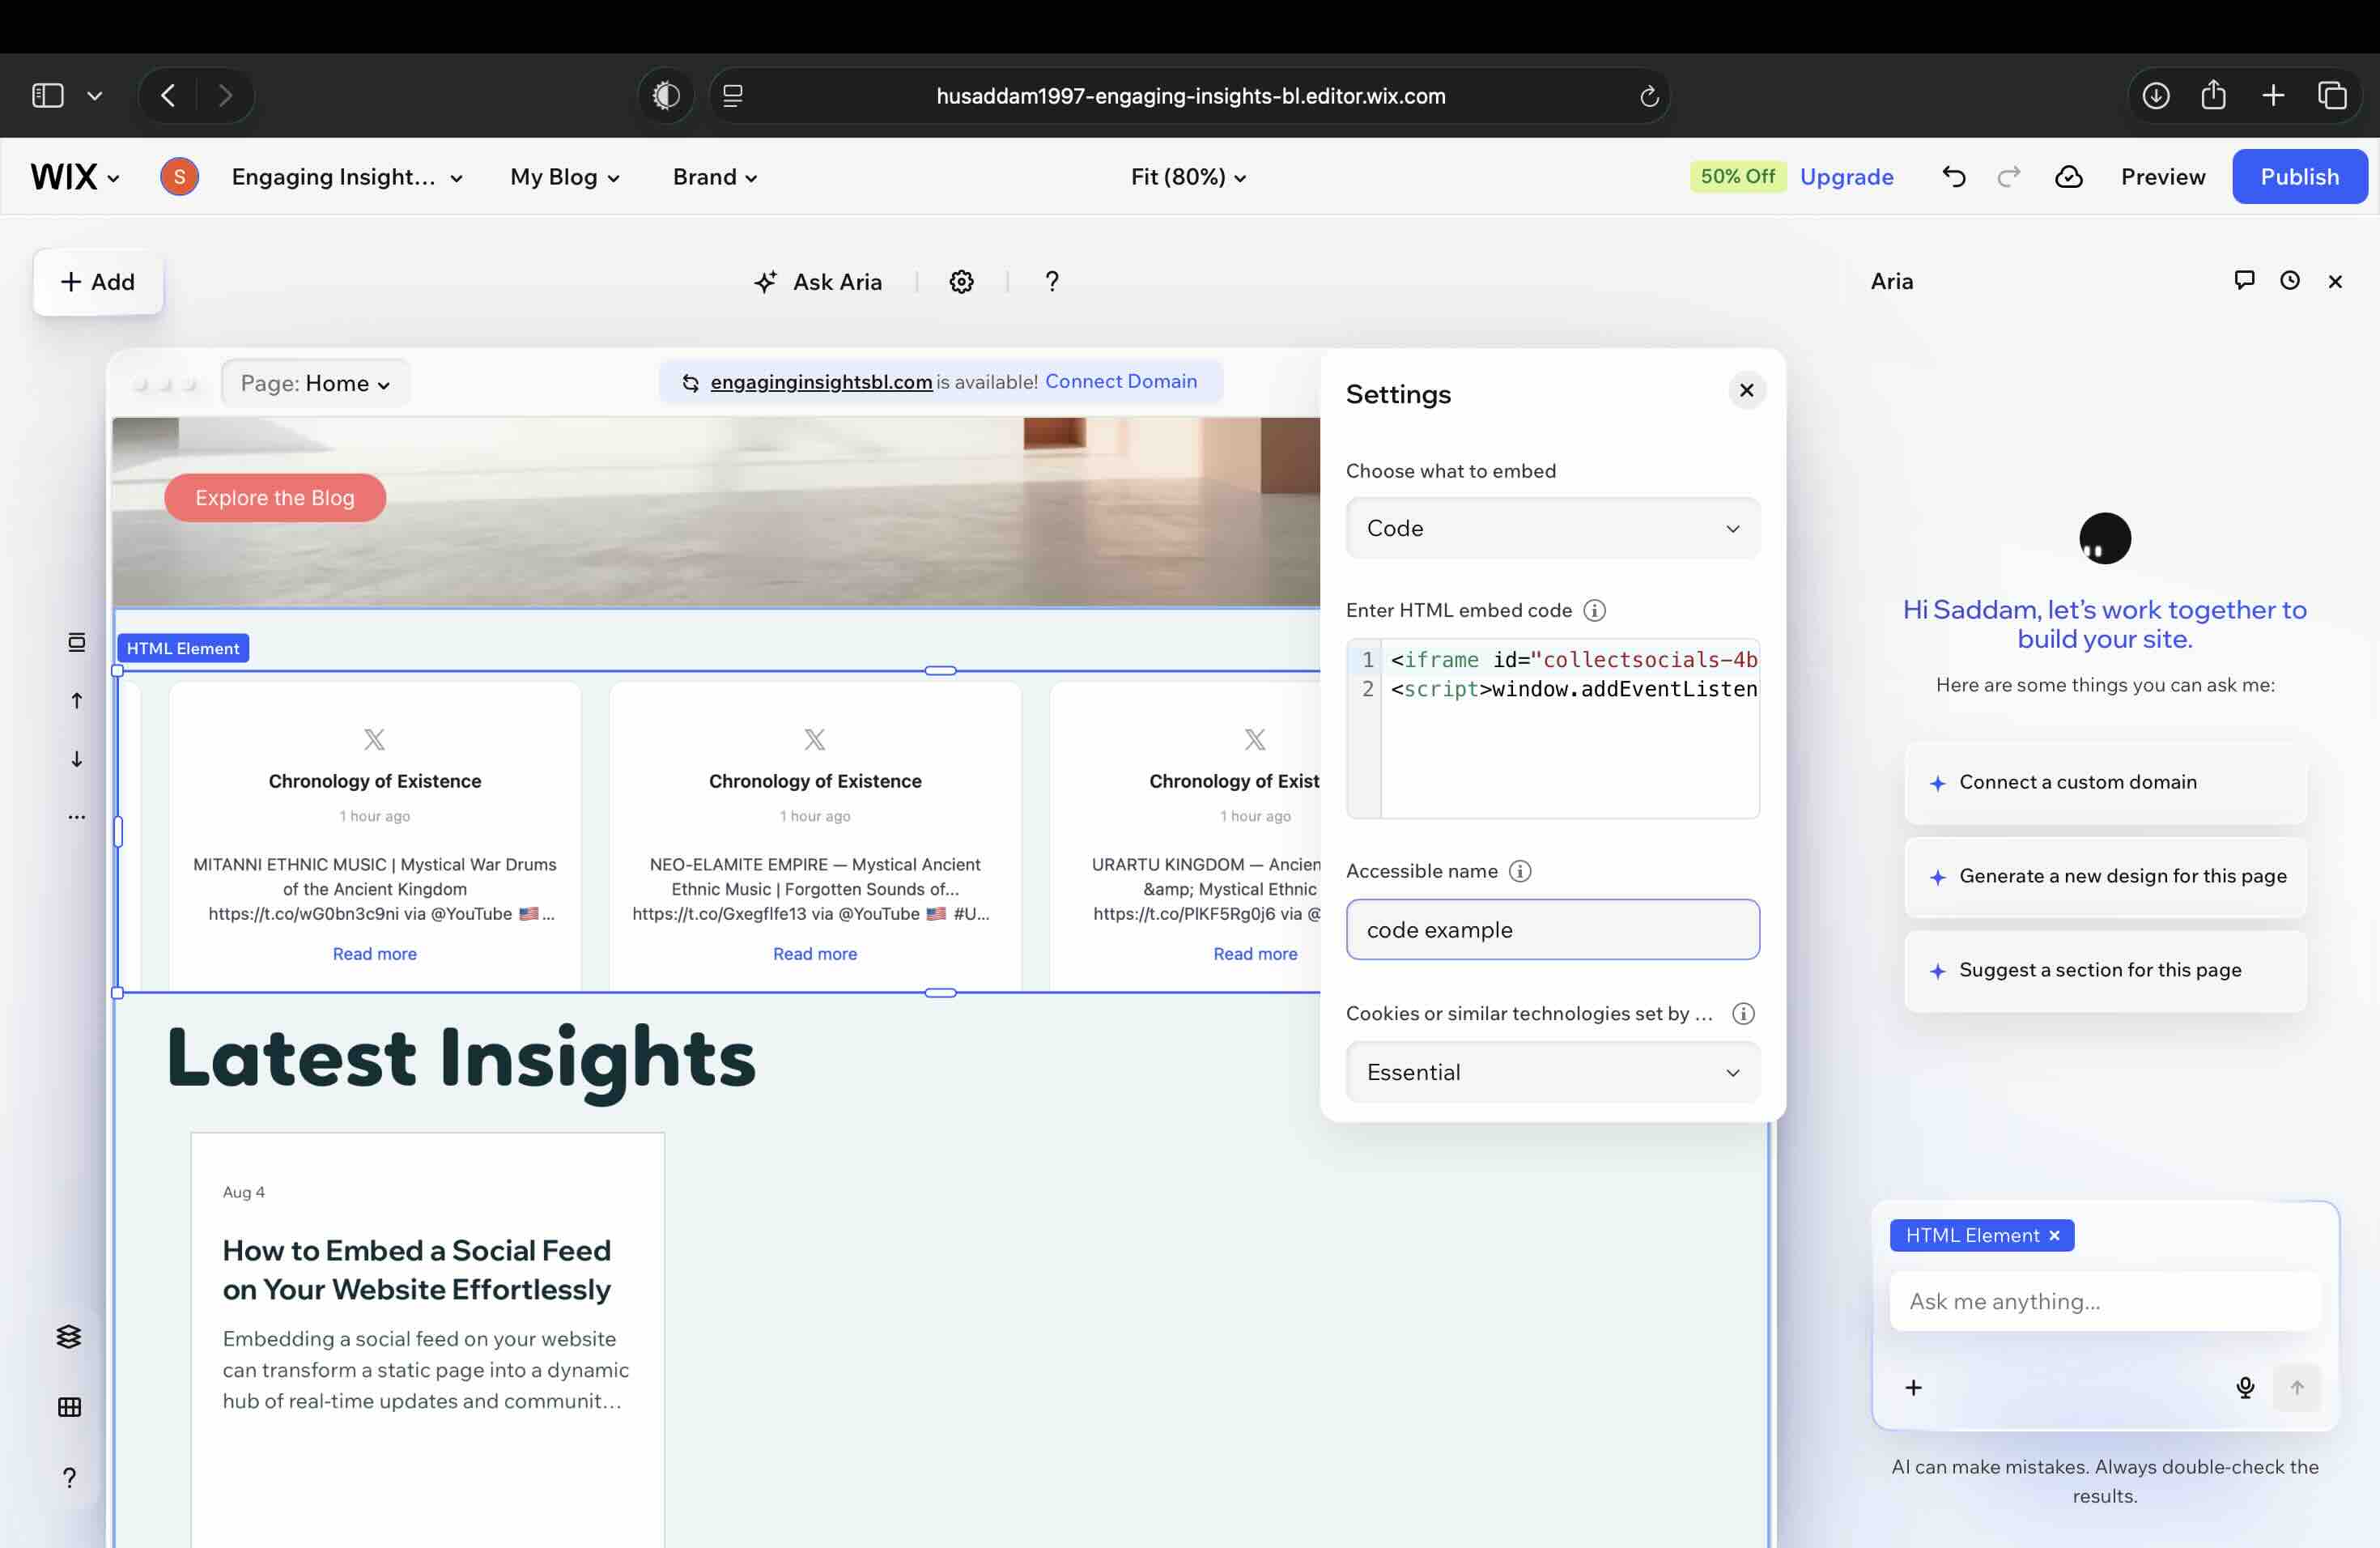
Wix drops an empty HTML Element onto the canvas showing a </> placeholder. Drag it to roughly the width you want the feed to occupy first, because the element is easier to size while it is empty than once it is rendering a feed. Then double-click it to open its settings.
Step 11: Paste the snippet and set the two fields nobody mentions
The Settings panel asks you to Choose what to embed. Set that to Code and paste your snippet into Enter HTML embed code. You can see in the screenshot below what the snippet actually is: an <iframe> followed by a <script> that listens for the frame's height message. That is the whole reason the Wix snippet differs from the one other hosts get.
Two more fields on that panel are worth filling in properly, and no Wix embed guide we have seen mentions either:
- Accessible name. This is what a screen reader announces for the frame. Wix leaves it blank and an unnamed frame is an accessibility gap on your page, not ours. Put something meaningful in it, such as "X feed" or "Latest posts from X".
- Cookies or similar technologies set by this embed. Wix asks you to classify the embed for its own consent banner, and the honest answer here is shorter than the field expects: the widget sets no cookies at all, and writes nothing to
localStorageorsessionStorageeither. You can check that yourself in about a minute, in the same DevTools Application panel this classification is really about: open your published page, look at the frame's storage before and after the feed renders, and it stays empty. Essential is therefore the accurate classification. Classifying it as marketing would suppress the feed for visitors who decline marketing cookies, which looks exactly like a broken widget.
Step 12: Preview, then publish and check the live URL
The feed renders in the editor and in Wix's Site Preview immediately. Preview is a good check that the snippet took, but it is not the final one: publish and open the live URL in a new tab before you call it done, because the sandboxed frame is only fully exercised on the published site.
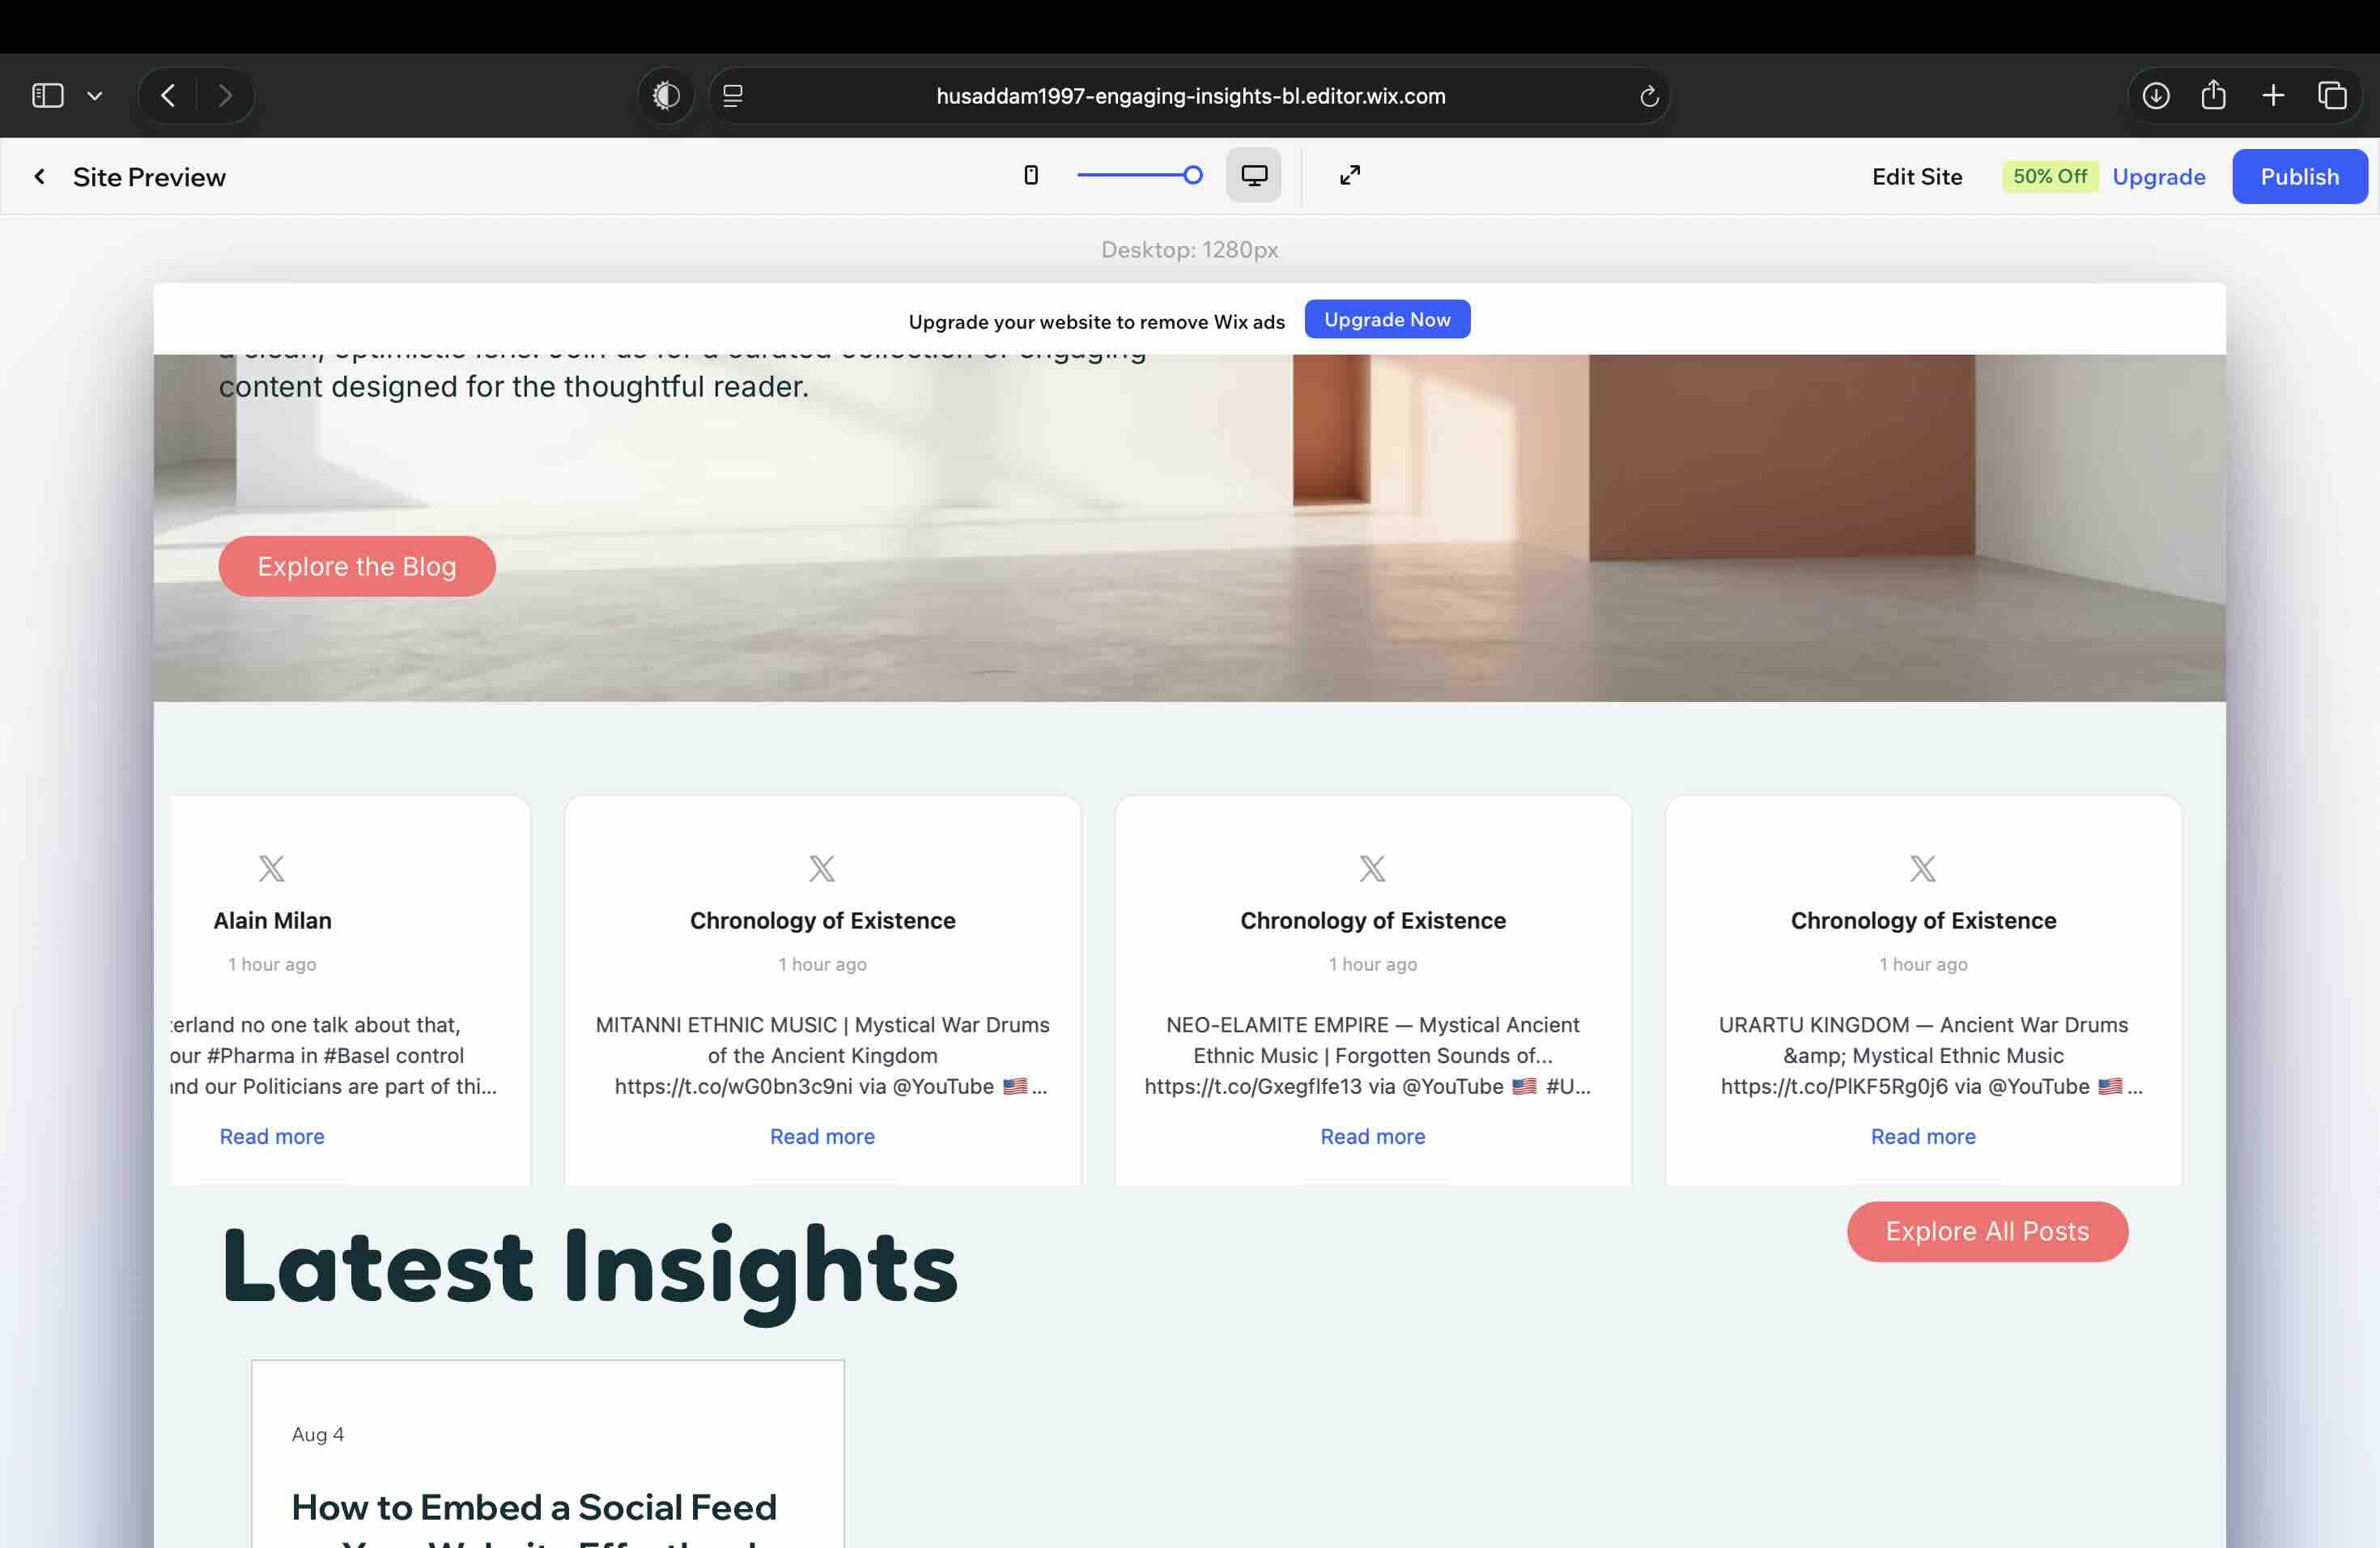
If the feed does not appear, the three things worth checking in order are: the feed has actually been published (the button reads Get the embed code rather than Put it on my site), the X source is connected and has approved posts in it, and the page loads the same way in an incognito window, which rules out an ad blocker on your own machine.
Why Wix Needs a Different Snippet Than Every Other Builder
Wix renders custom embeds inside a sandboxed iframe. That is a deliberate Wix design decision and it applies to all third-party code, not to any particular widget vendor. The practical consequence is that a script tag pasted into a Wix embed element does not run the way it runs on WordPress or Webflow, because it is no longer executing in your page's document.
This is why the Get Code dialog asks where you are installing the widget. Choose Wix and it hands back an iframe snippet instead of the plain script tag other hosts get, and that frame measures the feed and sets its own height. We found the same behaviour when we field-tested embedding a Facebook feed on Wix and embedding an Instagram feed on Wix.
The sandboxing has an upside worth stating, because people mistake it for a problem. Your feed's styling cannot collide with your Wix template's styling, in either direction. The widget also uses Shadow DOM internally, so you get isolation twice over. A feed that looks slightly different inside the Wix editor preview than it does on the published site is normal for this reason.
Four Wix Behaviours That Make a Working Feed Look Broken
Wix ADI does not support the embed element. If your site was built with Wix ADI, you need to switch to the standard Wix Editor before you can add a custom embed. You can switch without losing your site content, but it is a one-way move, so decide deliberately.
The mobile editor is a separate layout. Embedding on desktop does not place the element on mobile. Switch to Wix's mobile editor view after publishing and check the embed is visible and sized sensibly there. Position and height are set independently from the desktop layout, which is the most common reason a feed that looks right on a laptop is missing on a phone.
Site-wide code injection is the wrong tool here. Wix offers a settings-level custom code injection, and it is not what you want for a feed. It loads on pages that do not display the widget, and it gives you no way to position the feed within a page's layout. Use the page-level embed element.
The editor preview is not the published page. Because the embed runs sandboxed, some of what the frame does is only fully exercised on the live site. Judge the result from the published URL.
What publish.x.com Gives You, and Why It Does Not Help on Wix
X's own embed tool is the first thing most people try, and it is worth knowing what it produces before you spend an afternoon fighting Wix. In our testing of publish.x.com for the main guide, the profile and handle options returned a bare anchor tag rather than a rendering timeline, and there was no hashtag feed option at all. The single-post embed is the one path that works as advertised.
On Wix, that outcome gets worse rather than better, because the code X hands you is script-driven. You are pasting a script tag into the one environment that does not run pasted script tags. If you have already tried this and ended up with a link that says "Posts by [username]" sitting on your Wix page, that is the expected result of the combination and not something you configured wrongly. The full teardown with screenshots is in our main guide to embedding an X (Twitter) feed on your website, which also covers WordPress, Shopify and Webflow.
How Often the Feed on Your Wix Page Will Actually Update
This is the part that surprises people who have embedded an Instagram or YouTube feed before, and it has nothing to do with Wix. X charges for API access by the post read, so every refresh of an X feed costs real money, and X sources therefore carry a slower floor than the other platforms rather than following your plan's general refresh rate.
X refreshes every 12 hours on every paid plan because X bills per post returned; during the 7-day trial an X source refreshes once a day. Paid plans can also press Pull now for an immediate refresh, once an hour. Posts already in your feed are stored on our side, so they keep serving on your Wix page between refreshes and cost nothing to keep showing.
The practical implication for a Wix site is worth planning around: an X feed is a credibility surface, not a live ticker. If your use case genuinely needs minute-by-minute updates on a public page, that is a cost question to settle before you build, and the plan comparison is the place the numbers are stated.
What an X Feed on Wix Costs
Two separate costs, and it is worth separating them because Wix guides routinely blur the two.
The Wix side. Custom embeds are a Wix feature and Wix's own plan rules govern them. No widget vendor can waive that half, and any that implies otherwise is describing a different arrangement than the one you will meet.
The feed side. X is the one source in our product that is not on the free plan, for the single reason that X bills us per post read. Every other platform we support is on the free plan. New accounts get X switched on for the 7-day trial with no card, which is enough to build the feed, install it on Wix and see it on your published site before deciding anything.
Frequently Asked Questions
Can I embed an X feed on Wix without any code?
You will paste one snippet, and that is the whole of the code involved. You do not write any, and you do not need Wix's developer mode. The snippet goes into an Embed code element through the normal Wix Editor interface.
Why does my X embed show only a link on my Wix site?
That is the signature of a script-based embed in an environment that does not run pasted scripts, and it is what X's own publish.x.com code produces on Wix. The fix is not a Wix setting; it is using an iframe snippet built for Wix instead.
Do I need my own X developer account?
No. You approve read access on X's own sign-in screen for a profile source, and a hashtag source needs no connection at all. The API access is ours.
Will the feed match my Wix template?
You choose the layout and theme in the design studio before you copy the snippet, and the widget's styles are isolated from your template's, so what you designed is what renders. The isolation also means your Wix template cannot restyle the feed by accident.
Can I show a hashtag instead of my own posts?
Yes, on any paid plan and inside the trial, and it is the one source type that needs no account connection. Two things to know before you rely on it: hashtag search reaches back 7 days only, and a broad hashtag returns a lot of automated promotion, so moderate it or narrow the tag. The hashtag section of the main guide covers what X's search endpoint will and will not return.
Which Wix element do I use, Embed code or Embed a site?
Embed code. It is the one that accepts an HTML snippet. Embed a site takes a URL and displays a whole page inside a frame, so pointing it at a feed puts an entire page where you wanted a widget.
Start Using CollectSocials Today
One curated feed from 10+ platforms: on your website in a single line of code, or up on the big screen at your event.