
That is the gap a social media wall fills. It pulls your live social content, meaning posts, photos, videos and reviews, straight onto your website, keeping things fresh without you manually updating a single thing. And the best part? You do not need a developer, a weekend of free time, or any coding knowledge to set one up.
In this guide, we will walk through the entire process of embedding a social media wall on any website using CollectSocials. From signup to a live, working feed on your site, all in under five minutes.
What Is a Social Media Wall (and Why Should You Care)?
A social media wall is a live display of content pulled from your social accounts, gathered into one place instead of scattered across networks. It runs in two places. Embedded on a page of your website, it is a self-updating highlight reel of your whole social presence. Blown up full screen on a TV or a projector at an event, it is something the room watches together, and can post to. This guide is about the first one.
Either way, instead of visitors having to find you on Instagram, then check your YouTube, then look up your Facebook page, they see everything in one unified, auto-updating feed.
Here is why it matters, without a statistic attached, because the conversion figures that circulate for this all trace back to another blog post rather than to anyone who measured it. The mechanism is the argument on its own. A visitor who lands on your homepage cannot tell from your copy whether anyone actually buys from you. A wall of real posts, with real handles and real dates on them, answers that question before they ask it, and it keeps answering it next month without anyone updating the page. This is why unified social feeds are so effective at building trust.
What a social wall looks like
Watch your content come to life. This animation shows a stylized browser window where social media post cards appear one by one in a grid layout. Each card fades in and slides upward into position, displaying a platform logo badge (Instagram, TikTok, YouTube, X, Google Reviews, Facebook) that identifies its source. The cascade effect demonstrates how posts populate your social wall in real time, not as a static gallery but as a living, updating feed.
This is the end result visitors see on your website: a professionally designed, multi-platform social proof display that updates automatically. No manual copying. No outdated screenshots. Just real posts from your actual social accounts flowing into a grid that makes your site feel active and credible. The animation captures that moment of transformation when scattered social content becomes a cohesive, branded wall on your homepage.
Before You Start: What You Will Need
The setup is minimal. Here is everything you need to get started:
A CollectSocials account. The free plan gives you one connected source and 2,000 monthly page views, and the 7-day trial opens three, which is more than enough to test things out and get your first wall live.
Access to your website's backend. Whether you are on WordPress, Shopify, Squarespace, Wix, Webflow, or a custom-coded HTML site, you just need the ability to paste a small snippet of code. If you can edit a page, you can do this.
Your social media accounts. Know which platforms you want to pull content from. CollectSocials supports Instagram, TikTok, YouTube, Facebook, X (Twitter), Google Reviews, and more. LinkedIn is not live yet.
That is it. No plugins to install (unless you want one), no API keys to configure, no developer handoff required.
Step 1: Sign Up and Create Your First Feed
Head over to CollectSocials and create a free account. No credit card is needed.
Once you are in the dashboard, you will see an option to create a new feed. Click it. This is where you will define what content your social wall displays. Give your feed a name, something simple like "Homepage Social Wall" or "Customer Showcase", and move to the next step.
The whole signup-to-dashboard flow takes about 30 seconds.
Step 2: Connect Your Social Media Sources
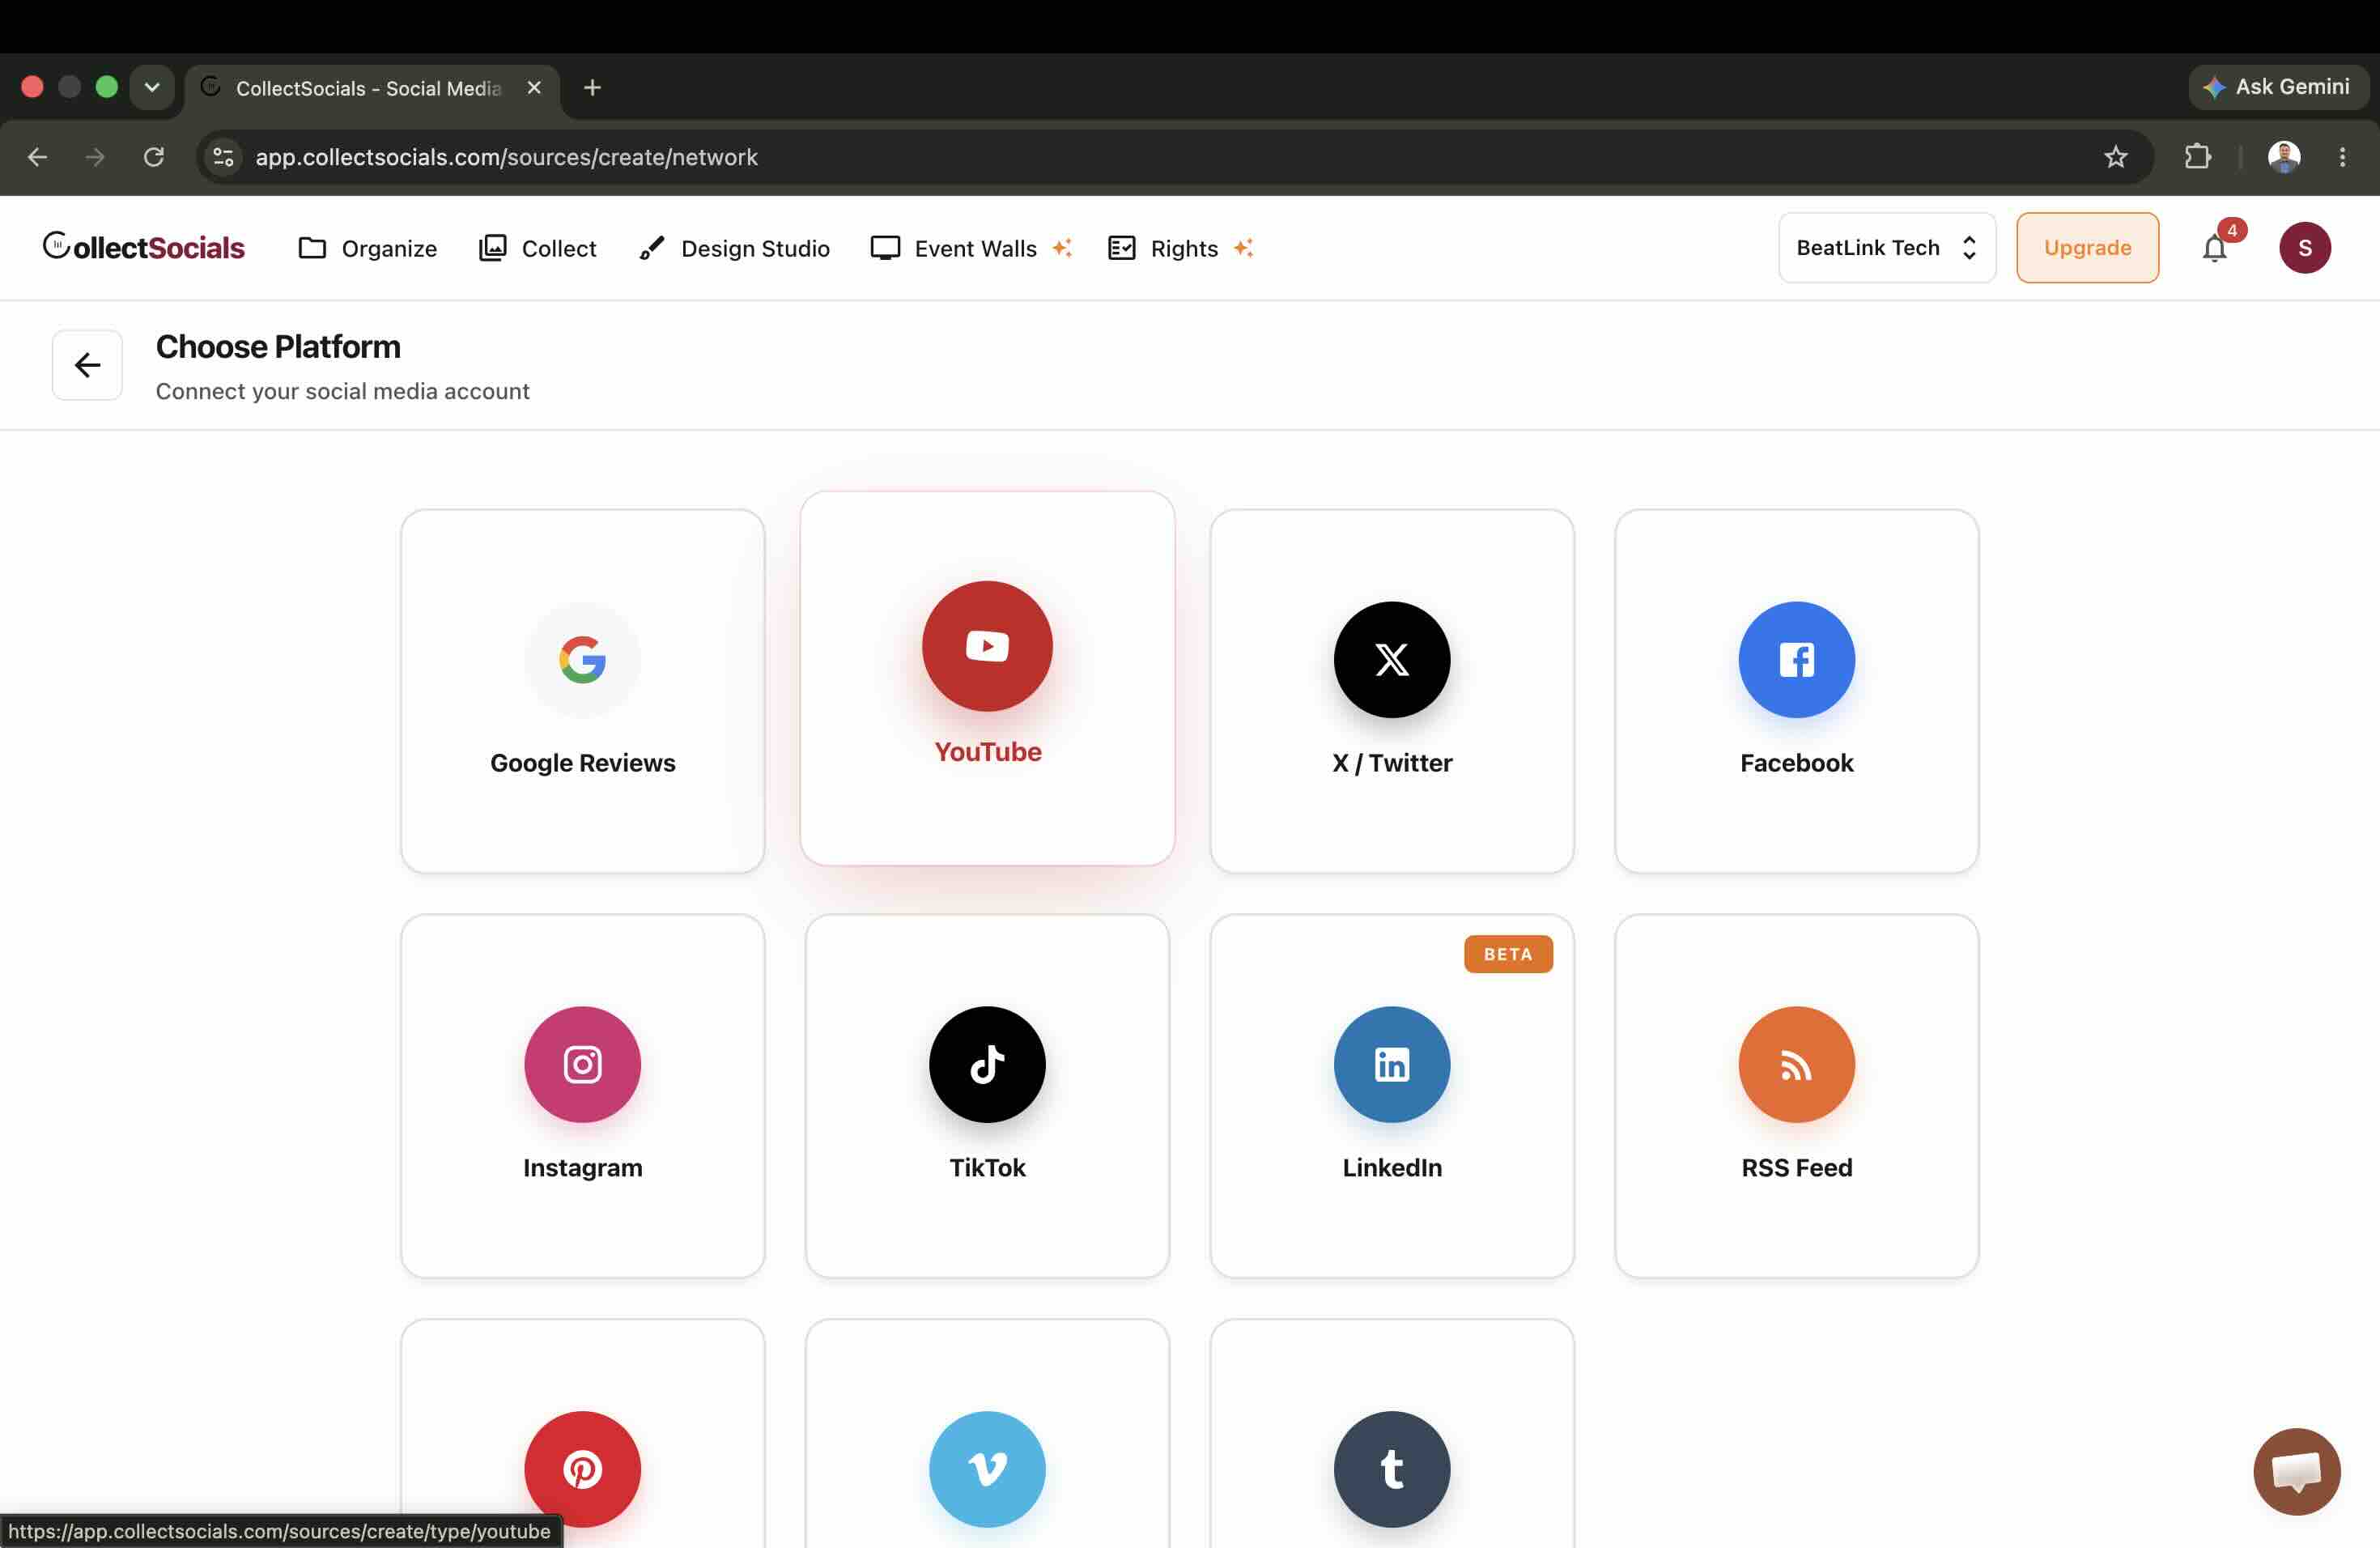
This is where the magic happens. CollectSocials pulls from ten live platforms: Instagram, TikTok, YouTube, Facebook, X (Twitter), Google Reviews, Pinterest, Vimeo, Tumblr and any RSS feed. LinkedIn has a tile in the picker but is not live yet, so it is the one platform you should not build a launch around.
Choose the platform you want to start with, then select your source type. You might pull from a specific profile, a hashtag, or even a tagged mention. For example, if you run a clothing brand, you might aggregate posts from your own Instagram handle plus any posts tagged with your branded hashtag.
Each source you add becomes part of your unified feed. Free gives you 1 source and the 7-day trial opens 3, Pro at $29/month gives you 5, Business at $59/month gives you 15, and Scale at $119/month gives you 30. Paying yearly is two months free on any of them. Sources are the only thing the tiers really ration here: feeds are unlimited on every plan including free, so a single source can power as many differently-designed walls as you have pages to put them on.
What is not on that ladder matters more than what is. Keyword and profanity moderation, all 16 themes, custom colours, custom fonts, editing post captions, and UGC rights and consent tracking all run on every plan, free included, with rights requests metered at five a month on Free and Pro and uncapped from Business. That last one is the one to notice if you are comparing tools, because asking a creator for permission to reuse their post and keeping a record of the answer is commonly a four-figure-a-year feature elsewhere. Three things genuinely need a paid plan: AI vision moderation, which is Business and up; pinning a post to the top of the wall, which free accounts get during the 7-day trial and then on a paid plan; and X (Twitter), which also runs in the trial and then needs a paid plan, because X is the one platform that bills us per post read.
Adding a source usually takes one or two clicks: pick the platform, authenticate or type in the handle or hashtag, and confirm.
Feed
How connection works
Six platforms, one central hub. This animation visualizes the connection process. Social platform icons (Instagram, TikTok, YouTube, X, Facebook, Google Reviews) are arranged in a row at the top. When the animation runs, arrows draw from each icon down to a central "Feed" hub. As each arrow completes, the platform icon bounces, confirming the connection. When all six are connected, the central hub pulses to show it's active and syncing. Every logo in it is a platform you can connect today; LinkedIn is not drawn, because it is not live yet.
This represents what happens behind the scenes when you set up your social wall. Instead of managing six separate widgets or manually embedding posts from each platform, you connect all your accounts to one centralized feed. The hub becomes your single source of truth: pull from it once, and your website displays content from all connected platforms. The bouncing icons and pulsing hub aren't just visual flourish; they represent the relief of consolidation.
Step 3: Choose a Layout and Customize Your Wall
CollectSocials ships 40 layouts and 16 themes, all built to look polished on a real website. You are not stuck with a single generic grid. Choose from masonry grids, carousels, classic walls, list views and more.
This is one area where CollectSocials stands apart from competitors. The layouts are not afterthoughts. They are designed with modern UI principles, giving you feeds that actually look like they belong on a well-designed website rather than a clunky embed from 2018.
Once you pick a layout, you can customize colours, card styles, spacing and typography to match your brand. There is no CSS editor and no stylesheet to maintain: the colour, gradient and font controls are the whole surface, and all of them are on the free plan rather than behind an upgrade. If you want a starting point instead of a blank canvas, Generate my layout reads what is actually in your feed and proposes one.
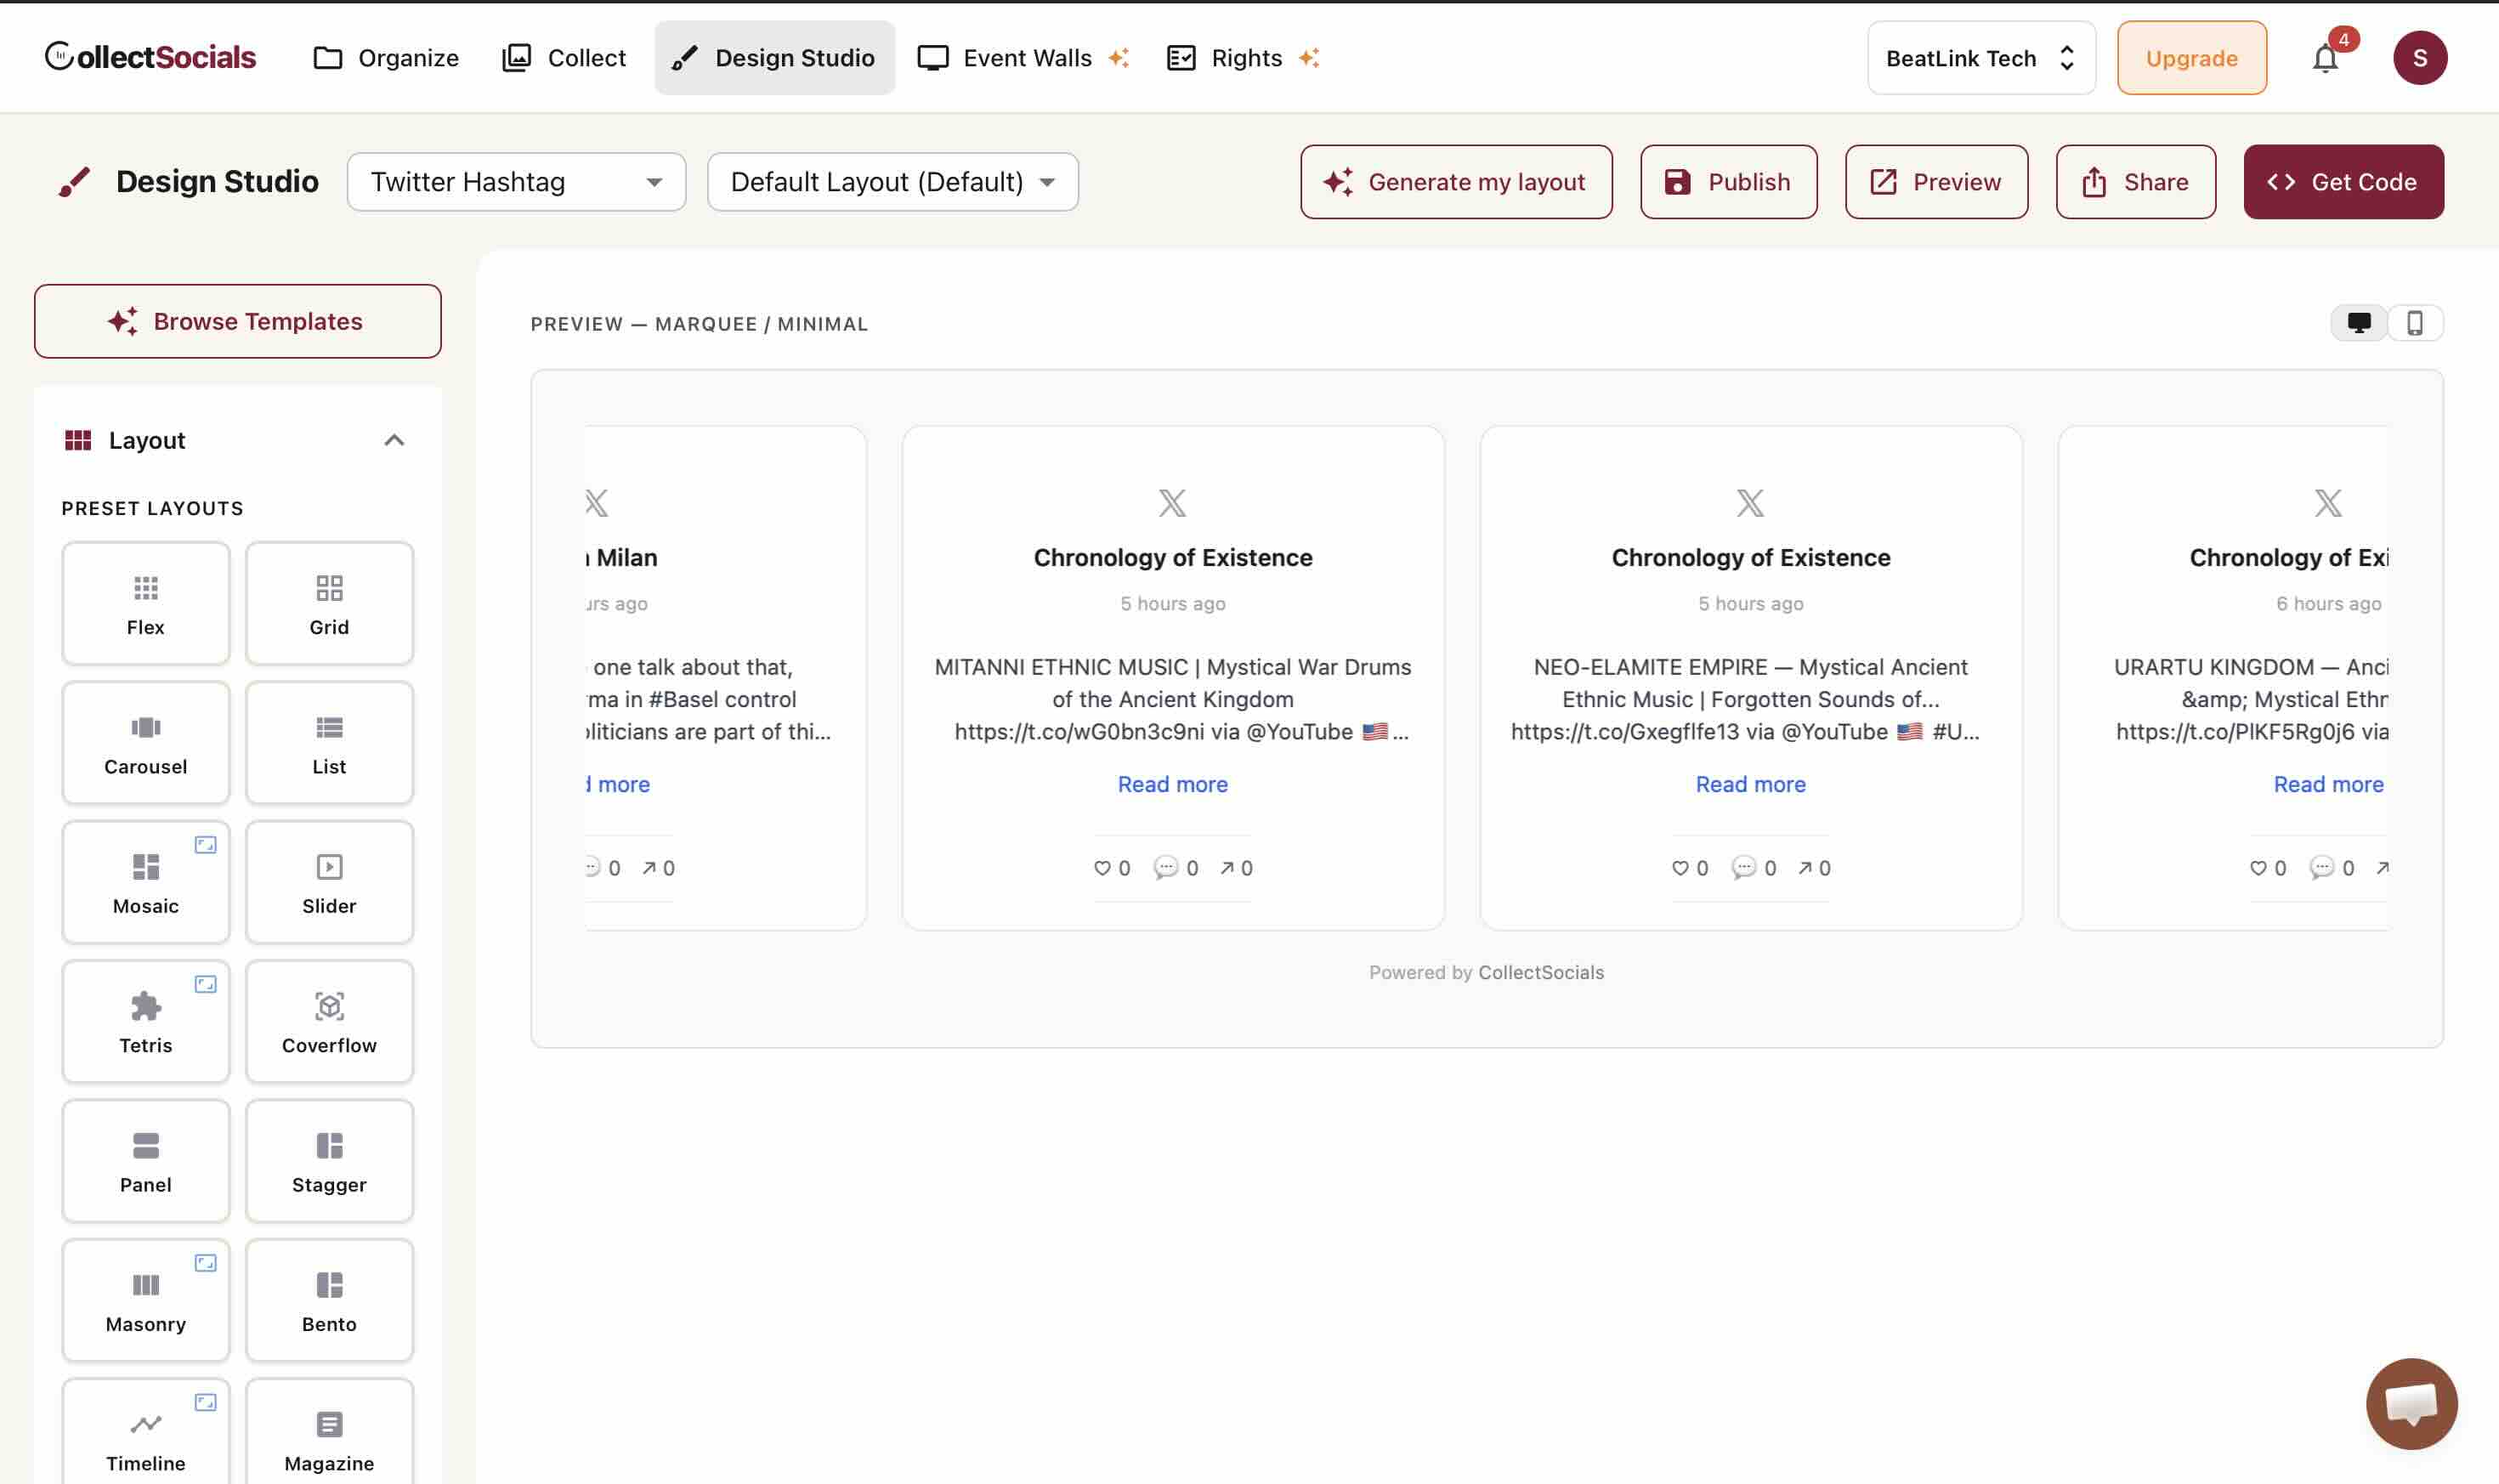
Take a minute to preview your wall. Adjust anything that does not feel right. When you are happy with how it looks, move on to the embed step.
Step 4: Grab Your Embed Code
Click Get Code, and read the question at the top of the dialog before you copy anything. It asks "Where are you installing your widget?", and the dialog's own subtitle says why: "Pick where you're installing the widget for the right snippet and steps."
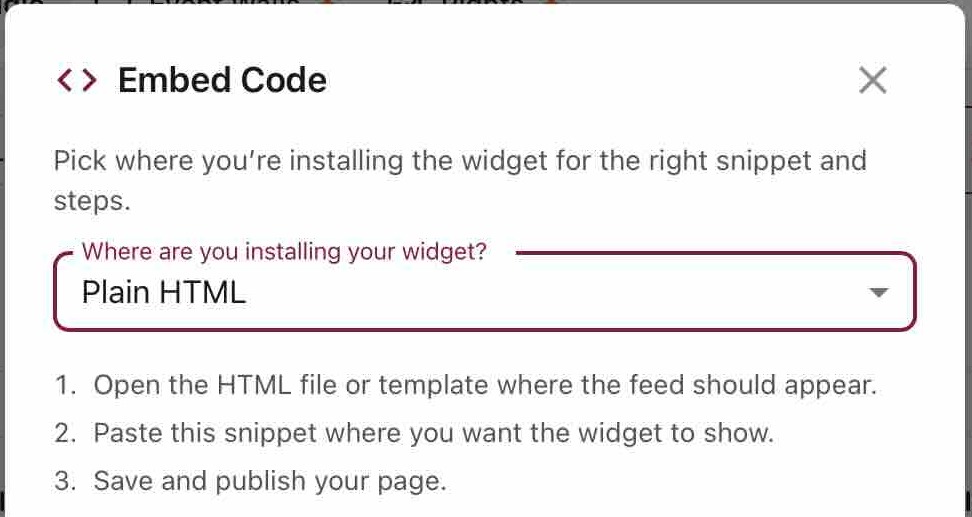
This is the step guides skip, and it is the one that breaks installs. There is no single universal snippet, because the builders do not all handle pasted code the same way. The dialog hands out four different payloads, plus a plugin path on WordPress:
- Plain HTML, Webflow and React get the script snippet: a preload hint, an empty container div, and one
<script>tag carrying your feed id and token. - WordPress is the one host with two paths, and it opens on the plugin rather than the snippet. That path hands you a short feed key instead of markup. The snippet is still there behind the toggle.
- Shopify gets that same script wrapped in a page-width container, so a theme's own flex rules cannot squeeze the wall into a strip down one side.
- Wix and Squarespace get a self-resizing
<iframe>plus a few lines that listen for its height, on every plan. Wix sandboxes custom HTML, and Squarespace strips<script>out of a Code Block on its lower tiers, so the script version fails on both, sometimes silently. - Notion and Google Sites cannot run a script at all, so they get a plain URL to embed rather than any markup.
Copy what the dialog gives you, without editing it. Whichever payload you get, the wall is responsive by default and adapts to desktop, tablet and phone on its own.
Step 5: Paste the Code Into Your Website
Where the code goes changes by platform. What you are pasting changed back in step 4, when you named your host, so do that first and this step is short everywhere.
WordPress: pick WordPress in the dialog and it opens on the plugin, not on a snippet, because that is the better of the two paths and it is what the dialog defaults to. Install CollectSocials from the official WordPress directory, add the CollectSocials Feed block to your page, and paste in the feed key the dialog gives you. The reason it is the default is worth knowing rather than skipping: the plugin copies your posts into your own site's database and renders them from your domain, so once a feed has synced, visitors never make a request to us and those page views stop counting against your plan's limit, on any plan including free. On a high-traffic WordPress site that is the difference that matters. If you would rather not install anything, switch the dialog to the snippet path and paste it into a Custom HTML block in Gutenberg (or the Text tab in the Classic Editor); those views are metered like any other embed.
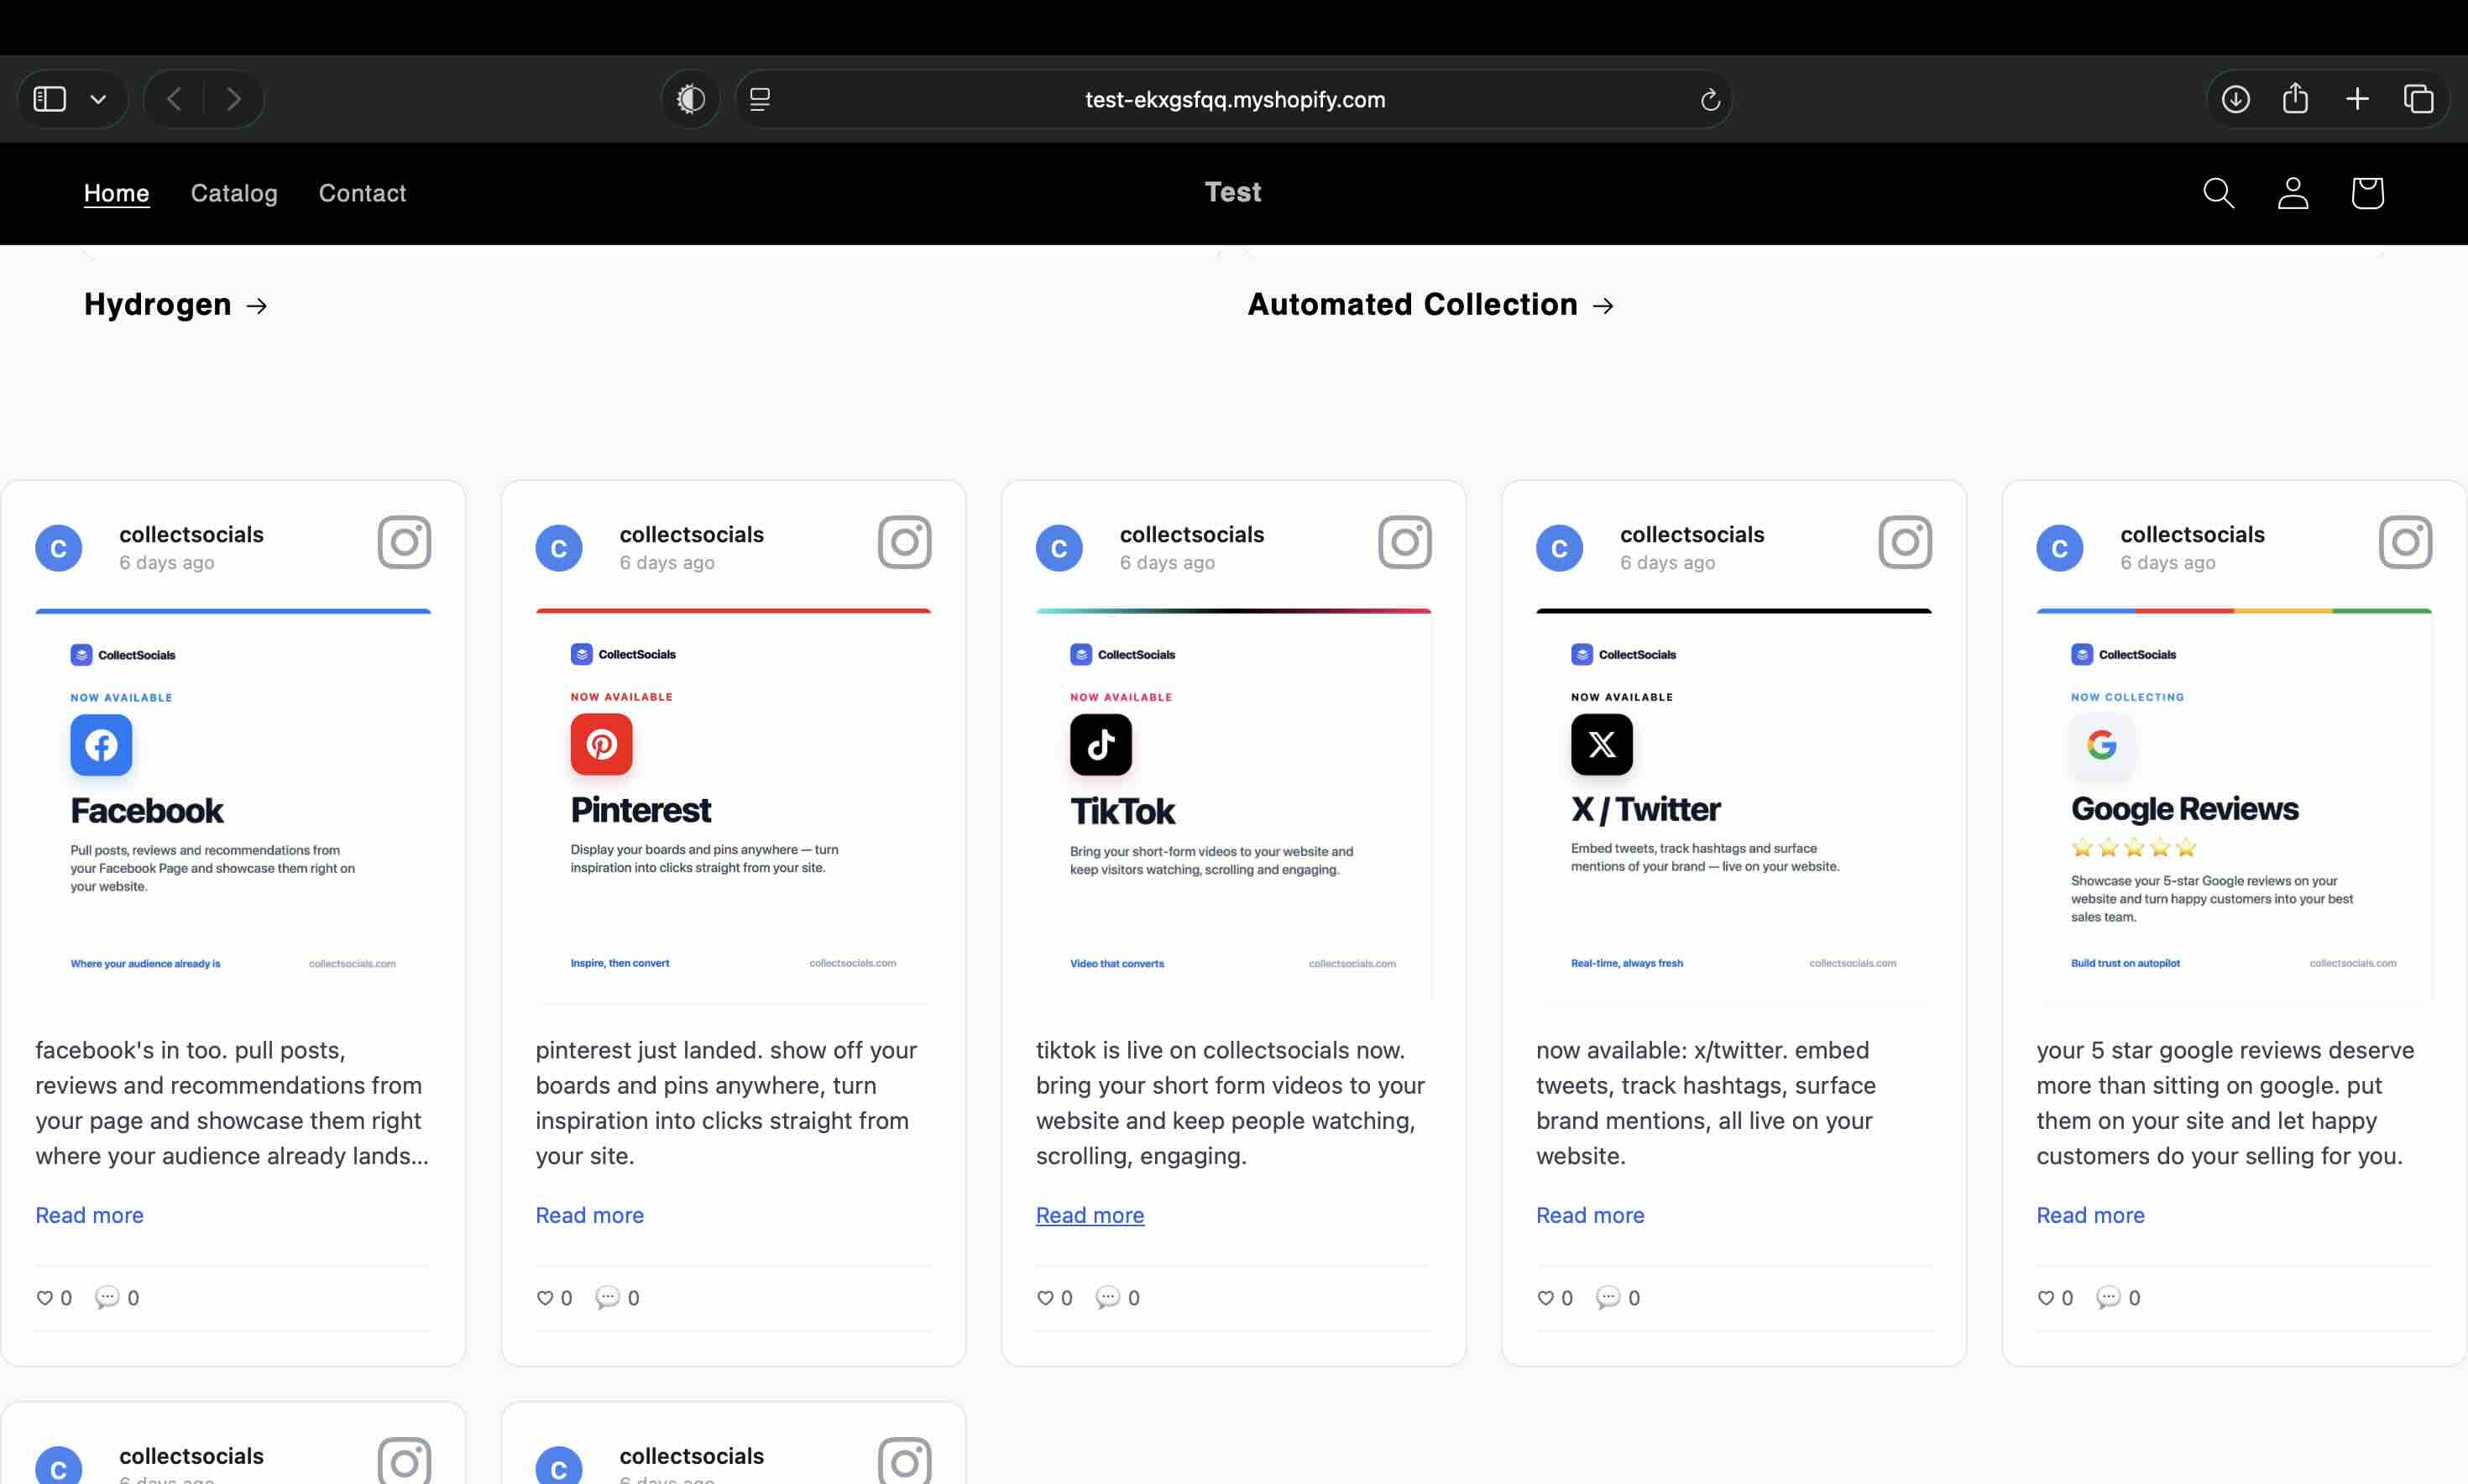
Shopify: Online Store, then Themes, then Customize. Add a Custom Liquid section where you want the wall, paste the Shopify snippet, and save. The wrapper on that variant is doing real work, so use it rather than the Plain HTML one.
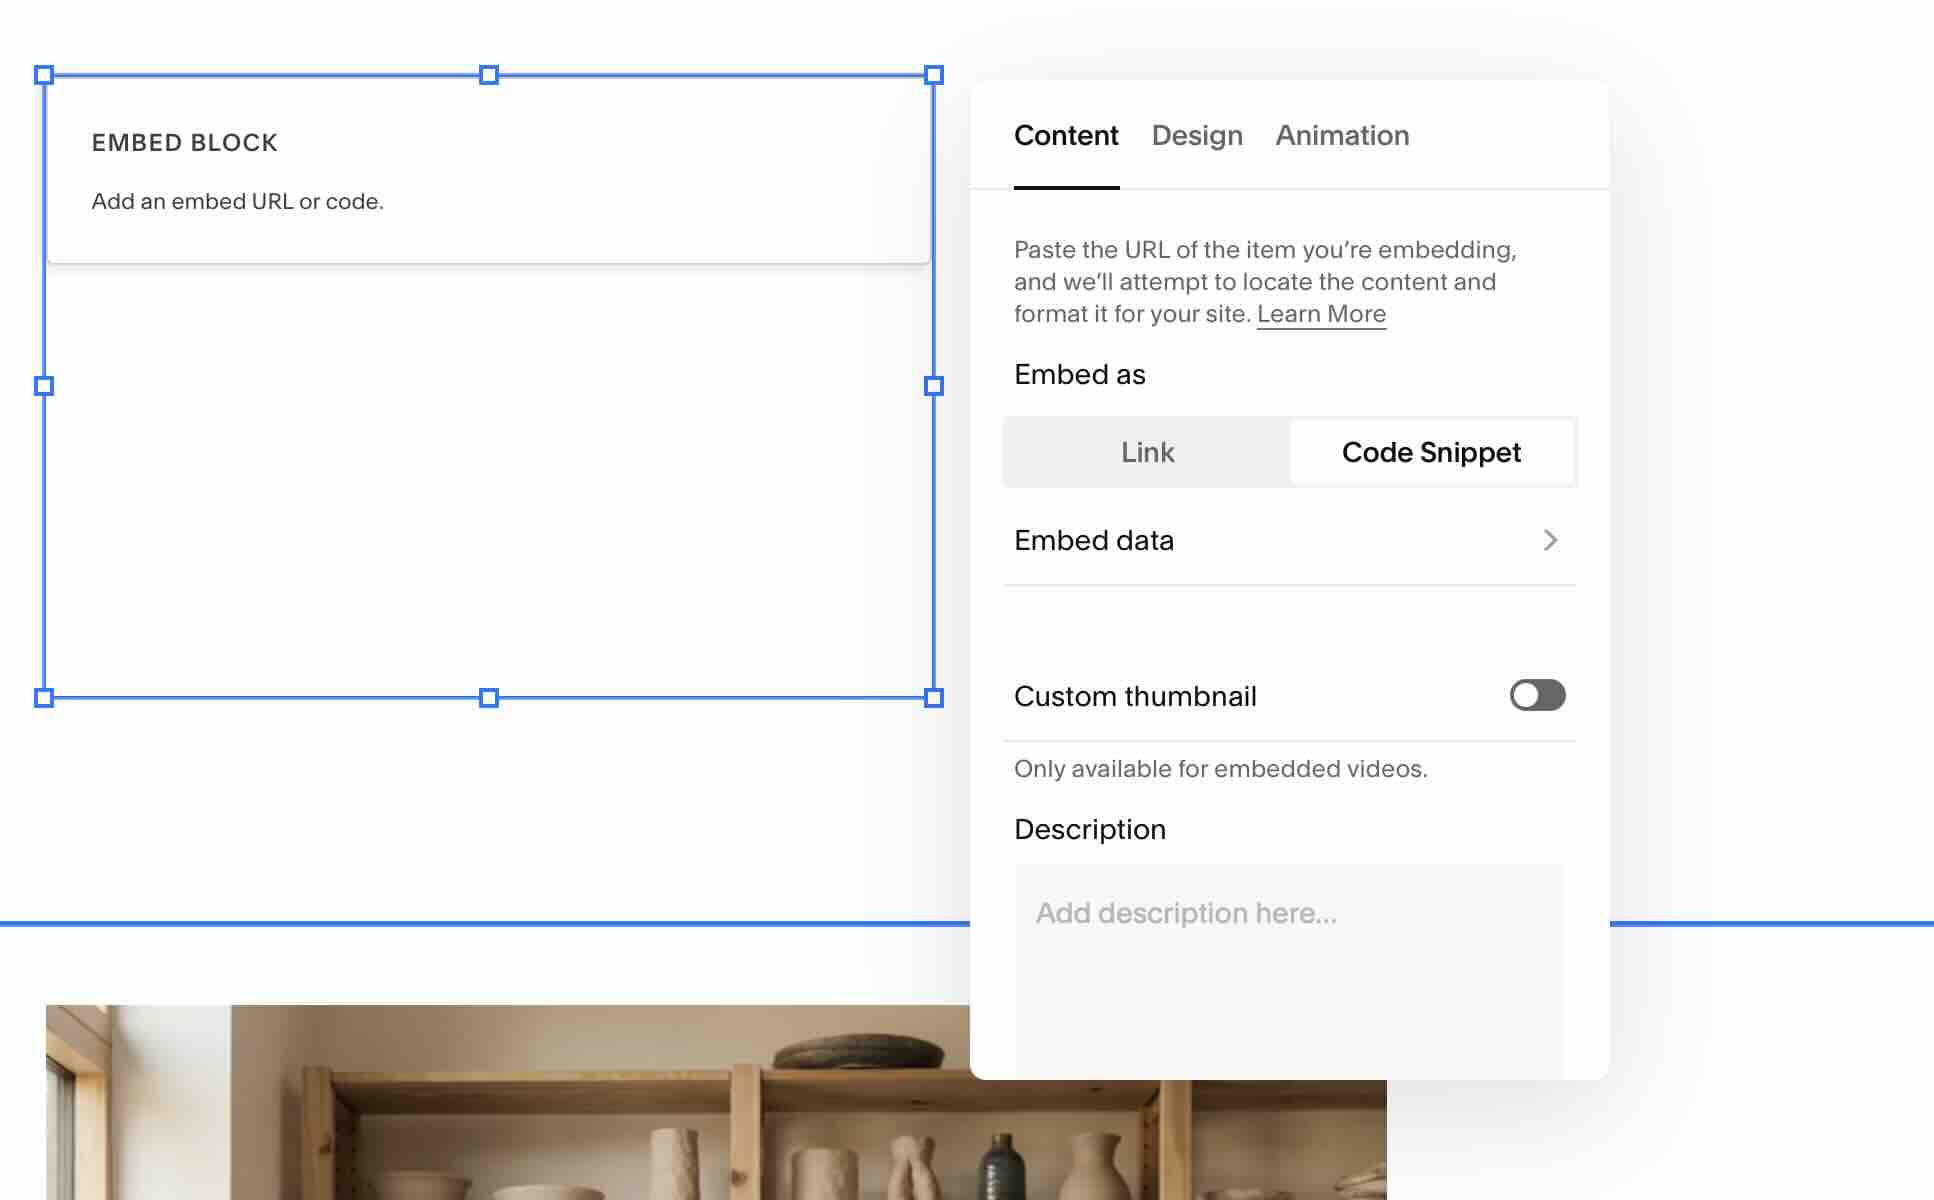
Squarespace: add an Embed block, open its Content panel, and set Embed as to Code Snippet rather than Link. Paste the iframe snippet there. One thing that alarms people and should not: while you are logged in and editing, Squarespace disables embedded scripts, so the block can look clipped or overlapping in the editor. That is Squarespace holding back the height listener, not a broken feed. Preview in Safe Mode, or save and look at the page, and it renders at full height.
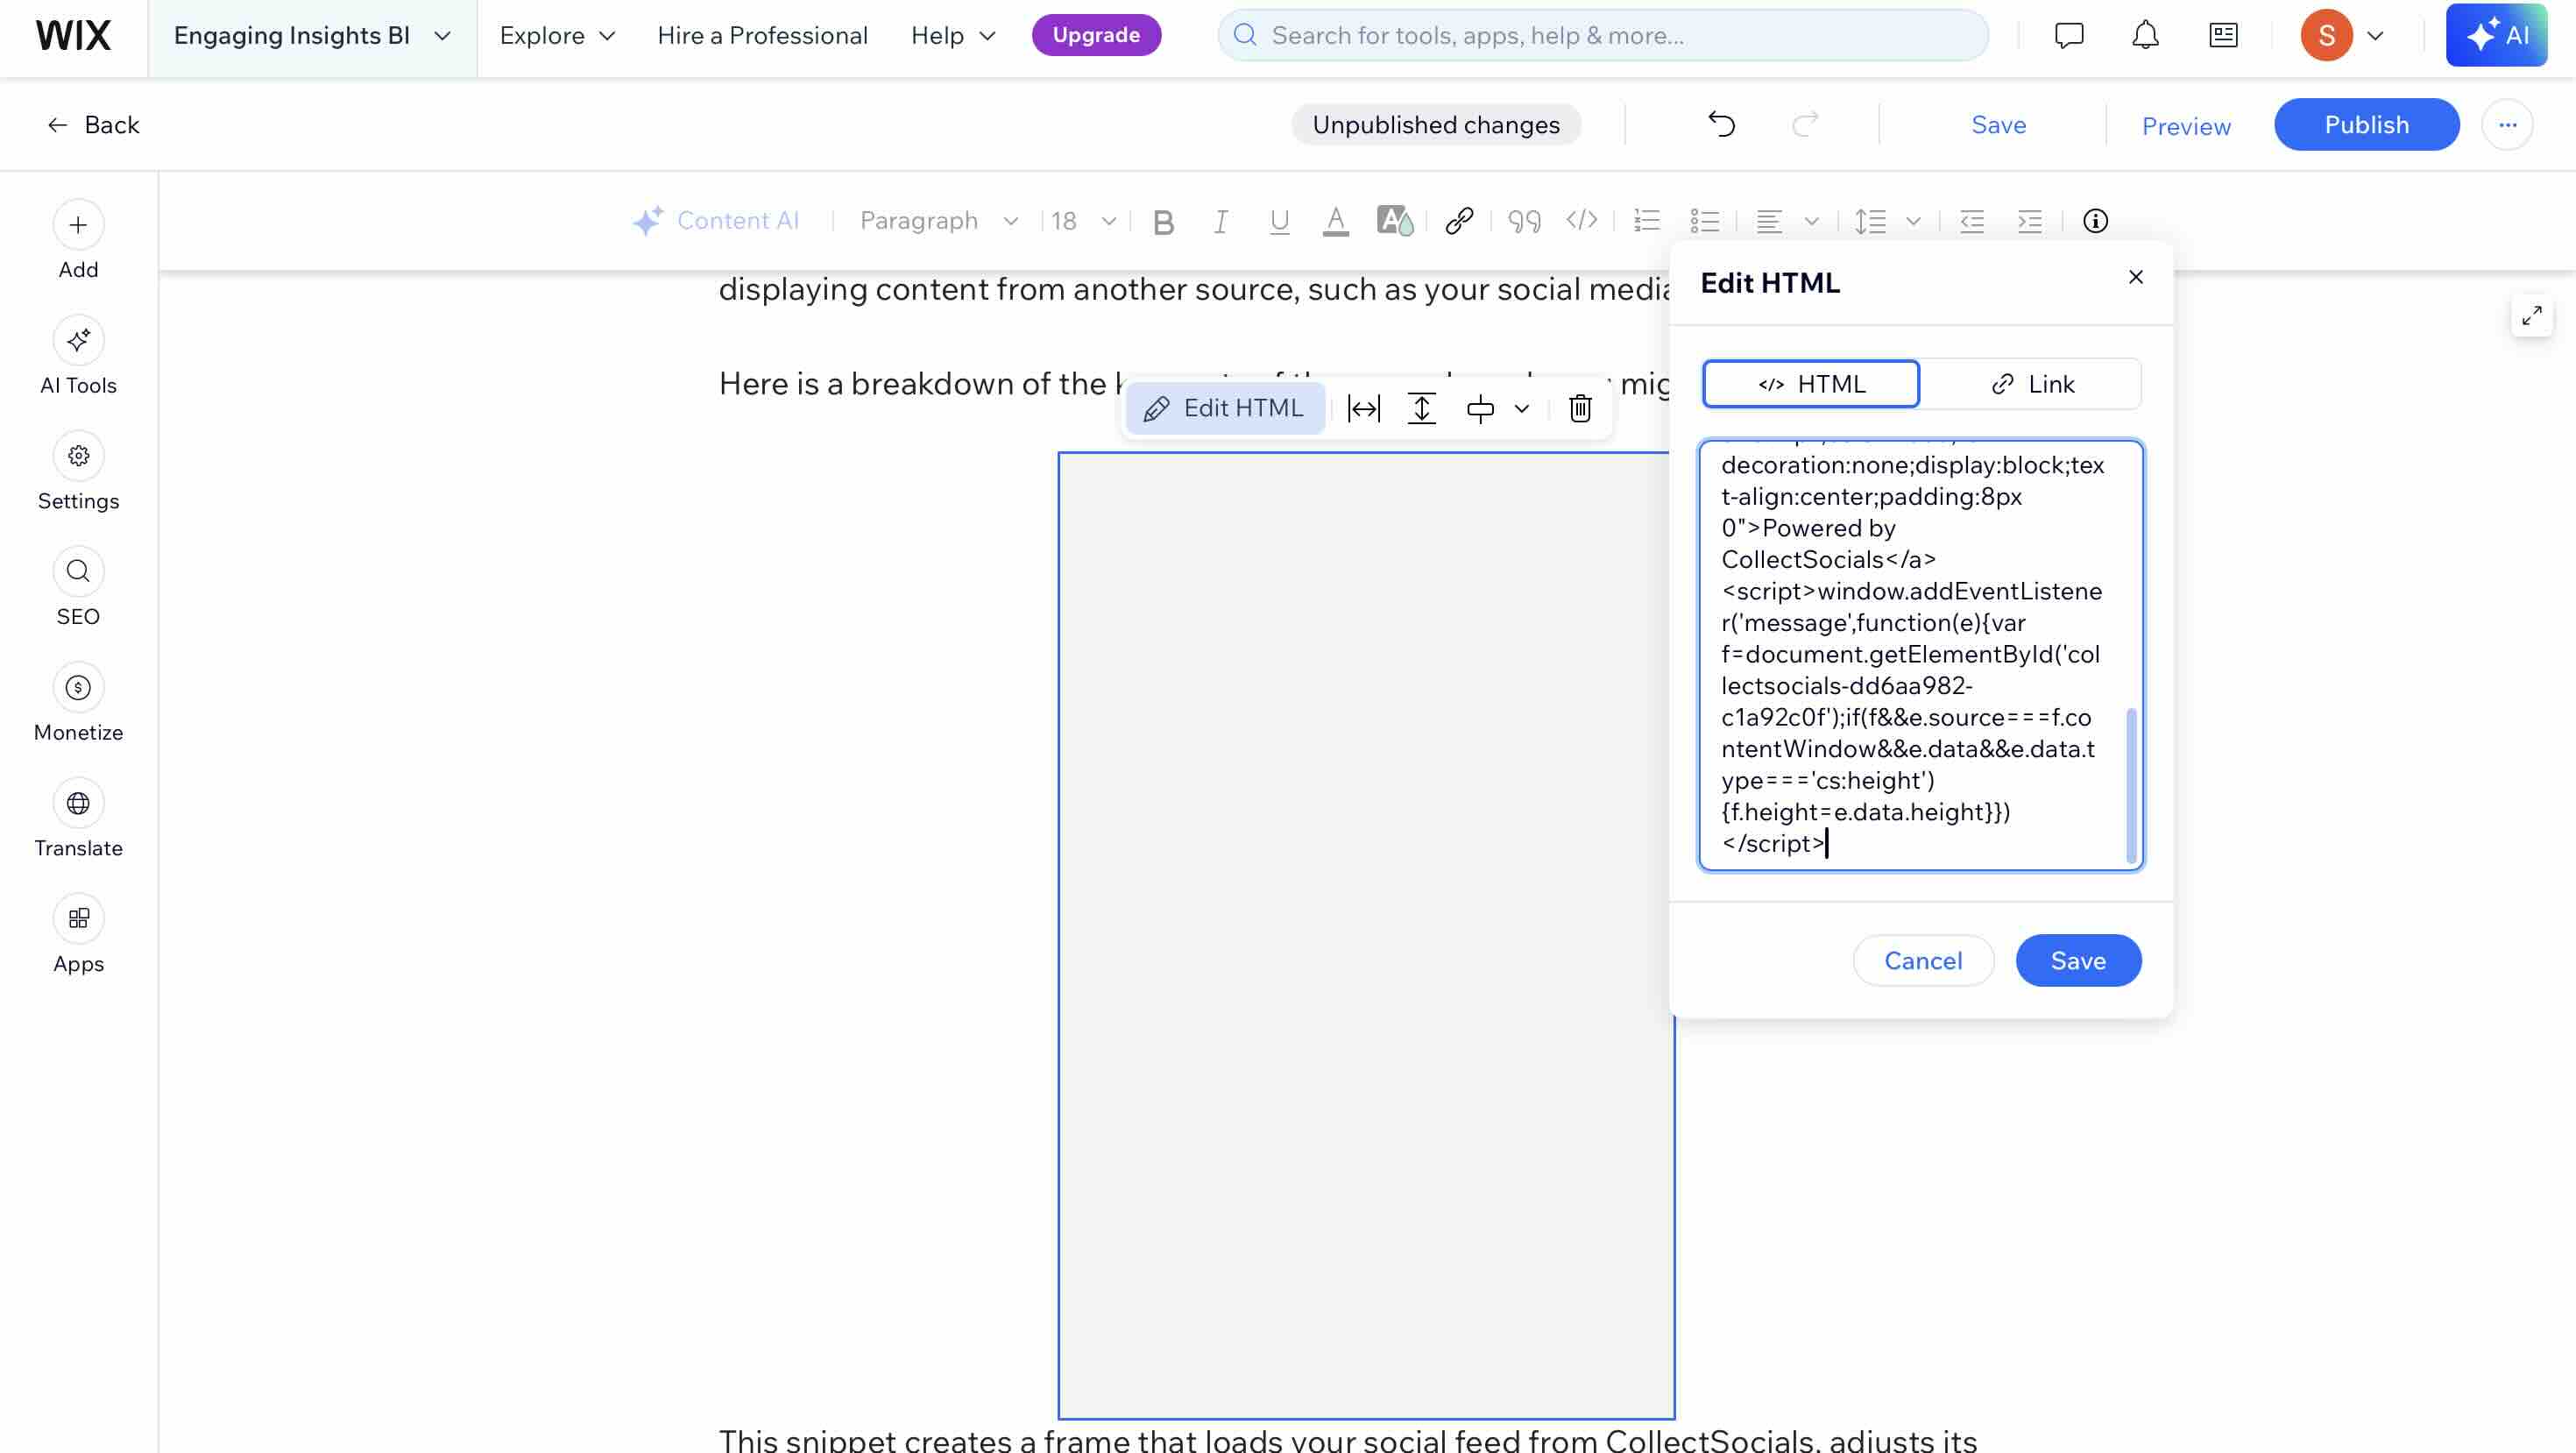
Wix: Add, then Embed Code, then Embed HTML. Paste the snippet into the element, size it, and publish. What you are pasting here is an iframe followed by a short listener that resizes the frame as the feed grows, which is why the Wix version looks different from everyone else's.
Webflow: drag a Custom Code Embed element onto the page, paste the script snippet, and publish. Two Webflow specifics: custom code needs a paid Webflow site plan, and the element shows a placeholder rather than the feed inside the Designer, so judge it from the published page.
Custom HTML site: open the file, find the section where the wall belongs, paste the snippet, upload. Nothing else to configure.
That is it. Your social media wall is live.
<!-- Custom HTML block (or install the plugin) -->
<div id="collectsocials-a1b2c3d4-e5f6"></div>
<script src="app.collectsocials.com/api/widget"
  data-feed-id="…" data-token="…"
  data-container="collectsocials-a1b2c3d4-e5f6" defer>
</script>
One feed, a snippet matched to your platform
WordPress, Shopify, Squarespace, Wix, or plain HTML. This animation shows a tabbed interface displaying embed code for different CMS platforms. Click a tab (WordPress, Shopify, Squarespace, Wix, HTML) and the code area transitions to show that host's actual payload: a script tag for WordPress and plain HTML, that script inside a page-width wrapper for Shopify, and a self-resizing iframe for Squarespace and Wix. A green checkmark then confirms it is ready to copy and paste.
The key insight: it is one feed and one design, whichever host you paste into. The snippet itself is not byte-identical everywhere, and the tab you pick is what decides it. A WordPress Custom HTML block, a Webflow embed and raw HTML take the script tag; a Shopify Liquid section takes that script wrapped in a page-width container; a Squarespace code block and a Wix HTML element take a self-resizing iframe, because both builders sandbox or strip custom scripts. The rendered wall is the same in all five, which is what means you are never locked into a platform: migrate your site, copy the snippet for the new host, and your social wall comes with you.
Tips for Getting the Most Out of Your Social Media Wall
Once your wall is embedded, here are a few things worth doing to maximize its impact.
Place it where it matters. Your homepage is the obvious choice, but do not stop there. Product pages, landing pages, about pages, and even blog sidebars benefit from live social content. A wall on your product page showing customers using your product is more persuasive than any copywriter's tagline.
Decide your moderation model before the wall goes live, not after. Out of the box a feed works as a denylist: posts appear and you remove the ones you do not want. The opposite mode exists and is one switch, Pre-approve posts in the feed's own settings, after which nothing reaches your page until you approve it. Both are reasonable; the mistake is assuming you are in the second one when you are in the first. If your wall pulls a hashtag or anything else you do not control, turn Pre-approve on before the source starts pulling. Keyword and profanity rules run on every plan, free included, and a blocked post still shows in your queue flagged rather than vanishing, so you can see the rule working and overrule it. AI vision moderation, which screens the images themselves, is Business and up.
Mix your sources. A wall pulling from just one Instagram account is fine, but a wall combining Instagram posts, YouTube videos, TikTok clips, and customer tweets tells a much richer story. This is where having multiple sources pays off, because it creates a dynamic, multi-dimensional feed that keeps visitors scrolling.
Let it breathe on the page. Do not cram your social wall into a tiny sidebar. Give it space. A full-width section with generous padding looks professional and invites engagement. Treat it like a design element, not an afterthought.
Why CollectSocials Over Other Aggregators?
Five reasons, each of them checkable rather than a matter of taste. If you want the head-to-head versions with named rivals and screenshots, those live in our comparison guides; this is the short version.
First, the free plan is a plan rather than a countdown. One connected source and 2,000 monthly page views, three sources through the 7-day trial, unlimited feeds, all 16 themes, custom colours and fonts, keyword moderation, Instagram Stories and UGC consent tracking, with no card and no expiry. Several tools in this category have no free tier at all, and most of the ones that do mean a one-widget demo.
Second, the design range is not a handful of templates. 40 layouts and 16 themes, and the nearest tool we have tested offers five layouts. That is a catalogue difference rather than a styling opinion, which is why it is the one design claim worth stating as a number.
Third, the same feed does two jobs. One curated feed of posts, reviews and video can sit embedded on your website and also run full screen on a projector at an event, on a wall the room can post to from their phones with no app and no account. That is one feed, one moderation queue and one consent trail, rather than two products to keep in step. The live wall modes sit on the $59 Business plan; walls preview free in test mode on any account, and the first event runs free on a one-time 24-hour go-live window with no card, so a single event can be rehearsed and run before you decide.
Fourth, simplicity. The onboarding flow is intentionally streamlined so that someone with zero technical background can go from signup to a live embed in under five minutes. No confusing feature bloat, no hidden complexity.
And finally, unlimited feeds on every plan, including the free tier. With some competitors, you pay extra for each additional feed or layout. CollectSocials does not limit you that way.
Common Questions
Will this slow down my website?
No. The script carries defer, so it does not block the rest of your page from parsing or rendering, and the snippet starts fetching your feed in parallel rather than after the bundle arrives. Your site loads normally, and the social wall populates once the page is ready.
Do I need to update the wall manually?
No. CollectSocials automatically fetches new posts from your connected sources based on your plan's refresh rate. Your wall stays current without any effort from you.
Can I use this on more than one page?
Absolutely. You can embed the same feed on multiple pages, or create different feeds for different pages. All plans include unlimited feeds.
What happens if I exceed my page view limit?
On the free plan, your wall pauses after 2,000 monthly page views. Upgrading to Pro (30,000 views) or Business (unlimited views) removes that cap.
The Bottom Line
Embedding a social media wall on your website is one of the highest-impact, lowest-effort changes you can make to improve how visitors perceive and engage with your brand. It turns a static site into something that feels alive, connected to real conversations, real customers, and real content happening across your social channels.
With CollectSocials, the entire process, from account creation to a live social wall on your website, takes less than five minutes. No developer, no coding, no complexity.
Before and after
Static vs alive. This split-screen animation shows the visual impact of adding a social wall. The LEFT side displays a muted, static website section: generic placeholder content, no activity, no proof of real business happening. The RIGHT side shows the same section transformed with a vibrant social media wall that activates: real platform logos (Instagram, X, YouTube, Facebook, Google Reviews), star ratings, and engagement indicators appear in a live grid.
The contrast is deliberate. Websites without social proof feel abandoned, like a store with no customers inside. Websites with active social walls feel credible and current. The right side isn't just prettier; it answers the visitor's unspoken question: "Is this business legitimate?" The Google review stars, the fresh posts, the multi-platform presence, all signal that real people engage with you. This animation captures that before/after moment when a homepage goes from forgettable to trustworthy.
Start Using CollectSocials Today
One curated feed from 10+ platforms: on your website in a single line of code, or up on the big screen at your event.